Your Browsing History

Mark S.
Joined on 07/18/03
0
0
product reviews
- 30
2 Extra SATA Ports and 1 IDE Port
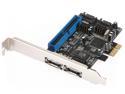
Rosewill RC-216 PCI Express eSATA II x 2 / ATA 133 x1 RAID 0/1/0+1/JBOD mode Controller Card
Pros: -Price (a fair price to get a couple extra SATA ports and a IDE port) -It Works (on my 200GB IDE HDD/250GB SATA HDD/Liteon iHAS-324B SATA Burner) -Speeds (it's basically on par with on-board SATA as i was doing transfers between my IDE 200GB drive and a 250GB SATA drive (both are connected to the controller card) at speeds that you would expect for drives of that size. also files transfer fine between my motherboard connected SATA drives and the controller card drives) note: i am using this device in a 'ASUS P8H61-M LX Plus Rev3.0' (using BIOS 4001 (April 27th 2012)) motherboard. you install the card, boot into windows, install the drivers, reboot and then everything works.
Cons: -None overall (although before drivers are installed Windows 7 takes quite a bit more time to load with the card installed. but once you get the drivers installed boot up times return to normal) -----Other Thoughts:----- i am using Windows 7 64bit Home Premium... i am using the newest drivers from Jmicron's official website which are... "JMB36X_WinDrv_R1.17.63_WHQL.zip" (Driver release notes say May 26th 2011) the card came with v1.07.00 Firmware. the newest on JMicron's official website is 1.07.24 even though in their release notes they list 1.07.28 as the newest but 1.07.28 is not available for download on the official Jmicron website. Website notes on the BIOS updates... 1.07.24 - Fixed failing to create new RAID (HDD gray in GUI) 1.07.28 - Fix HDD detection failure under AHCI and RAID mode files needed for the process explained below: "RomUpdateTool_1.19.zip" & "jmb363_1.07.24.zip" (which you can get from official JMicron website)
Overall Review: Here is how to create a bootable USB drive to flash firmware... 1.Format USB device in FAT32 Format from Windows (like usual) 2.Use Windows Version of "UNetbootin" and select FreeDOS for Distribution. Type: USB Drive. Drive: *your USB drive*. Click OK. (then it will make your USB drive bootable which don't take long) 3.Copy Jmicrons BIOS files (i.e. 36xupd.exe/dos4gw.exe/jmb363_1.07.24.bin (rename that bin to "update.bin")) to root of USB Drive. 4.Boot to USB Drive (then hit enter on initial load screen that has 'default' listed) 5.Select 5 and press enter 6. "A:\" prompt shows up 7.type "C:" (without ") hit enter 8. type "36xupd /r backup.bin" (without the ") hit enter (current BIOS on card goes to USB drive as the name backup.bin) 9. type "36xupd /w update.bin" (without the ") hit enter (i am assuming you renamed the firmware file (i.e. jmb363_1.07.24.bin) to update.bin before putting on USB to flash it) side note: i used a 128MB flash drive for this pr
5/18/2012See more detail
Aviod this ram and get crucial ram
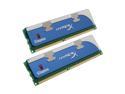
HyperX 1GB (2 x 512MB) DDR 400 (PC 3200) Dual Channel Kit Desktop Memory Model KHX3200AK2/1G
Pros: "might" be good ram if it actually worked... so overall i dont really have any pros since i only had it a day before it died.
Cons: the ram died in about 1 day of use on my ASUS A8N32-SLI Deluxe motherboard... started blue screening in windows as soon as it would load up... so i ran microsoft's free ram checking program on it and sure enough it found errors... since then i tried some of my old crucial ram from my old pc (DDR2100 - 256MBx2 = 512MB) in the ASUS A8N32-SLI deluxe motherboard and it works flawlessly i ran the "Prime95" torture testing program on my pc for about 17hours30min straight and NO errors with the CRUCIAL ram that i tested in it... so i know my pc is very stable with the crucial brand of ram. bottom line... my first impression with kingston ram is not good and i always had good luck with crucial ram so i recommend to buy crucial ram and stay away from kingston.
Overall Review: im going to get my refund for this and buy some crucial ram here instead... http://www.newegg.com/Product/CustRatingReview.asp?Item=N82E16820146577 ... as this is cheaper and im sure it's more stable/reliable as i this is the first time i have ever bought something besides crucial ram and it failed on me, plus i used crucial ram in the past and it's ALWAYS worked and was stable... plus i checked crucial.com and it says this ram WILL work on my ASUS A8N32-SLI deluxe motherboard.
3/22/2006See more detail
Solid Product at a Reasonable Price.
VANTEC CB-ISA225-U3 IDE/SATA TO USB 3.0 Adapter
Pros: -Flashing blue light on adapter when hard drive is being accessed. -USB 3.0 speed! (this ensures your hard drive transfers go as fast as they possibly can. my old Seagate 200GB IDE did about 60MB/s where as if that same drive was on a USB 2 connection it would be limited to about 30MB/s since that's the limit of the USB 2 interface. with USB 3 on the other hand, since it's faster than any hard drives available, you don't have to worry about any speed handicaps based on the USB 3 interface unlike USB 2 where you will experience a 30MB/s limit on file transfers. to state the obvious... in order to use this devices USB 3 speed you need to have a USB 3 port on your computer which the easiest way to find these is they typically are 'blue' in color.) -Price (at $20 it's a solid buy) -Seems durable enough, does not feel cheap. on/off switch seems like it will last and connecting this device to a hard drive's/DVD drive's IDE port seems to firmly hold in place. -Works on (almost(see Cons)) all IDE devices I tested it on, which are... ---Some old 10-12GB or so range 2.5" IDE drives. ---Some old 10GB range 3.5" IDE hard drives. NOTE: some are from original XBox consoles but for these to work they need to be unlocked first. ---80GB(Seagate)/160GB(Western Digital)/200GB(Seagate) 3.5" IDE hard drives. ---Lite-On 1673s DVD burner (IDE connection). mfg date March 2005. ---HP CD-writer+ 9100 (8x4x32) (IDE connection). mfg date May 2000. (see 'NOTE' below) I briefly tested burning a ISO file with ImgBurn on the Lite-On 1673s drive and it worked fine. I primarily got this device for older IDE drives even though I would assume ill have no problems with it's SATA connection (I do have some 2.5" and 3.5" SATA drives I could test) given the IDE drives work. it's basically a great device for making any internal hard drive work externally up to 8TB. NOTE: on my HP CD-Writer+ 9100, being the power port/IDE data port are so close together, it's not possible to use this device 'as is' being the white tab on the molex power plug sticks out which blocks this device from being plugged into the drive to power it as if you plug in the main device you cannot plug in the power to it (or vice versa) as it's physically not possible on the HP CD-writer+ 9100. but what I did to work around that is use one of those 'molex power extenders' I had laying around and hacked off the small white block that protrudes so that I can now plug that part into the HP CD-writer along with this device (as the tab no longer interferes with both the power/IDE being connected at the same time since I hacked it off on the extended molex power connector) and then simply connect this devices molex connector into the extended molex connector (so this device molex power goes into the extended molex power connector and that extended molex connector then plugs into the HP CD burner) and then the device works. but generally speaking I doubt this will be a problem for the vast majority of people who buy this device as all of the hard drives I got have no issues plugging in the power and IDE connection and this device functions perfectly fine.
Cons: -Devices USB cable is a bit too short at only 18 inches (or 1.5 foot) as this is the adapters biggest flaw which forces you to sit the device real close to the computers USB 3 port and makes things more difficult to use. the USB cable should be at least twice that length as that would help out a lot in certain setups like mine. the the devices AC adapter power cord length on the other hand has plenty of length which is about 44 inches in length or a bit over 3.5 foot. -Some comments on the following hard drives... ---428.1MB Seagate (model ST3491A) ---Western Digital 8GB (model WD80EB-28CGH1) (Western Digital has a mfg date of Nov 24th 2001) both of the above hard drives have no problems being wiped with DBAN v2.3.0 on a old eMachines 500Mhz Celeron CPU computer I had since the year 2000. because I ran DBAN on the 428.1MB hard drive in April 2017 on that old computer and there was no errors during the drive wipe and I recently ran DBAN on the WD 8GB above on April 27th 2018 on that same old computer and that did not have any errors. also, the 8GB Western Digital is seen in Windows 10 through the 'Disk Management' but when attempting to create a drive and then format it, it has errors and upon a disk scan for errors it attempts to fix them but fails etc. so my guess is the old computer is probably not detecting the errors where as Windows 10 is(?) and I think it's a faulty hard drive because the other 10GB Seagate drives(of which I have three), which are of similar age, function fine with this adapter on my primary Windows 10 computer. the 428.1MB hard drive is not recognized at all by this adapter but it's not a big deal since the drive is quite ancient and not really worth using anyways since the storage space is next to nothing. -Given my experience with the 'HP CD-Writer+ 9100', in rare cases you may not be able use this device 'as is' without a slightly modified molex power adapter so that this devices molex power can connect to the modified molex power adapter so it can then power up the device while the device is connected to the IDE connector on your HDD/DVD drive etc.
Overall Review: -Make sure to set your IDE drive jumper settings to MASTER and, like the instruction manual says, you want to have the power switch OFF on the devices power cable with the USB plug UNPLUGGED from your computer and then power on the switch and wait at least 20 seconds before inserting the devices USB cable into your computers USB port (20 seconds is likely not required (I would say more like 5 seconds) in many cases but I think they say this just to be certain things will work). NOTE: it may seem like there is no power to the hard drive when the power adapter's power switch is switched to ON but the hard drive only spins up once the USB cable is inserted into your computer on nearly all of my hard drives besides a Maxtor 10.2GB as that seems to spin up immediately after the power switch is switched ON where as the others don't power/spin up until the USB cable is plugged into the computer. -I got this device connected to a USB 3 port on back of my computer which is connected to a Vantec USB 3.0 PCI-E card, model UGT-PC345. but it does work on my computers USB 2 ports as I briefly tested it. I got a 'ASUS P8H61-M LX Plus' motherboard. -Auto-detected by Windows 10 (build 17134(which is April 2018)). so in other words, you just connect it to your computer and it just works without any driver installation needed. -Hard drive easily managed from 'Disk Management' in Windows 10 if you need to delete everything and start from scratch etc. but for good measure, and partially to test out this IDE to USB 3 adapter, I did a 'delete volume' and then created a new one to make sure it takes up the maximum storage of the hard drive and then did a full format and everything worked fine. but to state the obvious... DO NOT use 'delete volume' unless you have your data on the hard drive somewhere else first since this will delete all data on the hard drive! ; but basically if your drive does not show up, check 'Disk Management' as you may need to do a little bit of adjustment in there before Windows see's the drive so you can use it. Bottom line... I give this Vantec IDE/SATA to USB 3.0 adapter a 4.5 out of 5 as it's only real fault is the short USB cable length at 18 inches, but for $20 it's hard to complain.
4/28/2018See more detail
Great bang-for-the-buck graphics card!
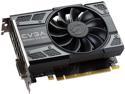
EVGA GeForce GTX 1050 Ti GAMING, 04G-P4-6251-KR, 4GB GDDR5, DX12 OSD Support (PXOC)
Pros: -Price-to-performance ratio (offers strong performance for 1080p gaming (basically you can play modern games at higher graphics settings with solid frame rates) without breaking your bank account as those higher end cards i would say start beyond this card (and price starts to get fairly steep to) which means the Geforce GTX 1060 and higher and while those are nice i would rather just use this card for a while and wait as by the time this card becomes outdated (like where games are unplayable) you will be able to go to a much faster card then what's available now for a similar or less price. just a more efficient use of $$$ that way. you won't regret buying this for 1080p gaming to say the least.) -Runs Cool (it has not exceeded 67c under full load with benchmarks (i.e. Superposition(this looks really good)/Valley. or stress tests... Furmark), or with GTA V running for hours, with a room temp of 80f+. fan speed has not exceeded 40% under full load so far. at Idle the fan runs at 30% with temps floating around 28-31c with a 80f+ room temp. just make sure to blow the dust off the GPU fan/heatsink (with the PC turned off obviously) with a air compressor once in a while and it will keep the fan speed down under load because as the dust accumulates over a period of time the GPU temps will rise, especially under a full load, and in turn will raise the GPU fan speed RPMs along with temps because once the heatsink has dust buildup the fan will have to work harder to cool it because of restricted airflow over the heatsink. hence, fan percentage will rise higher and higher as this was what i observed with my previous graphics card which was a Radeon 5670 512MB as after months of dust build up (i leave my PC on 24/7(with 120mm intake and exhaust fans, one of each on the case)) you could see a clear increase in temps/fan speeds on that one to when loading up the GPU with a game etc. but once i blowed the heavy dust out of the heatsink temps lowered a solid amount under full load and even fan speed does not ramp up as high either because it's now back to normal cooling. depending on how dusty your place is, and whether you leave your PC running 24/7 or not, you might need to blow out your computer case thoroughly 2-4 times a year to keep everything (CPU/GPU/PSU etc) cooling optimally.) -Powered from motherboard's PCI-E slot (does not need a additional power connection which will be quite beneficial to some people even though my PSU (Seasonic 520watt) has support for additional power connections to a video card. for those wondering... this works on a PCI-E 2.0 board as i got a 'ASUS P8H61-M LX' which has a PCI-E 2.0 slot.) -The best graphics card you can get right now (as of July 2017) for $150 or less. -Quiet (I cannot hear it even when under a full load during GPU intensive things like Benchmarks or gaming. just make sure to keep the dust buildup to a minimum on the GPU so cooling is efficient and will keep fan RPM's to a minimum.) -Low power consumption (it cannot use more than 75watts under full load as that's the PCI-E slot limit. but this video card seems to be in the ball park of 65-70 watts or so playing games and at a idle around 10 watts from looking at some quick reviews online about this general 1050 Ti graphics chip) -4GB of Video Ram (i would not buy a card with less than 4GB if you want to be sure that RAM will not become a issue for getting the most of your games (those 2GB or so cards are simply going to limit your available graphics options in games especially in the future) as i figure by the time 4GB becomes a issue this card will be quite outdated by then anyways so it won't matter. but with the 2GB version of this card it's already a issue on some games as a fair amount of games can use more than 2GB which means you got to lower graphics options. even with GTA 5, when i got everything MAXED (but MSAA off) @ 1080p, that the video memory is in the ball park of 3-3.5GB according to GPU-Z's 'memory used' when i tell it to show me the 'Show Highest Reading' it's recorded.) -Fits a lot of PC cases/setups (it's compact size help ensure it fits a lot of computer setups out there as it fit into my Antec SLK3000-B case, which i had since March 2006, nice and easy.)
Cons: -None (for $135 (got it on sale recently) it offers a lot of performance for 1080p gaming for a reasonable price as it's hard to come up with a real negative when you factor in price/performance ratio and even does it efficiently to with lower power consumption. I am not concerned with higher resolutions beyond 1080p as my monitor, like many others out there, only does 1080p anyways and i see no reason to upgrade to 4k etc) but to nit pick a little... -Takes two slots instead of one like my old card did. -After upgrading from a Radeon 5670 512MB card to this one i noticed 'Pot Player x64' (a video playback program) constantly crashes every time i try to play a video from my hard drive (so it's not useable) which did not happen on the Radeon 5670MB card. I even clean installed Pot Player etc and nothing fixed it so i was forced to jump ship to VLC Player instead (sadly) and turned on DXVA so the GPU does the video processing instead of CPU. I am using newest drivers from Nvidia's website which are v384.76.
Overall Review: Got this running with a older i3-2120 CPU (with 8GB of RAM on my system), which is only dual core (but has hyper-threading(so games etc see it as a quad core even though it's not)), and it plays GTA 5 well as my frame rates according to MSI Afterburner are typically around 40-50fps give or take most of the time but it does hit 60fps a fair amount and i have not seen it dip below the low 30's in more intense firefights/explosions and i have ALL graphics settings on MAX but have MSAA turned off as that's a performance killer for minimal visual gain. with that said, at least as far as GTA 5 goes... the CPU is mostly the bottleneck for me but i do see the graphics card being the bottleneck here and there as you can see the CPU usage is not maxed with the GPU being pretty much maxed and the frame rate starts to dip below 60fps but from what i have noticed even in these cases it's still around 50fps+ when the GPU is the bottleneck. This Geforce GTX 1050 Ti 4GB was a BIG upgrade over my Radeon 5670 512MB which i had since 2010. as a small bonus in my particular case... when using the HDMI port, which is connected to my TV(the DVI connection is connected to my 24" 1080p PC monitor), it has a constant connection with the 1050 Ti, which is expected, but with the Radeon 5670 512MB, while it basically worked fine, the PC monitor would loose connection for a second or two when i powered on the TV to use the HDMI port. this does not happen with this 1050 Ti card which is nice. NOTE: for those who don't know much about games frames per second (i.e. FPS) here is a general guideline... 60fps (or higher) is considered a perfect gaming experience and i would say that you don't want to go much under 30fps otherwise the game will start to become unplayable. so considering i am running GTA V on MAX graphics (but with MSAA turned off) @ 1080p and am largely around 40-50fps i have a quality experience with the game overall even though technically not liquid smooth perfect at all times but unless your super picky i am sure the vast majority of people would see their experience with GTA V with my setup easily on the positive side of things considering graphics are basically peaked and frame rates are more than good enough.
7/13/2017See more detail
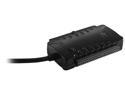
A solid USB 3.0 add-on card for a good price.
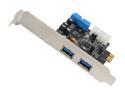
VANTEC 4-Port SuperSpeed USB 3.0 PCIe Host Card w/ Internal 20-Pin Connector Model UGT-PC345
Pros: -Windows 10 recognizes the card automatically as you don't need to mess with drivers as you simply physically install the card into the PCI-E x1 slot and power up the computer and everything just works and maxes out the hard drives i tested on it through a external USB 3.0 docking station(see 'Other' below). it can't get any easier than that. -Has capability of using front USB 3.0 ports if your case has them built-in to your case or you can get a add-on (search... "usb 3.0 front panel" on newegg) which plugs into this cards 20-pin connector and comes out the front of your case (which uses either a floppy drive slot or a regular DVD drive slot depending on what you need). the front panel option is roughly $10-20 on newegg if you want it.
Cons: -It uses up a power connector on your PSU (power supply) since, apparently, it can't get enough power from the motherboards PCI-E x1 slot. so in other words it will either take up a molex power connector from you PSU or, with the adapter that comes with the card, it will use a SATA power connection on your PSU which the adapter then converts back to the molex type that this USB 3.0 card uses. but this is only a mild con and not enough to lower my rating of the card.
Overall Review: -I bought this at the same time i got a ORICO 6518US3-V1-US docking station(supports up to 8TB hard drives), which is USB 3.0, and it maxes out my hard drives i tested in it. everything works perfect so far. -I installed this in my ASUS P8H61-M LX motherboard.
8/17/2016See more detail
A solid 20 foot HDMI cable for connecting a PC with a HDMI port to a 1080p HDTV
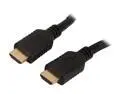
Kaybles 20ft NMHD-20MM 20 ft. High Speed HDMI Cable with Ethernet,Black,CL2 rating,28AWG Gold Plated M-M 20 feet - OEM
Pros: -It works as expected for playing back HD 1080p video (and SD video to etc) from my PC to my LG 43" 1080p HDTV (Mfg date Jan 2016). NOTE: my PC has a Radeon 5670 512MB video card that has a HDMI port on it. -Price (for around $14 for 20 feet is a fair price unlike the popular local stores that can cost roughly $40-60 for similar length) -Durable (cable does not look or feel cheap given it's thickness and seems to fit fairly snug into the HDMI ports)
Cons: -None (it does what's expected at a fair price so there can be no cons especially when you get 20 feet at about $14 which is quite reasonable and 20 feet i suspect will be long enough for most people unless your device is of fairly long distance to your TV etc)
Overall Review: here is some important info for those using this HDMI cable to playback HD video etc onto a 1080p HDTV... NOTE #1: To get sound playback from your computer to the HDTV you need to do this (i am using Windows 10)... right click the 'sound' icon (bottom right area of the screen to the left of the time display) and select 'playback devices' and then when the 'sound' window pops up you will probably see 'speakers' with a green check mark on there but to get sound through your HDTV you need to right click the TV Icon (or whatever is your HDTV) and select 'set as default device' and then any sound the computer outputs will go to your HDTV's speakers instead of your regular computer speakers. NOTE: what i personally see for my TV is 'AMD HDMI Output' with a TV icon there. but i suspect this will vary depending on your video card etc but the info here should get you the general idea on what's needed to get sound going to your TV using this HDMI cable. NOTE #2: To get proper 1080p video playback you need to do this... right click the desktop and select 'display settings'. now after the window pops up you should see two numbers there with a #1 and #2. one of those is the computer monitor and the other is your HDTV. you need to determine which is which by clicking the 'identify' (it will show you a #1 on one screen and a #2 on the other temporarily so you can find out which is which). but once you find out which is your HDTV you want to left click it by selecting either the 1 or 2 and then below where it says 'change the size of text, apps, and other items: 150%' you want to move the slider all the way to the left so then it will read 100% instead of what it will likely read initially of 150% as if you don't do this you won't have proper 1080p (1920x1080) video playback and will only have 720p (1280x720) video playback. doing this also gives you more desktop space to so it's a good thing to do either way even if you don't play videos on your HDTV. p.s. the above info is assuming your using a regular PC monitor with computer speakers etc and then you connect the HDTV to (using the HDMI cable here). so you basically got dual screens. also, once all of the above is setup you can then use your mouse to drag your video files you load up, which will start up like usual on your regular PC monitor, to the right (or left) so it goes out of your current screen (i.e. PC Monitor) and then it goes over to the other screen (i.e. your HDTV) and then simply run it full screen and your all set and catch watch your 1080p (or general HD video) video files on your HDTV.
5/29/2016See more detail