





Instructions for use
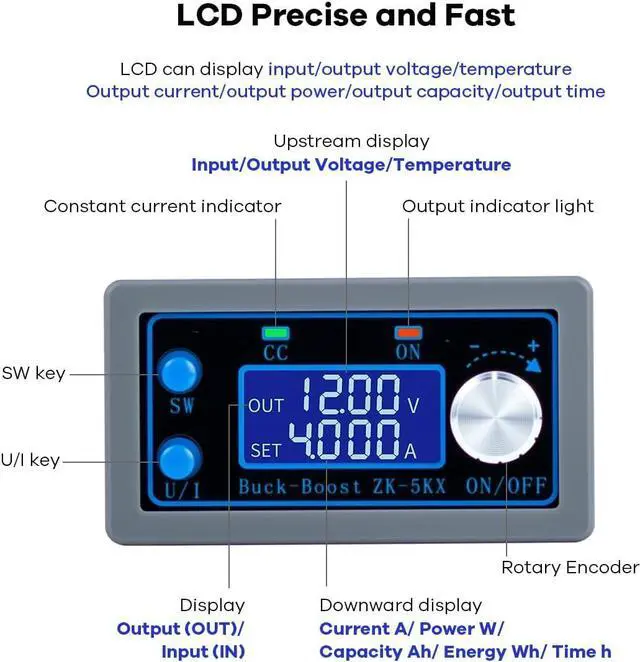
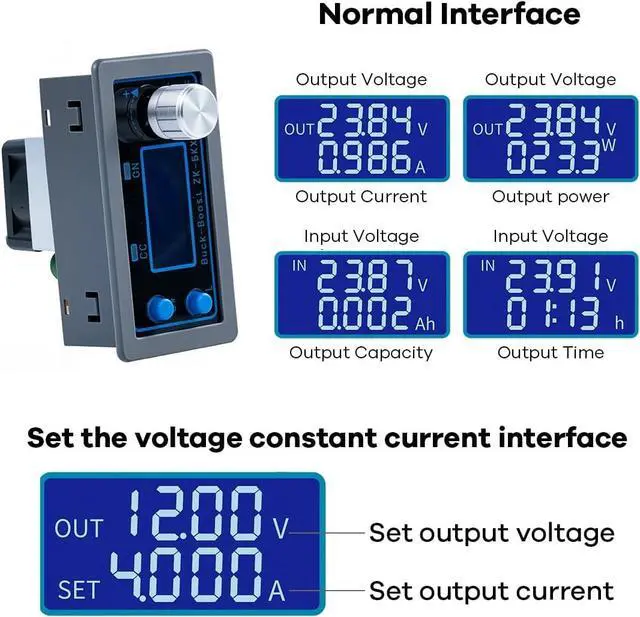
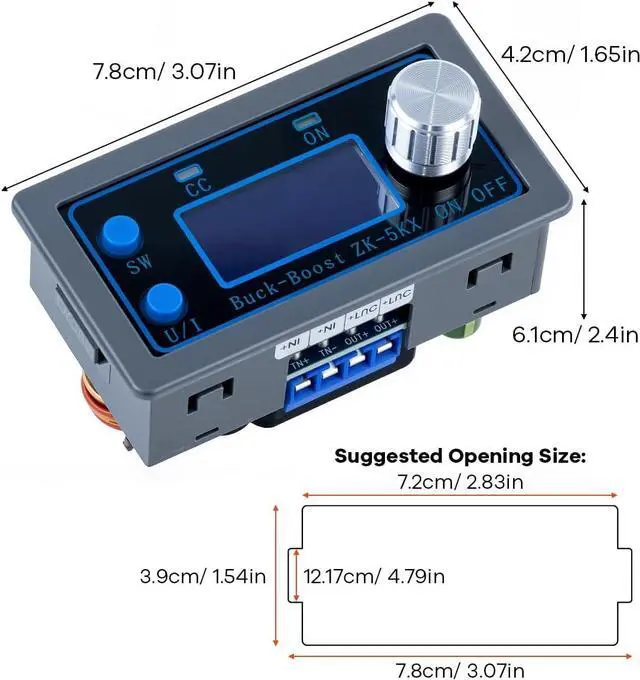
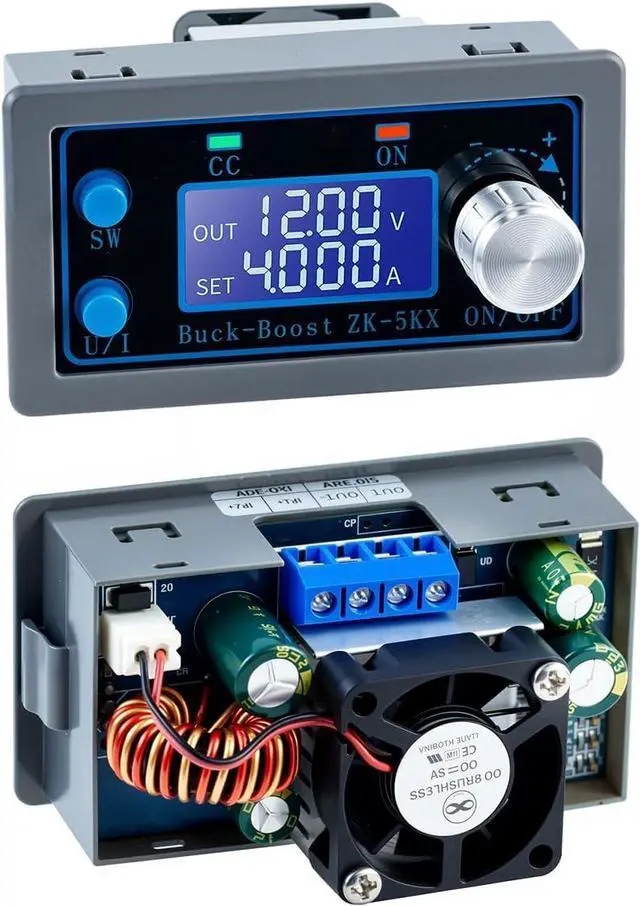
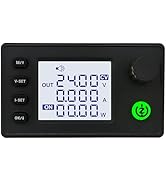
- Switching Display Parameters -- Under the normal interface, press SW to switch the down link display of the display screen, and the display content switches between current A, power W, capacity Ah, time h. Press and hold the SW button to switch the upstream display of the display. The display content switches between input voltage IN and output voltage OUT.
- Setting Output Voltage -- Press U/1 under the normal interface to enter the interface for setting voltage and constant current. You can see that a certain digit of the output voltage value is blinking, turn the rotary encoder left and right, and adjust it to large or small. Tap the rotary encoder to select which bit of the output voltage to set. After the setting is complete, press the U/1 button twice to return to the normal interface. Or the system automatically returns to the normal screen after stopping operations for 10 s.
- Set the constant current value (that is, the maximum current value allowed by the module) -- press the U/1 button under the normal interface to enter the interface for setting the voltage constant current. Then press the U/1 button to switch to set constant current value, you can see that a certain part of the constant current value is blinking, rotate the rotary encoder left and right, and adjust the major or small. Tap the rotary encoder to select which bit to set the constant current value. After the setting is complete, press the U/1 button to exit the setting voltage constant current interface and return to the normal interface. Or the system automatically returns to the normal screen after stopping operations for 10 s.
- Setting the Default Power ON/OFF State of the Module -- Press and hold down the U/1 button to enter the parameter setting screen. OPEN OFF or OPEN ON is displayed. OPEN Off indicates that the output is disabled by default during power-on, and OPEN ON indicates that the output is enabled by default during power-on. Long press the rotary encoder to switch between two states. After the Settings are complete, press and hold the U/1 button to return to the normal interface.
- Setting the Status and Threshold of Protection Parameters -- On the normal screen, hold down the U/1 key to enter the parameter setting screen. Press the SW button until the protection parameter you want to set appears. LUP- Undervoltage protection threshold; OUP - Overvoltage protection threshold; OCP - - Overcurrent protection threshold; OPP - - Overpower protection threshold; OAP - - Overcapacity protection threshold; OHP timeout protection threshold. OTP -- Overtemperature protection threshold. Tap the rotary encoder to select which bit of the protection parameter you want to set. Press and hold the rotary encoder to set the protection parameter on or off (only timeout protection and overcapacity protection can be set on/off, other protection parameters are enabled by default). . Rotate the encoder left and right to make the parameters smaller and larger. After the Settings are complete, press and hold the U/1 button to return to the normal interface.
- Calibrating Voltage and current -- Hold down the U/1 button to enter the parameter setting screen. Press the SW button until the parameter screen with CAL appears. The one with CAL+IN+V symbol is the calibration input voltage interface; The one with CAL+OUT+V symbol is the calibration output voltage interface; The CAL+OUT+A symbol is the calibration output current interface. The parameter size can be adjusted by rotating the encoder left and right. When the adjustment is complete, press and hold the rotary encoder to confirm the adjustment is complete. At this time, the parameter value is no longer blinking. Press and hold the U/1 key to return to the normal screen.

Product parameters

TKXEC
Best Sellers
New product
New product
New product
Why do we enjoy our work?
TKXEC team has a group of passionate friends who maintain a passion for products and develop products that customers like. Good customer feedback is the biggest driving force behind TKXEC's progress
Is our product of superior quality?
TKXEC brand products undergo layers of inspection and screening to ensure that customers receive high-quality products
What makes our product popular among people?
Our products have exquisite workmanship, simple packaging, and detailed operating instructions
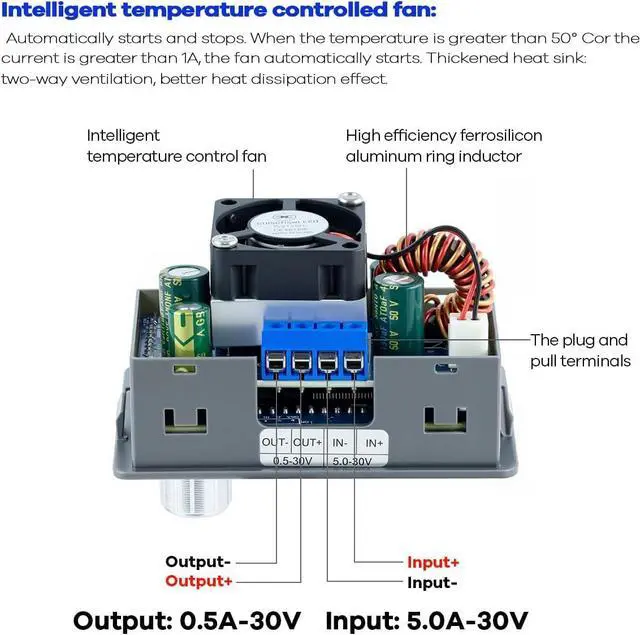
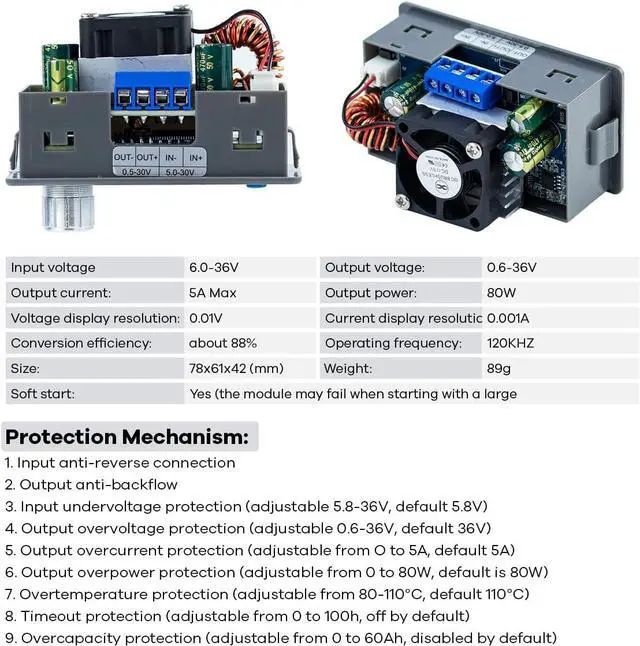
| Input Voltage | 5.0-30V Output Voltage: 0.5-30V |
| Operating Frequency | 180KHZ |
| Output Current | It can work stably in 3A for a long time, and can reach 4A under enhanced heat dissipation |
| Output Power | natural heat dissipation 35W, enhanced heat dissipation 50W |
| Voltage Display Resolution | 0.01V Current Display Resolution:0.01A |
| Size | Length * width * height 79mm(3.11inch)*43mm(1.69inch)*26mm(1.02inch) |
| Conversion Efficiency | about 88% |
| Soft Start | Yes (large power with load module startup may fail) |
| Protection Mechanism | Input anti-reverse connection; Output anti-backpouring |
| Input Under Voltage Protection | 4.8-30V Adjustable, default 4.8V |
| Output Overvoltage Protection | 0.5-31V adjustable, 31V by default |
| Output Over Current Protection | Adjustable from 0 to 4.1A, default 4.1A |
| Output Overpower Protection | 0-50W adjustable, default 50W |
| Over Temperature Protection | 80-110? adjustable, default 110? |
| Time-out Protection | 0-100h adjustable, off by default |
| Overcapacity Protection | 0-60Ah adjustable, off by default |
Instructions for use
- Switching Display Parameters -- Under the normal interface, press SW to switch the down link display of the display screen, and the display content switches between current A, power W, capacity Ah, time h. Press and hold the SW button to switch the upstream display of the display. The display content switches between input voltage IN and output voltage OUT.
- Setting Output Voltage -- Press U/1 under the normal interface to enter the interface for setting voltage and constant current. You can see that a certain digit of the output voltage value is blinking, turn the rotary encoder left and right, and adjust it to large or small. Tap the rotary encoder to select which bit of the output voltage to set. After the setting is complete, press the U/1 button twice to return to the normal interface. Or the system automatically returns to the normal screen after stopping operations for 10 s.
- Set the constant current value (that is, the maximum current value allowed by the module) -- press the U/1 button under the normal interface to enter the interface for setting the voltage constant current. Then press the U/1 button to switch to set constant current value, you can see that a certain part of the constant current value is blinking, rotate the rotary encoder left and right, and adjust the major or small. Tap the rotary encoder to select which bit to set the constant current value. After the setting is complete, press the U/1 button to exit the setting voltage constant current interface and return to the normal interface. Or the system automatically returns to the normal screen after stopping operations for 10 s.
- Setting the Default Power ON/OFF State of the Module -- Press and hold down the U/1 button to enter the parameter setting screen. OPEN OFF or OPEN ON is displayed. OPEN Off indicates that the output is disabled by default during power-on, and OPEN ON indicates that the output is enabled by default during power-on. Long press the rotary encoder to switch between two states. After the Settings are complete, press and hold the U/1 button to return to the normal interface.
- Setting the Status and Threshold of Protection Parameters -- On the normal screen, hold down the U/1 key to enter the parameter setting screen. Press the SW button until the protection parameter you want to set appears. LUP- Undervoltage protection threshold; OUP - Overvoltage protection threshold; OCP - - Overcurrent protection threshold; OPP - - Overpower protection threshold; OAP - - Overcapacity protection threshold; OHP timeout protection threshold. OTP -- Overtemperature protection threshold. Tap the rotary encoder to select which bit of the protection parameter you want to set. Press and hold the rotary encoder to set the protection parameter on or off (only timeout protection and overcapacity protection can be set on/off, other protection parameters are enabled by default). . Rotate the encoder left and right to make the parameters smaller and larger. After the Settings are complete, press and hold the U/1 button to return to the normal interface.
- Calibrating Voltage and current -- Hold down the U/1 button to enter the parameter setting screen. Press the SW button until the parameter screen with CAL appears. The one with CAL+IN+V symbol is the calibration input voltage interface; The one with CAL+OUT+V symbol is the calibration output voltage interface; The CAL+OUT+A symbol is the calibration output current interface. The parameter size can be adjusted by rotating the encoder left and right. When the adjustment is complete, press and hold the rotary encoder to confirm the adjustment is complete. At this time, the parameter value is no longer blinking. Press and hold the U/1 key to return to the normal screen.
Product parameters
TKXEC
Best Sellers
New product
New product
New product
Why do we enjoy our work?
TKXEC team has a group of passionate friends who maintain a passion for products and develop products that customers like. Good customer feedback is the biggest driving force behind TKXEC's progress
Is our product of superior quality?
TKXEC brand products undergo layers of inspection and screening to ensure that customers receive high-quality products
What makes our product popular among people?
Our products have exquisite workmanship, simple packaging, and detailed operating instructions