Updated October 2026: corrected settings paths for current driver versions, including the NVIDIA App (which replaced the classic NVIDIA Control Panel for GeForce drivers in May 2026), AMD Software: Adrenalin Edition, and Intel Graphics Software.
To change your refresh rate in Windows 11, go to Settings > System > Display > Advanced display, then pick a rate next to Choose a refresh rate. If the rate your monitor is rated for isn't listed, the cause is almost always the cable, the port you plugged into, or an outdated graphics driver. The troubleshooting section below covers each one.
You've just connected a new 240Hz gaming monitor. You launch a game, open a browser, move your cursor, and something feels off. The motion isn't as smooth as you expected. The most likely culprit: your refresh rate is still set to 60Hz. Windows doesn't always switch to the maximum rate when you connect a new monitor. This guide covers every place you can change it in 2026, by platform, with numbered steps.
Why Refresh Rate Doesn't Set Itself
When you connect a new gaming monitor, Windows reads the monitor's EDID (Extended Display Identification Data), a block of information the monitor sends over the cable that lists its supported resolutions and refresh rates. Windows then applies a default that is often 60Hz rather than the monitor's maximum. That protects compatibility, but it doesn't help gaming, so it's worth setting the refresh rate manually after connecting any new display.
Before you start, check two things:
- Your monitor cable is plugged into the graphics card, not the video ports on the motherboard. On a desktop with a dedicated GPU, the motherboard ports use integrated graphics and may be limited to 60Hz, or may not work at all.
- Your graphics driver is current. Older drivers can hide refresh rates that newer monitors support.
Method 1: Windows Display Settings (Works With Any GPU)
This is the fastest route, and it works the same whether you have NVIDIA, AMD or Intel graphics.
Windows 11
- Open Start > Settings > System > Display. You can also right-click the desktop and choose Display settings.
- If you have more than one monitor, select the one you want to change at the top of the page.
- Scroll down and select Advanced display.
- Next to Choose a refresh rate, select the rate you want, such as 144Hz, 180Hz or 240Hz.
- Confirm the change with Keep changes if Windows asks. If the screen goes black, wait 15 seconds and Windows will revert automatically.
The Display information panel on the same page shows the active resolution and refresh rate, and whether your display supports variable refresh rate (VRR). If a rate in the list has an asterisk (*), it isn't supported at your current resolution, and choosing it will change the resolution too.
About Dynamic refresh rate: On displays that support VRR at 120Hz or higher, Windows 11 shows a Dynamic refresh rate toggle on the Advanced display page. It lowers the refresh rate when little is moving to save power. Microsoft notes that it can cap the refresh rate in some games, so turn it off if a game seems stuck below your monitor's maximum.
Windows 10
- Open Start > Settings > System > Display.
- Select Advanced display settings.
- Under Refresh rate, choose the rate you want.
On both versions, the classic dialog still works as a fallback: on the Advanced display page, select Display adapter properties for Display 1 (the number matches your monitor), open the Monitor tab, choose a Screen refresh rate, and click Apply. Note that Windows 10 reached end of support in October 2025, so newer monitors and drivers are tested primarily on Windows 11.

A good example of why the port matters is the ASUS ROG Strix XG27ACG, a 27-inch 1440p monitor rated for 180Hz. ASUS lists 180Hz over DisplayPort 1.4 and USB-C, but only 144Hz over its HDMI 2.0 port. Connected by HDMI, Windows will never offer 180Hz, no matter which settings you change.
Method 2: NVIDIA App (GeForce Graphics Cards)
For NVIDIA GPU users, display settings now live in the NVIDIA App. Starting with GeForce Game Ready driver 610.47 in May 2026, NVIDIA retired the classic NVIDIA Control Panel for Game Ready and Studio drivers, and a clean driver install no longer includes it.
Steps:
- Open the NVIDIA App from the Start menu or the system tray. If you don't have it, download it from NVIDIA's website.
- Select the System tab, then open Displays.
- Select the monitor you want to change.
- Set your resolution, then choose the highest available refresh rate.
- Apply the change and confirm it if prompted.
Custom resolution: If your monitor supports a rate that doesn't appear, the NVIDIA App (version 11.0.7 and later) has a Custom Resolution option under System > Displays > Display Properties. Only use rates your monitor's manual lists. Forcing an unsupported rate can cause a black screen or frame skipping.
G-SYNC: The G-SYNC toggle is in the same System > Displays section. For the full setup, see our guide on how to enable G-Sync or FreeSync on your monitor.
Still have the classic NVIDIA Control Panel? If you updated over an older driver, it may still be installed, and NVIDIA keeps it available on the Microsoft Store. The old path is Display > Change resolution > Refresh rate. It no longer receives updates, so use the NVIDIA App for new monitors.
Method 3: AMD Software: Adrenalin Edition (Radeon Graphics Cards)
For AMD GPU users, there is one important difference: AMD Software doesn't have a simple refresh rate dropdown. AMD's own support pages send you to Windows for that, so set the refresh rate with Method 1 and use AMD Software for FreeSync and custom resolutions.
To check FreeSync and display options:
- Open AMD Software: Adrenalin Edition from the Start menu.
- Type Display in the search box and select Display Settings.
- If you have more than one monitor, select the one you want.
- Confirm that AMD FreeSync is enabled if your monitor supports it.
To create a custom resolution or refresh rate:
- In AMD Software, type Custom in the search box and select the Custom Resolution result.
- The first time, expand Custom Resolutions and accept the end-user license agreement.
- Click Create New. The form opens with your current settings filled in.
- Enter the refresh rate you want and click Create. The screen may go blank briefly while AMD Software tests it.
- Apply the new profile in Windows Display settings (Method 1) or from a game's display menu.
Method 4: Intel Arc and Intel Integrated Graphics
On Intel graphics, including Intel Arc B570 and B580 cards and the integrated graphics in Intel laptops, set the refresh rate in Windows with Method 1. Intel's control software is useful for related settings:
- Intel Graphics Software is Intel's current app for Arc graphics cards and newer integrated graphics. It replaces Arc Control, which is end of life. Use its per-monitor display settings to check variable refresh rate (Adaptive Sync), scaling and color.
- Intel Graphics Command Center covers older Intel integrated graphics (6th Gen Core and newer). Its Display section lists resolution and refresh rate. To add a custom resolution there, click the plus sign (+) next to the Resolution dropdown.
- On laptops, Intel's power-saving features can lower the built-in screen's refresh rate on battery. Plug in the charger before you test the maximum refresh rate.
Method 5: Monitor OSD (On-Screen Display)
Some gaming monitors need a setting changed in their own menu before Windows can see the highest refresh rate. Open the OSD with the joystick or buttons on the monitor and look for:
- Overclock: some monitors ship at a base rate (for example, 144Hz) and unlock a higher rate (for example, 165Hz) only after you enable this.
- DisplayPort version or input settings: some monitors let you switch the DisplayPort input between versions, and an older setting caps refresh rate.
- Adaptive-Sync / FreeSync: turning this on in the OSD is often required before G-SYNC Compatible or FreeSync works.
This step matters most for curved ultrawide monitors and larger displays that have tiered refresh rate modes.
Verifying Your Refresh Rate Is Actually Active
Choosing a refresh rate doesn't always mean it's being applied. Here's how to confirm it:
- Windows 11: Settings > System > Display > Advanced display > Display information shows the active refresh rate.
- NVIDIA App: System > Displays shows the current resolution and refresh rate for each monitor.
- In a browser: UFO Test (testufo.com) shows the refresh rate your browser is running at, along with a motion test.
- Monitor OSD: many gaming monitors show the incoming refresh rate in an information page or an on-screen counter.
Refresh Rate by Scenario: Quick Reference
| Monitor Type | Target Refresh Rate | Minimum Connection | Where to Set |
|---|---|---|---|
| 1080p 144Hz | 144Hz | HDMI 2.0 or DisplayPort 1.2 | Windows Display Settings |
| 1080p 240Hz | 240Hz | DisplayPort 1.2 or HDMI 2.0 (check manual) | Windows or GPU app |
| 1440p 144–180Hz | 144–180Hz | DisplayPort 1.4 or HDMI 2.1 for 165Hz and above | Windows Display Settings |
| 1440p 240Hz | 240Hz | DisplayPort 1.4 or HDMI 2.1 | Windows or GPU app |
| 4K 144–240Hz | 144–240Hz | DisplayPort 1.4 with DSC, HDMI 2.1, or DisplayPort 2.1 | Windows or GPU app |
| OLED 360–480Hz | 360–480Hz | DisplayPort 2.1 or DisplayPort 1.4 with DSC | OSD + Windows or GPU app |
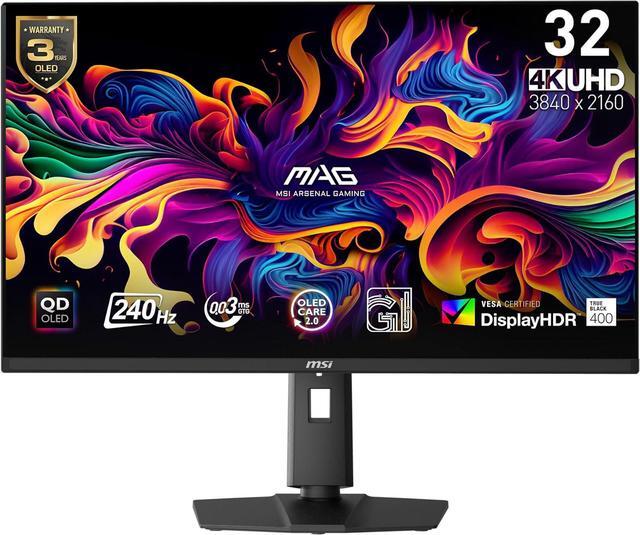
Exact limits depend on the monitor, so check the manual's signal table. The MSI MAG 272QP QD-OLED X24, for example, reaches 1440p at 240Hz over both HDMI 2.1 and DisplayPort 1.4a. The MSI MAG 321UPX QD-OLED reaches 4K at 240Hz over DisplayPort 1.4a by using Display Stream Compression (DSC).
Troubleshooting: Can't Find the High Refresh Rate Option
1. The cable can't carry enough bandwidth
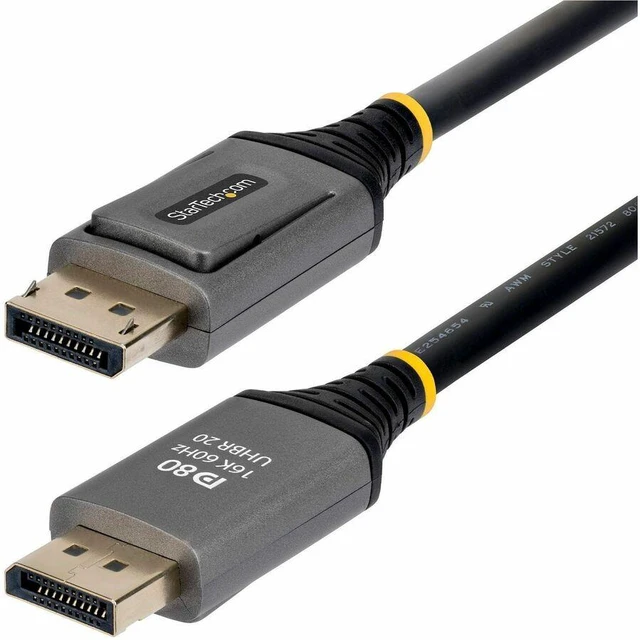
This is the most common cause. An older HDMI cable or a cheap DisplayPort cable can limit you to 60Hz or a lower tier. For high refresh rates at 1440p and 4K, use a certified cable that matches your ports, such as a VESA-certified DP80 DisplayPort 2.1 cable or a certified Ultra High Speed HDMI 2.1 cable. The cable that came with the monitor is usually the safest choice.
2. You're using the wrong port (HDMI or DisplayPort)
Many monitors support their maximum refresh rate on DisplayPort only, as in the ASUS example above. Check the monitor's spec sheet for each input's maximum refresh rate. Also make sure the cable goes into the graphics card, not the motherboard.
3. An adapter, dock, or KVM is limiting the signal
USB-C hubs, docking stations, KVM switches, and passive DisplayPort-to-HDMI adapters often cap the refresh rate. To test, connect the monitor directly to the GPU with a single cable.
4. Your graphics driver is outdated or corrupted
Update through the NVIDIA App, AMD Software, or Intel Graphics Software. If the right rates still don't show up, do a clean installation of the latest driver, then reboot. Windows' basic display driver often limits you to 60Hz.
5. A monitor setting is locking the rate
Check the OSD for overclock, DisplayPort version, and input settings (Method 5). Some monitors also reduce refresh rate in certain picture or HDR modes.
6. HDR or 10-bit color uses up the bandwidth
HDR and 10-bit color need more bandwidth than SDR. If turning on HDR drops your refresh rate, use a connection with more bandwidth (HDMI 2.1 or a DSC-capable DisplayPort connection) or check whether your monitor needs DSC turned on in the OSD.
7. Windows or a game is capping the rate
Turn off Dynamic refresh rate in Windows 11 if a game seems stuck below your maximum. Also check the in-game display settings, since some games keep their own refresh rate setting in fullscreen mode.
Related Refresh Rate Guides
- How to Enable G-Sync or FreeSync on Your Monitor: the next step once your refresh rate is set.
- 60Hz vs. 144Hz Gaming Monitor: whether a higher refresh rate is worth it for the games you play.
The Bottom Line
Setting your refresh rate correctly takes about five minutes. On any PC, start in Windows: Settings > System > Display > Advanced display. Use the NVIDIA App, AMD Software, or Intel Graphics Software for G-SYNC, FreeSync, Adaptive Sync, and custom resolutions. If the rate you paid for still isn't there, check the cable, the port, and the driver, in that order.
Frequently Asked Questions
Common questions about changing refresh rate on Windows PCs.
How do I change my refresh rate in Windows 11?
Why can't I select 144Hz or higher?
Where is refresh rate in the NVIDIA App?
Can I change refresh rate in AMD Software: Adrenalin Edition?
Is HDMI or DisplayPort better for high refresh rates?
Read More
- Change the Refresh Rate on Your Monitor in Windows (Microsoft) - Microsoft's official steps, including Dynamic refresh rate.
- NVIDIA App Updates and Release Highlights (NVIDIA) - Which Control Panel features moved to the NVIDIA App and where they are.
- How to Create Custom Resolutions in AMD Software (AMD) - AMD's official custom resolution walkthrough.
- Intel Graphics Software FAQ (Intel) - Which Intel graphics use Intel Graphics Software, Arc Control, or Graphics Command Center.
- What Is Refresh Rate? (Newegg Insider) - The basics of refresh rate and how it relates to frame rate.