Technology is changing the way we live. It’s never been easier to optimize your home for comfort, convenience, and security. But smart home technology offers much more than controlling switches and locks with your voice and phone. In this guide, we’ll show you how to make a smart home with five entry-level home improvement projects anyone can do.
What Are the Different Smart Home Connection Technology Platforms?
When it comes to smart home tech, things can become complicated. If you’re starting out with smart home devices, then you’ll want to do your due diligence.
For now, we’ll focus on different smart home connection technologies and how they stack up to one another. While there are a number of different connection standards, we’ll cover the 3 major standards: Wi-Fi, Z-Wave, and Zigbee.
Wi-Fi
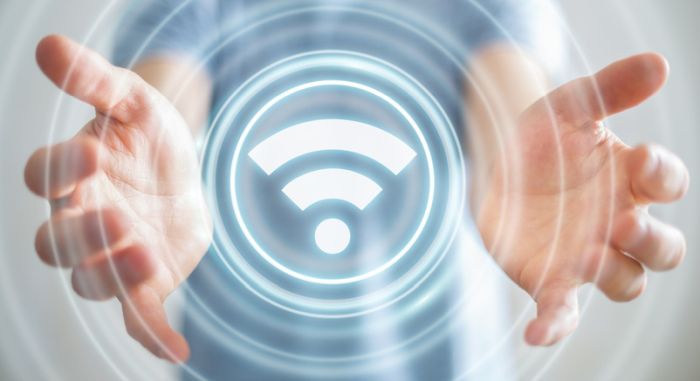
Wi-Fi Oughtta
If you’re new to smart home tech, then you might consider going with Wi-Fi devices. Instead of connecting through a special hub, they connect through your router. They’re also easy to set up, and are vastly cheaper than Z-Wave and Zigbee devices.
However, their lower price point does come at a cost. Wi-Fi smart home devices are often less secure than other proprietary wireless standards. That means you’ll want to double down on your network security.
They often rely on cloud services to work, further increasing security and privacy risks. And because they connect to the cloud, you’ll need an Internet connection to control them.
Z-Wave
If you don’t mind shelling out extra money for extra security and control, then you might consider going with Z-Wave. You’ll need a special hub with a Z-Wave controller to connect your smart home devices. But the devices also act as a node in a Z-Wave mesh network for better coverage than a standard Wi-Fi router.
Besides providing greater coverage, they also have better range than Zigbee, though they fall short of Wi-Fi. Z-Wave devices also operate at a lower frequency than other wireless standards – in the 800-900Mhz range. This makes them the slowest devices, but allow for greater security and control, and are less prone to interference.
Of course, Z-Wave is not without issue. The 232 device limit on a single Z-Wave network shouldn’t be an immediate issue for most users. However, as more devices come equipped with smart functionality, this limit could prove detrimental in the future.

Gettin’ Zigbee wit it
Zigbee
Like Z-Wave, Zigbee devices require a specialized hub with a Zigbee controller for connectivity. Each Zigbee device also doubles as a node on a mesh network for greater coverage. Zigbee devices are also similar to Z-Wave devices in power consumption, security, and price.
That said, there are a few differences between Zigbee and Z-Wave. Zigbee operates alone on the 915MHz band, but shares the 2.4GHz band with Wi-Fi. Because of this, Zigbee devices are subject to greater wireless interference than Z-Wave. The wireless range of Zigbee is also shorter than the others.
However, Zigbee devices are also faster than their Z-Wave counterparts, second only to Wi-Fi. And with a greater device limit at around 65,000 devices per network, they’re far more future-proof than Z-Wave.
We offer thousands of Smart Home solutions
1. Always Know When You’ve Got Mail
Have you ever wanted a notification when the mail comes? Well, thanks to smart home technology, you can. Best of all, you don’t need a new mailbox or any tools. All you need is a door contact sensor mounted to the door of your mailbox.

“You’ve got snail mail”
Once you’ve connected the sensor to your smart home, you’ll receive a notification on your phone any time your mailbox opens and closes. You can also set your favorite voice assistant to audibly notify you when you’ve got mail.
After integrating the sensor into your smart home setup, you’ll need to test the sensor near your mailbox before installation. Test the sensor inside your mailbox first, since you’ll want to mount it inside, if possible.
Monitor your phone to see if it reliably picks up the sensor’s state. If it doesn’t, then it’s either too far from your home or there’s too much interference. In that case, you may need to mount the sensor on the outside of the mailbox.
Another solution to combat range issues is using a signal-boosting device. This can help if your sensor’s access point is near the back of your house.
After confirming the sensor works at your mailbox, mount the sensor so that it triggers when opening or closing the door. Viola! Your mailbox is now smart.
2. Make Your Home’s Climate Self-Regulating
Keeping your home comfortable year-round is easy, but often comes at a high cost. In 2015, heating and cooling accounted for 51% of the total residential energy consumption in the US. With smart home technology, you can optimize your heating and cooling energy usage without any home renovations.
Start with your home’s central heating and cooling. By upgrading to a smart thermostat, you can remotely control your thermostat and optimize energy usage with routines. You can base these routines on your schedule, whether you’re home, and the local temperature of different rooms in your home.
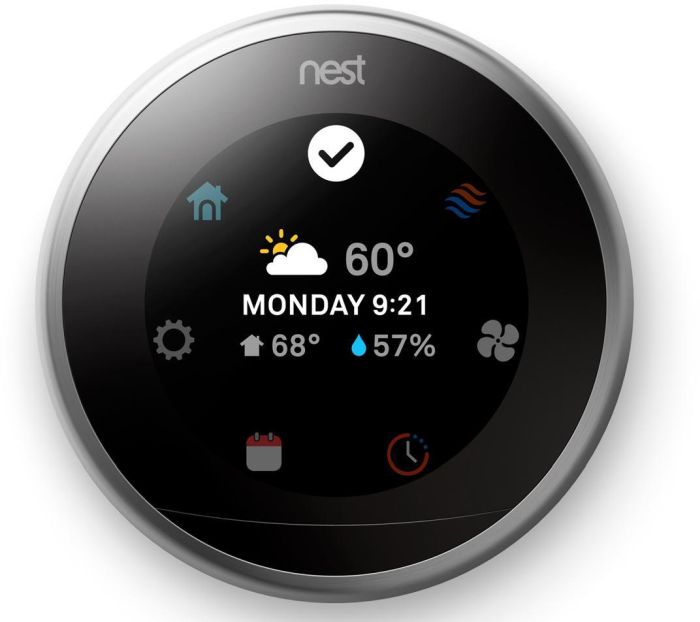
You’re the Nest, around
For this project, you’ll need a couple of basic tools:
- Screwdriver
- Voltmeter
Before you buy a smart thermostat, look at the wiring configuration on your existing thermostat. Take note of the number of wires your thermostat uses, and whether you have a C-wire connection. You’ll want a thermostat that’s compatible with your HVAC wiring. Many smart thermostats also need a C-wire to provide wireless connectivity.
When wiring your new thermostat, it’s important to cut the power to the thermostat at the breaker. Remember to double-check the wires with a voltmeter before installing your new thermostat.
If you use supplemental space heaters or air conditioners, you can also integrate them into your smart home. For this, you’ll need a temperature sensor and a Wi-Fi IR controller for each room you want to climate control. This gives you greater control over your room’s temperature and how often these devices run without a second thought.
We’ve got all the Household Tools you’ll need when learning how to make a smart home.
3. Light Up Any Dark Room With Your Presence
One of the hallmarks of home automation is convenience. And nothing says convenience like lighting up a room by simply walking into it.
This can really come in handy if you need light but don’t have a free hand to hit the light switch. It can also be useful for midnight bathroom trips. Not only does this save you the trouble of fumbling for a switch in the dark, but you can also set it to provide dim light to ease eye strain.
To do this, you’ll need to start with your power source. Smart outlets or plugs for lamps or light strips can work. For overhead lights, you’ll need smart light switches or bulbs.
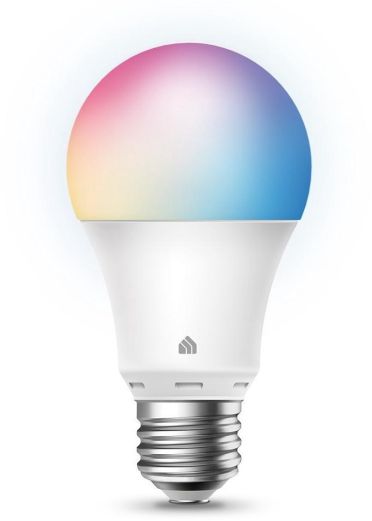
This dimmable bulb is pretty bright.
If you’re installing smart outlets or switches, you should first check to see if your home has a neutral wire. Some outlets and switches require a neutral wire to function, but older homes may not have a neutral wire. If you don’t have a neutral wire, you’ll need to find outlets and switches that don’t require a neutral wire to function. You’ll also need a few tools to get started:
- Screwdriver
- Voltmeter
The last thing you’ll need is smart motion sensors to trigger your lights. When placing your motion sensors, you should account for the sensor’s detection range, as well as who you want to trigger it. If you’re using a motion sensor for night lighting only, then you’ll also want to set your routine to only trigger when it’s dark.
4. Automatically Prevent Mold and Mildew in Your Bathroom
Mold and mildew thrive in warm, high-moisture areas like bathrooms, and can present a significant health risk to everyone in your home. A simple bathroom fan is often enough for keeping these troublesome fungi at bay. But it’s easy to forget to turn it on.
Fortunately, you can automate your bathroom fan with little more than a smart switch and a humidity sensor. You can also find smart switches with built-in humidity sensors and fan controls. However, this could complicate things if you’re transitioning from a 2-gang setup to a single-pole box.
Like other projects, you’ll need a few simple tools to help you get started:
- Screwdriver
- Voltmeter
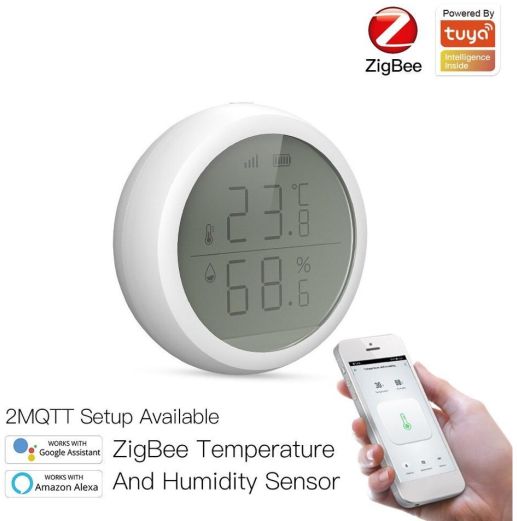
Whether it’s the heat or the humidty, Tuya has you covered.
First, you’ll need to determine the configuration of your bathroom switches. You’ll also need to determine whether you have a neutral wire running to your switches. Finally, remember to cut the power to the switches at the breaker and test with a voltmeter.
Once you’ve wired your fan to the smart switch, you’ll need to pair it with the humidity sensor. Now you can set it to automatically trigger the fan any time it detects humidity above a certain level, and turn it off once it drops below the threshold.
We have all the Home Goods you need to make your house a home.
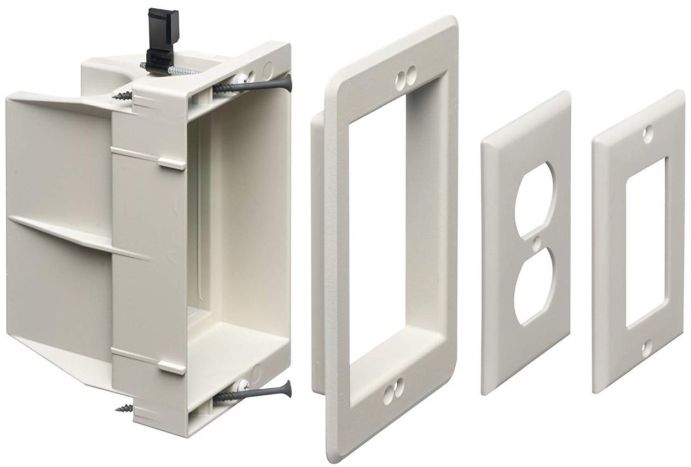
5. Turn an Old Tablet into a Wall-Mounted Control Panel for Your Smart Home
Got an old tablet lying around collecting dust? With a little handy work, you can easily turn it into a wall-mounted control panel for your smart home. It’s a great way to extend the life of an old device and can help top off the high-tech aesthetic of your smart home. It also allows other house members to control the smart devices throughout your home.
To start, you’ll need a wall mount for your tablet, a recessed outlet box, and an outlet. You’ll also need the following tools:
- Voltmeter
- Screwdriver
- Drywall saw
- Drywall patch kit (optional)
- Paint (optional)
There are a few ways you can tackle this project, based on your home’s layout. The easiest way to do this is to move an existing outlet to a different spot and patch the old outlet hole. However, if you want an extra outlet, things get a little trickier.
Not your grade school recess.
To add an outlet, you’ll need to piggyback off of a nearby outlet or light switch. This will require rewiring the outlet or switch and properly running a line to the new outlet. Depending on your area, this could go against local electrical code, and regardless, may be best left to a licensed electrician.
When choosing an outlet, you’ll want to opt for a smart outlet. While a standard outlet will work, a smart outlet allows you to control when the tablet receives power. This can further extend the life of the tablet and avoid overcharging, which can eventually lead to battery bloat.
One final consideration is the side of the recessed box. Some boxes are standard single gang boxes that sit a couple of inches inside the wall. Meanwhile, others are larger and sit at an angle to provide more space for plugs. Depending on the available clearance in the box, as well as the size and orientation of your charger, you may need to use a flat USB wall charger.
You can find tech and all your home needs at Newegg