Your Browsing History
 Holiday Shipping Details & Extended Holiday Returns Holiday Shipping Details & Extended Holiday Returns
Joined on 01/27/06
Works fine - great price
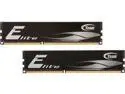
Pros: Great price for dual channel pair. Plug and play, the BIOS recognized the memory on first boot up.
Cons: CAS L = 11; but then again that what I already had in the other two slots:) Had to remove the GTX 660 video card to install the memory but knew ahead of time that would be the case - piece of cake.
Overall Review: The 11-11-11-28 timing matched the timing of the memory already installed at the factory in my rig. Dell XPS 8700, Intel Haswell Core i7-4770 quad core CPU, PNY GeForce GTX 660 video card 2GB DDR5 VRAM, 16GB DDR3 dual channel system RAM, 1TB hard drive.
Good for what they are inteded to do
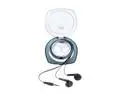
Pros: Hang in ear, one size fits all. Comfortable and sound better than the speakers on the Notebook. Very inexpensive - so quite good for the price.
Cons: Since they don't fit tight in the ears there will be less bass
Overall Review: For notebook users or those that want something to use while exercising they work great. Have had them for almost 2 years and I am constantly forgetting I have them on so they get yanked out at least once a week - still working:)
Works fine
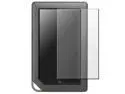
Pros: As easy to install as any other screen protector. Inexpensive - free shipping.
Cons: New users may be confused if they don't carefully read the instructions on layers #1 and #2. To install the protector one should: 1. In a dust free location, clean the screen. 2. Remove the top part of protective layer #1 exposing some of the sticky side of the protector. 3. Carefully place the protector on the screen - sticky side down, smooth out any bubbles before removing more of layer #1. 4 Finish gradually removing layer #1, and smooth out any other bubbles - DO NOT use excessive force - work from one end to the other - a few small bubbles are normal. 5. Remove layer #2 which was there to protect the screen protector while smoothing out bubbles. 6. Enjoy.
Installing a screen protector

Pros: As easy to install as any other screen protector Low price - free shipping
Cons: Some may be confused by the instructions. To install it one should: 1. In a dust free location, clean the screen. 2. Remove the top part of protective layer #1 exposing some of the sticky side of the protector. 3. Carefully place the protector on the screen - sticky side down, smooth out any bubbles before removing more of layer #1. 4 Finish gradually removing layer #1, and smooth out any other bubbles - DO NOT use excessive force - work from one end to the other - some small bubbles are normal. 5. Remove layer #2 which was there to protect the screen protector while smoothing out bubbles. 6. Enjoy.
Using a screen protector
Pros: It requires the same effort to install correctly as any other screen saver. Inexpensive - free shipping
Cons: Some may be confused by the instructions. To install one should: 1. In a dust free location, clean the screen. 2. Remove the top part of protective layer #1 exposing some of the sticky side of the protector. 3. Carefully place the protector on the screen - sticky side down, smooth out any bubbles before removing more of layer #1. 4 Finish gradually removing layer #1, and smooth out any other bubbles - DO NOT use excessive force - work from one end to the other - some small bubbles are normal. 5. Remove layer #2 which was there to protect the screen protector while smoothing out bubbles. 6. Enjoy.