Your Browsing History

Eric R.
Joined on 05/25/05
0
0
100%
100%


product reviews
- 108
Nice little proc
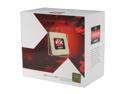
AMD FX-4100 - FX-Series Zambezi Quad-Core 3.6GHz (3.8GHz Turbo) Socket AM3+ 95W Desktop Processor - FD4100WMGUSBX
Pros: Very inexpensive quad; runs at just over 1vt with C&Q enabled; multiplier bump to 20x has it had 4GHZ, with no increase in heat. Great cornerstone for ANY gaming system (see comments below)
Cons: None at all -- I'll start my "other thoughts" here, as I think they'll be helpful for that person who's afraid to buy this as a foundation piece for a gaming machine. This proc is a perfect example of why you need to take reviews with a grain of salt. I can guarantee that EVERY reviewer that says this proc is useless for gaming, acquired that opinion from reading some elitist thread in a PC forum. I have it in a cheap AsRock 970 Extreme 3 (1.40 bios), with 4GB of PC12800, a 60GB OCZ Agility 3, Win7 Pro 64-bit, and an old XFX GTX 285 (quick and dirty PDXLan build) -- and it games perfectly. MW3 at 1920 res, all details maxed. BF3 at 1920 res, with some details reduced (because of the older video card) plays perfectly. I benched these two games for a reason. MW3 uses an older engine that still looks decent, but lacks some of the dazzle of the newer games -- this setup should be able to handle it, and it did just fine.
Overall Review: BF3 has some of the best lighting and shadow effects out there -- very graphically demanding. The GTX 285 struggled with settings maxed out, so I swapped it with a GTX 580 -- ran like butter. My point? There is NO bottleneck with this proc -- NONE. Does it bench like my i7 930 setup? No. Does it bench like my i7 2600k setup? No. BUT there is no difference in gaming. And this was at a bone stock 3.6GHZ. The 400MHZ bump upped the FPS a few, but it was already high enough that there was no stutter or lag. Final thoughts. The SSD, ASRock mobo, and FX4100 cost $263 (not including a $15 rebate for the SSD). There will be those that say you don't pair a high-end GPU with a budget system like this -- but they're wrong. It just shows that gaming is all about the video card, and the more you spend on the rest -- the faster it all runs. Just know that the FX4100 is fast enough to run it all at bone stock. OCing is just a bonus that adds a few FPS. So buy with confidence.
4/29/2012See more detail
Tough to recommend
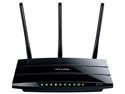
TP-LINK TL-WDR4300 Dual Band Wireless N750 Router, Gigabit, 2.4GHz 300Mbps+5GHz 450Mbps, 2 USB port, IP QoS, Wireless On/Off Switch
Pros: • 2.4 GHZ download speeds on par with a wired connection when you are in the same room with the router. I usually pull about 7MB per/sec on a wired connection when downloading game content from Steam – very similar numbers with both wireless bands • Simple setup within a browser window • After two weeks of constant use – never lost an established connection with any wireless device on my network (laptops, phones, desktop w/Wi-Fi card, smart TV, and Wi-Fi blue ray players) • No power cycles (plug/unplug) in that two weeks of use • Very lightweight design had me concerned about it running too hot – especially while pounding both bands simultaneously. Ran slightly warm, but I attribute that to the warmth of the room that it was operating in. • Printer and file sharing worked flawlessly (just need to install a small application on each machine) • On/off switch for wireless is a cool feature – haven’t seen that on my other routers • Cost after rebate is excellent for a dual-band router that has so many features • Maintained a VPN connection to my place of employment (working from home) for three consecutive days – and never lost the connection, despite me pounding it with downloads and multiple device connections • Bright yellow sticker covering the Ethernet ports (a deterrent for the novice user who doesn't read installation directions first – great idea • Solid explanations of each and every setting within the firmware • All of the security settings that you want to see (usual variety of encryption options, guest network, WPS) • TP-Link website (particularly the download area) is easy to navigate, and find what you need • Firmware update as easy as flashing the bios on a standard motherboard • TP-Link responds with helpful comments to users reviews – very rare to see, and also very cool • Based off my comments above, I would say that this router can be counted on to be reliable for maintaining your connections
Cons: • Setup disk would not run to completion on a Win8 64-bit Pro desktop, nor would it complete on a Win7 64-bit Pro machine. Setup would run part way through, then error out saying that there was no network connection – please verify if you are connected to your network. I figured it was a Win8 issue, so I went to TP-Links website, and downloaded the latest installer. While this worked just fine, your average user would probably have spent wasted time on their hands and knees tracing network cables. I tried the setup on a Win7 desktop – same negative results. Same negative results when attempting to install the printer sharing software, as well • Very large in size (about 6” x 10”) and can’t be mounted vertically. While lightweight, it’s definitely a big boy – one of the largest routers I’ve ever used • Wireless speeds on both bands (especially the 2.4GHZ band) suffered in a huge way as soon as you put one wall between your device and the router • Despite the very large size of the three included antennas, the wireless range was not acceptable. My standard router (Asus N750) is half the size of the WDR4300 + has internal antennas – and tested twice as fast with everything else being equal • LED indicator lights look fine up close, but end up looking like distracting blue blurs once you get a few feet from the router • While the WDR4300 refused to drop a connection from any reasonable spot in our home, connecting from distance was the complete opposite. With the router upstairs in our bonus room, we all took turns sitting downstairs on our living room sofa, trying to connect laptops, phones, blue ray players, and our smart TV. There is one wall between that sofa and room, with about 60 feet of distance. Connection attempt success from that distance with a half-wall in between, was about 75%. Moving another twenty feet to the far corner of the room (where our TV is mounted on the wall), and you could drop that percentage below 50%. • We were only able to connect our smart TV to the network when I walked the router outside the room (with no wall in between devices). Connection was no problem at that point, but as soon as I moved the router back to its normal location (with the wall in between) the speed dropped below 1MB per/sec, and I wasn't able to stream YouTube content without freezing or buffering.
Overall Review: I was a little jaded going into this experience, as I had previously used a TP-Link WR940N, and had constant problems with it needing to be power cycled every other day on the average (put up with that for a few weeks before it was replaced). I never ran into any problems like that with the WDR4300, but it’s range and speed, while maybe adequate for the money spent, would never make the average home user happy enough to continue wanting to use it. All testing was done with a CAT 6 cable from the modem to the router. I ran my initial tests with the stock firmware, and leaving the channel on auto. I was hopeful that current firmware would make a big difference, as well as trying all of the channels – but it was all pretty much the same in terms of range and speed. I would run bandwidth tests from sites like speedtest.net, and while the laptop was in the same room (regardless of the distance from the router) I would pull results on par with my wired connection (usually around 60MB per/sec on a Comcast Blast package). If I moved to the staircase (with the wall between the devices) – speeds would drop to the 16MB per/sec range. Wireless downloads from Steam would drop to 3MB per/sec once I put the wall between the devices, and would drop fluctuate between 1-2MB per/sec at the farther corners of our downstairs living space. We have a very open floor plan in our home, and while I got the expected speed results when I went out into our garage/back patio/bedrooms, I was definitely expecting better range in such an open environment. Frankly speaking, your average user isn't going to care about how fast something is within one room. They’ll want range throughout the house. You buy a wireless router hoping for a good blend of speed and range, and that wasn't happening with this particular unit. While I understand that the router I used for a comparison (Asus N750) usually ranges in price from $117-$149, the WDR4300 is normally priced around $100 – and I consistently saw twice the download speed when making comparisons. The only time they were comparable was when I had 4+ devices downloading a variety of small/large file sizes from the internet, or from a portable hard drive that I had connected to the USB 2.0 port on the back of the router. I think the average consumer would pay a few more dollars for these much better results.
8/13/2013See more detail
Rock solid performance from one of the best out there
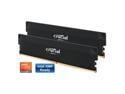
Crucial Pro Overclocking 32GB (2 x 16GB) DDR5 6400 (PC5 51200) Desktop Memory Model CP2K16G64C38U5B
Pros: Sleek and black for stealth builds No timings stickers = clean Fired up with simple EXPO profiles in the AMD BIOS Cost was competitive until Micron backed out of the consumer market Hits rated timings under stress test without issue Some room for tightening secondary timings, but not much
Cons: Cost of all DDR5 is now ridiculous Not flashy (if thats your thing) Gains from tightening timings were minimal What you see is what you get fast kit at base timings
Overall Review: Quality kit from one of the best brands in Crucial. Shame that Micron is backing out of the consumer market, and we have to deal with these inflated prices for who knows how long. Ive used just about every quality brand of RAM out there, from 1GB sticks of Mushkin PC4000 (yeah, the 3.40v stuff that required active cooling) to my current Patriot Venom kit. Lots of Crucial kits in between, and never an issue over a 20+ year period. Kit fired up at low speeds until EXPO was chosen in the BIOS. Paired with a Ryzen 9700X running at stock 5.6GHZ speeds showed similar benches to my current Venom sticks (+/- 5-8 FPS in a variety of game benchmarks). HyperPi dragstrip 1M benches averaged around 10.20 seconds, roughly .5 seconds faster than my Venom sticks (at comparable CAS). Prime95 running large FFTs (for memory stress) came in stable after an overnight run. Solid performance from a reputable maker get them while you can. No hesitation recommending anything from Crucial. Have only had good experiences with them over the years. And dont see why Pro OC kit would be any different.
1/7/2026See more detail
An improvement over the older 4000D
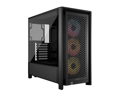
Corsair FRAME 4000D RS ARGB Black Steel / Tempered Glass ATX Mid Tower Computer Case
Pros: Large box that holds a lot of gear Thick tempered glass window Radiator options are great Can accommodate any size air cooler Includes 3x ARGB fans Separate panel for PSU access Good aesthetic with yellow/black thumb screws Lots of Velcro and tie-off points for cable management Multiple mount locations on MOBO backside for 2.5 drive mounting Cost is competitive with similar offerings
Cons: Release mechanism on side panels is over-engineered PSU is snug (but plenty of room for cable stash) No included instructions (definitely needed for some of the extra parts in the box Requires ICUE software to do anything fun with the fans Weird underneath cable routing thats ugly
Overall Review: Nice overall box from Corsair. I have the original 4000 in white, and there definitely improvements in the frame Series unit. Cleaner cable management and the lower PSU side panel are nice, as well as the adjustable GPU anti-sag bar. Plenty of room in the box for most any configuration. Price can be as low as $100 on sale, so a competitive choice against similar black boxes. When I say theres lots of room, Im not kidding. Heres the old school build that I went with DFI Expert skt 939 ATX MOBO Opteron 165Mushkin Redline PC400 DDR1 (the 3.4v active cooling required champ from back in the day) 2x Sapphire Radeon 3870X2 (Quadfire setup from back in the day) Creative X-Fi sound card 2x 2.5 spindle drives Antec Quattro 850w PSU Swiftech Storm water block/barb fittings/generic 360 radiator/XSPC pump/t-line for a reservoir) All fit in just fine with a tight squeeze on the pump. Those 3870X2 cards were huge for their time, and still comparable to a lot of the mid-level RTX stuff. All fit without issue. Things I didnt like were the lack of packaged directions. The filters and the additional radiator/fan bracket needed some instruction for install. I also didnt like the unlock mechanism for the side panels. I had to go online to see how to get the panels off. Two thumbscrews per side is just fine no need to reinvent a wheel that begs to put big fingerprints all over the class every time you pop that glass panel. Some of the reviews arent fans of the low mounted front connectivity ports, but I keep all of my boxes up on desks, so not a big deal. HOWEVER, you have a contained run of cables that sticks out like a sore thumb on the front/bottom of the case. Having the case on the desk makes that clearly visible. I think they had to do it because this a big mid-tower, and cable runs are long. They even included a an extension for the front-panel connectors. Another low one for me is the ICUE software. Not a fan. Some people dont like seeing the high RAM usage, but for me, the issue is its not at all intuitive, and the settings dont always stick. Hate it. Overall a nice box from Corsair. Doesnt stand out in any particular way, but it does most things right. Lots of self-contained thumb screws, filter/radiator options, and plenty of room. Not highly recommended, but recommended nonetheless.
6/27/2025See more detail
Good for basic image editing and quick video creation

Adobe Photoshop Elements & Premiere Elements 2024 for Windows - Download
Pros: - no subscription - basic to advanced modes - tons of tutorials on YouTube - solid for single image edits - slideshow creation is really easy - has some AI with smart brushes - you can go back and forth between Basic/Guided/Advanced modes - incorporates plugins just like LR & PS
Cons: - some of the styles in PS Elements added chromatic abberations back into the photo - don't think you can just jump in and go - if you are used to teh ease of filters in social media apps, this might not be for you - kind of clunky in that you make basic edits, and then output to what you want to do next (instead of editing in one panel) - Advanced and Guided modes need to work with 8-bit color (instead of the default 16-bit)
Overall Review: I'm a Lightroom Classic + Topaz plugins user. I thought this would be really easy since it's the "basic version of PS", but found I had my best luck going between all three modes, instead of just staying in the advanced panel. As a EggExpert reviewer we need to leave images and a video as part of the review. I tried to show editing steps on an image, and then final output on a quick slideshow made from images, but due to upload limits, had to leave out a lot of steps. Overall experience is going to be tough for the person that's used to taking a picture with their phone, finding a quick filter in one of their favorite social media application, and then posting. You need to treat this like a true editing application, with the patience to upload an image, and then put it through the process. First thing I did after watching a quick YT tutorial was to install Camera Raw. That allowed me to edit Raw files instead of just JPEGS. I loaded an image into the editor, applied some basic cropping and slider edits, looked at the output, and then tried the "auto" button for basic edits. Looked about as good as what I selected manually. I tried that over a few images, and most of the "auto" results were pretty solid, with nothing weird or useless. Next thing you do is open that pre-edited image into the advanced image editor. This is where you toggle between basic contrast/brightness style sliders, to a guided approach (select or search what you're trying to achieve, and then you get step-by-step), and then finally to an advanced panel that lets you create and edit individual layers. There are lots of pre-built styles and filters, with very basic tools to edit those. Keep in mind that to work in the Guided and Advanced modes you will need to downgrade to 8-bit color. I didn't notice much of an output difference from what I'm used to when I did this, but your results may vary. Editing got easier as I played around with all of the options. For a first time user, do yourself a favor, find some patience, and search out some basic video tutorials. That will allow you to get a feel for the workflow. There are a lot of fun effects and filters, and the smart brush did a nice job on AI sky selection. One area that I didn't like was no ability to remove chromatic aberrations. I had removed some purple fringing on the trees in the right corner of the image in this review, and most of the styles added that fringing right back in. I think you would need to do some heavy reading to coordinate those features with the smart brush. Not enough time in a shorter review to learn all of that, but again, it's an Adobe product so that means lots of available video tutorials. Premiere Elements Video Editor was really easy to use. I put together a quick one minute slideshow with some flower images, added transitions between the images, and background music, with relative ease. I used the quick editor as I'm not a video creator, but know that it was intuitive and easy to use. Lots of options to "apply all" to make things easy, and you could hit a button to automatically shorten the music to run to the length of your video, and fade it out. You can also use your own MP3 tracks. Super easy. I used images from a lower MP camera (Nikon D40x) and then max quality output (1920x1080). Result looks nice, right down to my watermark. Low quality had things looking pretty choppy and jaggy on the edges, but you wouldn't normally consider that unless you were concerned about size constraints on something like this (Newegg video review). The third feature offered here is the organization module. I did zero reading, instead just launching it to see what would happen. Within seconds I was selecting the folders to be searched for content, importing my existing LR Classic tagging, and BOOM -- I now had a catalog to work with. Very easy with good thumbnails and the ability to set parameters for backups. Overall experience was great after some reading and video watching. Adobe Premiere Elements is like a lot of editing software in that you have to unlearn a few habits if you're used to working in other applications. The suite definitely brings a lot to the table for the price, and like most Adobe standalone applications, you'll get free feature updates until they release the next years version. All of these software suites are better and better once you get a workflow down. Premiere Elements will do a lot for the beginning user, and gets better if you add some plugins (NIK or Topaz imported seamlessly), and do some reading. Definitely recommended.
12/11/2023See more detail
Excellent value bling-free PSU!
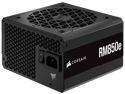
CORSAIR RM850e Fully Modular Low-Noise ATX Power Supply - ATX 3.0 & PCIe 5.0 Compliant - 105°C-Rated Capacitors - 80 PLUS Gold Efficiency - Modern Standby Support
Pros: Compact size + total modular is excellent Gold rating is solid for most operating environments Flat ribbon stealth cables that are easy to maneuver and hide 7-year warranty should cover at least a couple of builds Bling-free build (no lights or fancy stuff) Not a bad price for a 70amp 850w with this feature set Zero RPM fan mode is pretty slick for running light loads/everyday tasks Includes a single 8-pin PCI-E cable for lighter performing GPUs -- NICE
Cons: If youre looking for RGB you will find none of that here While the ribbon cables are easy to hide, you will not be modding these Includes the ever popular dual-head PCI-E cables that are impossible to make pretty, and almost always end up pushing against the glass in your case. again, not attractive
Overall Review: Nothing to complain about here. Youre getting a nice quality PSU from a reputable maker, and it comes with enough warranty that youll be looking for something fancier when you get around to your next build down the road. Being a Corsair unit, it will probably run far longer than youll ever be worrying about it. Ive used their PSUs for years, and everything from the AX units to the most barebones have all proven to be reliable runners that you install and forget about. The RM850e is all performance and zero flash. No lights or sleeved cables. All black and business. The small form factor is awesome on cases that have the PSU chamber riveted in. These are usually cramped areas to work in, but with the RM850e, this wasnt an issue at all. Lots of watts/amps on a PSU that will work in really tight spaces. Included cables are the flat ribbon style. They are easy to route/hide, get the job done. They include two dual 8-pin PCI-E strings (this style of cable almost always pushes up against the glass on your machine (unless you try to mitigate that with cable tiesstill looks bad). Nice touch here Corsair included a single head 8-pin. Very nice for the simple build that doesnt have a beefy GPU. This RM850e is running a new build with the following Ryzen 5600x Gigabyte M-ATX board 32GB of DDR4 EVGA GTX 1080 Bunch of SSDs WD 640GB Velociraptor (why not lol) Water pump + lots of fans Photo editing box that runs like a charm, and the RM850e made for easy cable management with its small form factor and easy to route cables. Highly recommended for the clean build without any fancy stuff.
6/2/2023See more detail
seller reviews
- 1
Easy to do business with!
Highly recommended. Well packed item, with fair shipping times.
On-time
Delivery
Product
Accuracy
Customer Service
Satisfactory
1/15/2018See more detail