Your Browsing History

Jonathan L.
Joined on 03/01/12
0
0
product reviews
- 7
Wonderful build quality and features for the price
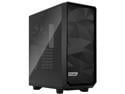
Fractal Design Meshify 2 Compact Black ATX Flexible High-Airflow Light Tinted Tempered Glass Window Mid Tower Computer Case
Pros: Excellent fit and finish. Well thought out. Tons of features for the price. Excellent airflow. Every case should have the removable top AIO bracket. Plenty of space.
Cons: The PSU bracket was slightly warped, but was easy to straighten out.
Overall Review: Want insane airflow? Want amazing cable management? Want super easy access to the 8pin ATX CPU connector with a top mounted 240mm AIO? Then this is the case for you! Blows my old NZXT H510i out of the water in build quality and features. Obviously it has better airflow than the H510i
10/13/2021See more detail
Worst Ever
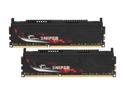
G.SKILL Sniper Series 8GB (2 x 4GB) DDR3 1600 (PC3 12800) Desktop Memory Model F3-12800CL9D-8GBSR
Pros: None
Cons: Well for one they aren't low profile would barely fit under CM V6GT, wouldn't auto detect on mobo. Even with XMP stuff still bsod like crazy, 600k+ errors in memtest and passmark. Buy this way better :D N82E16820233199 sorry g.skill but after 6 years I'm done this ram was just bad plus the heatsinks where really flimsy
3/6/2012See more detail
Great fan just a tad noisy
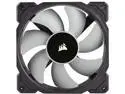
CORSAIR ML120, 120mm Premium Magnetic Levitation Fan, Single Pack, CO-9050049-WW
Pros: Pushes a lot of air for a 120mm. Excellent built quality.
Cons: Past 1600 rpms it sounds like a 747 is taking off. Seriously at 2500rpms these things crazy are loud. Below 1600 rpms these are pretty quiet.
Overall Review: Keep your fan curves from going over 1600 rpms and your PC will be fairly quiet.
10/13/2021See more detail
Great Software less AIO
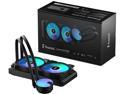
Fractal Design Lumen S24 RGB Aspect 12 RGB x2 AIO CPU Liquid/Water Cooler, LGA 1700 Ready / AM5 Compatible
Pros: Traditional DC voltage control for the pump and fans are 4 pin pwm. LEDs are standard 5v A-RGB No pump whine(The pump is built into the rad, for you Gamer Nexus viewers afraid of rad orientation) Easy installation for AMD AM4 users. Zero software is required to control this!!!
Cons: None
Overall Review: I finally got tired of NZXT Cam. The Kraken x53 was a good cooler ruined by the fact it can only be controlled by flaky software that would randomly turn off the pump. This AIO was designed properly. Allows the user to decide how to control it. Just calibrate the fans in your motherboards pwm controller and set your fan curves in bios and you're done.
10/13/2021See more detail
Fantastic 144hz monitor for the money!
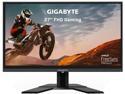
GIGABYTE G27F 27" 144Hz 1080P Height Adjustable Gaming Monitor, 1920 x 1080 IPS Display, 1ms (MPRT) Response Time, 95% DCI-P3, FreeSync Premium, 1x DisplayPort 1.2, 2x HDMI 1.4, 2x USB 3.0
Pros: Monitor is sleek and bezel plastic doesn't feel cheap. Color is very vibrant. Display gets very bright. On screen menu is easy to use. The stand has tilt , height adjustment and is very sturdy. Detected immediately with Windows 10 as a variable refresh rate monitor, just needed to enable that setting in Settings and change Windows to 144hz. Geforce control panel enabled G-Sync automatically. No dead or stuck pixels out of the box. Only has about 2 hours of use and still looks great.
Cons: None
Overall Review: This replaced a 2012 LG 27" 5ms 1080p 60hz TN monitor. I was pretty skeptical at first, but decided to order a 144hz monitor to see the difference. Just enabling the 144hz and variable refresh rate in Settings, scrolling and moving the mouse is significantly smoother. Color is amazing on this monitor and definitely reaches cornea melting brightness so be prepared to lower the brightness. Overall I don't really see why you would buy a 1080p 144hz monitor more expensive than this. Gigabyte really nailed this monitor for what I paid. I have always had great luck with Gigabyte products and would buy another one of these if my desk was larger. Does it make you a better gamer? No, but it sure is smooth as heck in game when trying to aim. Best of all no more screen tearing.
8/20/2020See more detail
Life changing!
SAMSUNG 850 EVO 2.5" 120GB SATA III 32 layer 3D V-NAND Internal Solid State Drive (SSD) MZ-75E120B/AM
Pros: Super fast!!!!. Samsung makes great products and this one is very affordable.
Cons: Wish I had bought the 240gb :( This is where I take the egg sadly. I agree with people on this being a pain to install for win7 x64 using ahci. Works ok in legacy IDE. My speeds were low at first. The key to making these work in ahci is to go into your registry!(See other thoughts for walk through)
Overall Review: 1) Run the Registry Editor (regedit.exe) 2) Navigate to Registry Key: HKEY_LOCAL_MACHINE\System\CurrentControlSet\Services\Msahci 3) Set the "Start" value to 0 (zero) 4) Navigate to Registry Key: HKEY_LOCAL_MACHINE\System\CurrentControlSet\Services\Pciide 5) Set the "Start" value to 0 (zero) 6) Shut down 7) Start up again, but before Windows boots go into the BIOS configuration screens and change the disk mode to "AHCI". Save the new BIOS configuration and restart so that Windows boots. This took be awhile to figure out hopefully this helps
1/20/2015See more detail