Your Browsing History

CARIBOU C.
Joined on 10/14/04
0
0
100%

product reviews
- 185
Regarding XP Mode
Microsoft Windows 7 Professional SP1 64-bit
Pros: Just to clear up confusion with regards to XP Mode. XP Mode can be added to Windows 7 Professional 32 and 64 bit and Windows Ultimate 32 and 64 bit. Just a matter of downloading it from Microsoft and installing it. I run XP mode on SEVERAL Windows 7 Professional systems that I have built over the past year and a half. Windows 7 starter and Home Premium do NOT support XP Mode however. You also need a processor that supports Virtual Machine modes, AND the virtual features have to be enabled in the BIOS. Not to mention, if its not enabled, you WILL have to reinstall the OS once it is enabled, and vice versa. There are some cases where it may work anyway without an OS reload, but not all.
Cons: Features in Windows 7 Professional, like XP mode and the games included with say Home Premium have to be downloaded (or in the case of the games, installed from the control panel / programs and features). Some people may not know how to add these components and it can cause frustration and confusion.
Overall Review: Just don't want to see people put down a review based on incorrect information. Plus since I didn't clarify the XP Mode thing on my previous review, I felt I should. Thanks.
5/23/2012See more detail
It was free anyway..
McAfee Antivirus Plus 2012 - 1 User
Pros: It came free, bundled with other items I bought for a couple of systems I was building.
Cons: I personally don't use McAfee anything. So for me, its worthless. Will probably give it away as a prize or something, though that may not be nice to the recipient either. lol And don't hate me out there, these reviews are based on opinion as well as fact. Its a fact that I don't use this software, and its my opinion that its worthless. ;) I still gave it 3 stars as its free protection, even though I won't use it, others may like this software.
Overall Review: It is nice to have things like this bundled with other stuff when you buy items. It really is, just in this case its something I can't use. They should think about bundling things like a case fan, or a small pack of blank DVDs or something occasionally.
5/13/2012See more detail
Not bad deal for the price, honestly.
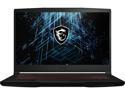
MSI GF Series - 15.6" FHD 144 Hz - Intel Core i5-11400H - GeForce RTX 3050 Ti Laptop GPU - 16GB Memory DDR4 3200 - 512GB NVMe SSD - Windows 11 Home ()
Pros: Lightweight, powerful, pretty fast. Has a decent combination of tactile feel, aesthetics, and function. This review is for the GF63 Thin 11UD-261 (i5 11th gen/16GB/512GB) Specifics: Keyboard feels good to type on, but does seem to have a fairly short keystroke. Touchpad feels pretty normal to me, works fine. Doesn't automatically disable when connecting a mouse, but can be disabled manually. Screen is very nice, and I don't even have to run the brightness at full, 70% is good most of the time. Boots fast, has enough memory and CPU power to do quite a bit out of the box without having to immediately upgrade it. Bloatware is minimal. Can run games using both the internal display and an external display with it in clone mode, and the FPS/Refresh do change to match the screens, even simultaneously.
Cons: Gets warm, was seeing temperatures of up to 180F on the GPU hotspot, 170F on the card, 150F on the CPU playing more intensive games, but overly not bad. Fan noise was ok though. No slowdown or throttling was noticed. This was without using a fan-based cooler pad, which I plan to do when gaming anyway. I have had laptops run hotter than this in the past. But the area behind the keyboard in front of the screen WILL get warm, even hot to the touch after gaming for 15-20 minutes. But the rest of the unit seems to stay fairly cool. This was tested on a hard surface desk with an item to prop up the back about half an inch. I would NOT recommend gaming on a cloth surface of any kind, and at the very least use something to prop it up to allow it to breathe better if possible. If this is to be heavily used for gaming, get a laptop cooler that has fans to help it. FPS has options for auto 72/144, or forced to 60, 72 or 144. The auto mode seems to mostly keep the FPS/Refresh on 72 vs 144. But that's not a breaker. Just set it to the limit you want and leave it there during gaming. But lower it for battery life. (the point of the option was to raise it to 144 while plugged in and lower it to 72 when low use or on battery and that doesn't seem to be the case all the time) Speaking of, battery life is not going to be great on this laptop, but since it has dual video cards, the power consumption isn't bad. You can expect an hour, perhaps 2 with tight battery management. But gaming would kill a battery in less than 20-30 minutes, so not built to game on a battery.
Overall Review: This unit was bought to fill a few needs, portability for work reasons, gaming for when visiting other family that games, and general personal use. Overall, I'm impressed. Can be used to carry around for a daily machine for work, but still play the latest games pretty well. I can confirm it will play D4 at above 60FPS. :p Anyway, good unit, good deal at current price, well worth it. Good luck!
11/16/2022See more detail
Really nice case, lots of features and options!
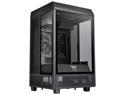
Thermaltake Tower 100 Black Edition Tempered Glass Type-C (USB 3.1 Gen 2) Mini Tower Computer Chassis Supports Mini-ITX, CA-1R3-00S1WN-00
Pros: Roomy! Case has a lot of space to work with for your build, choice of cooling, choice of GPU, drives, etc. Actual glass panels. Visually stands out.
Cons: It is large. 10.5"x10.5"x18" tall. But if you want room in your case, you can't build with a tiny box. 3.5" drive location usage require removal of the rear fan. This looks to be an oversight in my opinion. Granted, not everyone is going to run a 3.5" drive, but why have the option in the one place where a fan should be? Serious issue: Standoff height. I was installing an MSI MGP 560i Edge WiFI gaming board. These come with the back plate pre-mounted on the board. When trying to install using the existing mounts, the board was literally 3/16 of an inch too low and the plate would not line up no matter what I did. Not only that, the motherboard mounting the the backplate section was not square. And even when adjusting for that, it was still too low. I ended up having to remove the included standoffs and pull from my repository of computer parts a set of standoffs that were 3/16s of an inch taller. Now the board lined up perfectly with the back plate and was fine. Please note: Not all boards may have this issue. This particular board had the metal backplate pre-installed onto it and therefore there was very little tolerance. Typical boards have a plate that you install into the case and then put the board into it and it allows for some tolerance in fit. The other caveat here are cards you might wish to install into the PCIe slot. If the board is mounted too low, the cards will never be able to fully seat or can work loose very easily. On the other hand, if the board is too high, the card will seat all the way in but the bracket where the screw goes it might not go all the way down to the case properly. These sorts of things shouldn't normally be an issue, but due to variances in builds and tolerances, they happen. And on this case I did run into this issue, something I wouldn't have expected for a $100+ case price.
Overall Review: Overall, its a splendid case, eye catching, different, and it has a lot of room for whatever ITX build you want to put together. But as with all builds, be sure to test your fitment, plan, take your time and your build will go well and work out.
8/31/2021See more detail
This thing is HUGE!

Cooler Master MasterAir MA620M Dual Tower ARGB High Performance CPU Air Cooler, 6 CDC 2.0 Heatpipes, SF120R Fan, Hexagon Strip Addressable RGB Lighting for AMD Ryzen/Intel LGA1200/1151
Pros: Keeps your process cool, no problem! Looks really cool, has some neat lighting! IT REALLY IS LARGER THAN IT LOOKS! I'm using this on an i5 10600KA mounted on an MSI MPG ITX 560i board. Running Prime, it tops out at around 65C with an ambient temp of 27-30C.
Cons: Its BIG! If you don't have a big enough case, forget it! Thankfully I had ordered the Thermal Take Tower 100 ITX. It has room with nearly 2 inches to spare. BUT ITS STILL BIG! lol Make sure you pay attention carefully to the parts and the instructions. While they aren't completely clear, the instructions are correct.
Overall Review: For those not sure about compatibility: I used this for a 1200 socket system. It is identical to the 115X style. The backplate can only be used ONE WAY for Intel, and the OTHER WAY for AMD. They literally have each side marked for the type of processor. So it you are using it for AMD and see the word INTEL, you have it backwards, flip it over. There are studs that fit only one way onto each arm of the backplate, then have a clip that slides over them and can be locked into one of 3 positions. The middle position is for socket 115x and 1200. I think the AMD is a bit different. Very important! Make sure you lock the pin INTO the clips! What I did was push the clips in toward the center of the plate over the pins till they clicked into the clip (they will actually snap or click into the clip). Then slide it back out to the correct position. You do all this before putting the backplate on the board. The double ended hex bolts then hold the backplate to the motherboard. You can tighten them up good, but you will not get them tight to the motherboard. This is perfectly normal, they are designed this way to prevent you from damaging the board from over tightening them, so the setup and backplate will feel loose even when those are tight. Then you put the upper arms on with the proper screw mounts, and tighten those. At this point, you will want to mount the board to the case. I in fact recommend that you do all the tedious parts of connecting cables, mounting memory, etc and actually install the heatsink last due to its size! Make sure the CPU and heatsink are clean, use a proper amount of heatsink grease (provided but you won't need the whole tube) and evenly tighten the heatsink to the CPU. (Run each of the two screws in a few turns each alternating between them till they both get tight) It doesn't hurt to gently twist back and forth (it will move a tiny amount) the heatsink as you tighten them to help spread the heatsink grease between the heatsink and cpu. Once you get it near tight or tight, make sure you align the heatsink square with your board and so the parts all look straight. Then tighten good. Don't over-tighten any of the 3 fasteners at these steps, they can be stripped if you aren't careful or try too hard. If they don't start or turn easy, make sure you have the right part and that you didn't start the thread wrong. They should start turning together very easily till they get tight. The light-up feature is powered by a SATA connector and has a magnetically mountable push button control that you can route to the exterior of the case or wherever you prefer to put it. Base speed is around 750RPM and less than a whisper. Since the case I was using it in was an inverted vertical mount, I mounted the cooler so that the fan blows up and out the top of the case. You might be able to mount it in 4 different ways, depending on where you put the two base brackets. I will admit I didn't test all possibilities as I had a plan before I mounted it. The only caution I would suggest here for future concerns are two things: 1: Time may lead to this heatsink bowing the board from its weight. How long will depend on the board, the conditions, etc. But it might be as simple a fix as using some invisible fishing line to tie a support to take the weight off of the heatsink if its used on a vertically mounted board. 2: Moving the system with this installed. Be sure to transport it with the heatsink upright during travel and if possible support it. If it were to get a large enough shock in certain directions, it has the potential to tear itself loose of the board and potentially causing damage. If transporting it long distances or in unknown circumstances, I would even go so far as to remove the heatsink for the trip and reinstall it once set back up.
8/30/2021See more detail
Great motherboard for an ITX build!
MSI MPG B560I GAMING EDGE WIFI LGA 1200 Intel B560 Mini ITX Intel Motherboard
Pros: Compact, lots of features, solid design. Has dual M.2 Slots. Large motherboard heatsinks. 3 fan headers. 2.5GB LAN. I mean. Wow, nice! If you have a router than can support it... LOL WiFI6. Great! Support for Gen 10 and 11 is nice.
Cons: Can be a bit cramped if you are building with a cramped case. I suggest you don't. I used a Thermal Take Tower 100 ITX case. Roomy, has easy access to back of motherboard and lots of ventilation. M.2 slots. One is on the upper side of the motherboard and even has a heatsink! The other one is on the bottom side and no heatsink. On the plus side they did provide mounting hardware, screws and even different spacers for various SSDs. Would have liked maybe an extra set of USB ports for either front or rear, but it works as is.
Overall Review: Worked out well for the build: i5 10600KA Corsair 16GB DDR4 2933 kit WD 500GB SSD nvme WD 2TB SATA EVGA 550GR Modular Thermal Take Tower 100 ITX Cooler Master MA620M Runs perfectly at stock speeds of 4.1 and reaches 4.8 just fine. Memory set to 2933 speed instead of stock speeds and stable. Loaded Windows 10 20H2 in about 5 minutes from a USB3 memory stick. (including the time to type in key)
8/30/2021See more detail