Your Browsing History

Shawn B.
Joined on 04/16/20
0
2


product reviews
- 3
Fantastic 1440p gaming
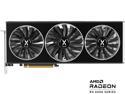
XFX SPEEDSTER MERC319 Radeon RX 6750 XT 12GB GDDR6 PCI Express 4.0 Graphics Card RX-675XYTBDP
Pros: Aesthetically pleasing Love the simple lighting Fantastic build quality Team red
Overall Review: Been a fantastic 1440p contender so far. I've been able to play most games on high to ultra and sticking in 80 fps and above. Been watching the temps on it constantly and I haven't seen the core get hotter than 72C. Not great the temps and when I've tried adjusting the case fans more aggressively and makes little to no difference on the GPU. Hey, at least it's not thermal throttling though and that's what really matters. I was able to pick this up for $450 about three weeks ago. Watching Nvidia's comparatively 12GB models still going for a thousand or way more. Yea I'm good with the price on this card.
2/26/2023See more detail
BQ's take on the dual chamber.
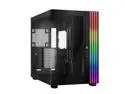
be quiet! LIGHT BASE 900 DX Black ABS / Steel / Tempered Glass ATX Full Tower Case
Pros: Dual Chamber, LED strips, super simple to invert or to have it rest on the back panel. Dust filters on the insides of the respective panels.
Cons: No thumb screw to lock the integrated GPU support bracket. Questionable way of getting to the 140mm fan screws on the back mounts. The two hubs act as one.
Overall Review: Love the case. It looks great. It displays the internals in such a good way. Love the dust filters are on the insides of the panels. I have a two year old, and he snapped the top filter off of my Shadow Base 800, so that's why that's a plus. Top and bottom fan trays are removable. Unfortunately, the fan tray for the back intakes is not removable. That's where my first issue showed. If you're using 140mm fans (which you should be with this case), the top fan top screws and bottom fan bottom screws are supposed to be accessible through drilled holes to stick a screw driver through. Well, those holes don't really line up. I had to uncomfortably angle the screw driver and screws to get them to tighten. So, I have four screws that are angled into the fan mounts. They're tight, but still. Then, the GPU support arm. It's nice to have, but the way to adjust it up and down is trash. They didn't make it a thumb screw like with most of the case screws. So you have to adjust the arm while holding it under the GPU, keeping it from sliding down naturally while reaching around to the other side of the case with a screw driver. Because the way they want you to get to that screw is from the back of the case, since there is minimal room to actually get a screw driver in between the inside of the case and that single screw. Now, that is an issue I mentioned because I have a feeling that's how it would go for most people building in this case. I didn't have to reach around the back of the case because I have a bit driver that holds like a ratchet. I'm having a hard time figuring out why they didn't make it a thumb screw. Cable management.... It's not great on the back side anyway. I found myself just stuffing everything in and closing the SSD tray. I have big hands, so getting to the cable tie downs in the Grand Canyon was pretty much impossible for me. Normally, I cable manage behind the case the best I can, but I just couldn't. Doesn't matter too much since with that part of the case. No one is going to see that anyway. Oh, and I found that running your power supply cables first is the way to go. If you're using fans, that have separate leads for RGB and control. If you're using all 10 fan mounts like I did. It becomes way harder to run your PSU cables afterwards. And the hubs. This is an issue for me that might not be for others, but I'm pointing it out. I thought they would be independent from each other. They're not. They're tied in together. They're a combo PWM and ARGB control hub. Twelve ports in total. I like to keep my intake and exhaust fans on separate control speeds. I was hoping to use one hub for intake fan control and the other for exhaust control. Since the two hubs are connected and act as one. You can't control them independently. Only one hub has the MB headers, so you can't just connect them separately to the MB. Despite those complaints. I love the case. It looks great. The LED strip wrapping around the case is amazing. The diffusion works really well. The animations are smooth using the built-in case animations. The simplicity of just switching the stand-off feet with a 90 degree turn to invert the case or to lay it on the back panel for that retro look. It is so simple that it's surprising that Hyte or Lian Li didn't think of it first who have been making dual Chamber cases first. Or at least some kind of similar idea. Be carefulful with the feet, though. They are plastic, and you can't see the notches all that well (on the black case anyway). I can see them breaking easily or anyone not paying attention.
11/17/2024See more detail
It's a modern power supply
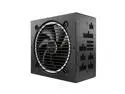
be quiet! Pure Power 12 M 1200W ATX 3.0 Power Supply | 80+ Gold Efficiency | PCIe 5.0 | Fully Modular | Quiet Performance | Overclocking | 10 Year Warranty | BN513
Pros: Quiet. Connector layout on the PSU. 10 year warranty.
Cons: Short cables, especially for an oversized mid or full tower. Questionable 12 pin connector on the PSU when only 8 pins are populated.
Overall Review: Haven't had any issues with power delivery from what I can tell. PCIe 3.0 compatible if I ever get a card that switches to the 12 pin. A few gripes, though. The included cables are short for an oversized mid or full tower. I got the Be Quiet shadow base 800 and the 24 pin won't get close to the motherboard connector. The PCIe cables will probably reach the card no problem going from the PSU shroud but I run my cables from the top of the card so it would not reach that either. Thankfully I have cable extensions already so not an issue for me. I'm putting it out there for other people running a bigger case. Now, my other concern is the PCIe connectors on the PSU. Not so much an issue, but a question for the choice. Normally, you have an 8 pin to 2, 6+2 pins. Be Quiet power supplies use a 12 pin on the PSU to 2 6+2 pins. Looking at the connector to the 12 pin is where my question is. Why do they use a 12 pin connector when only 8 pins are populated? At that point, why not use an 8 pin connector? I get not all pins may not be populated, but it's redundant to me to have a 12 pin connector when the same amount of pins are populated as a regular 8 pin. I'm sure there's a reason why they chose this route, but from a normal person's perspective, it doesn't make sense. Other than to give a false sense of security to those not paying attention. Other than those two things, the PSU is great so far. Can't even hear the fan when under load. Love the layout of the connectors on the PSU. I was hoping to keep my last power supply for longer than I did, but with the new 12VHPWR connectors and AMD almost putting them on the 7000 series. I thought I should start looking. This came up for $50 cheaper than its retail price and I had to get it. Hopefully, this will last me the 10 year warranty.
11/23/2023See more detail