



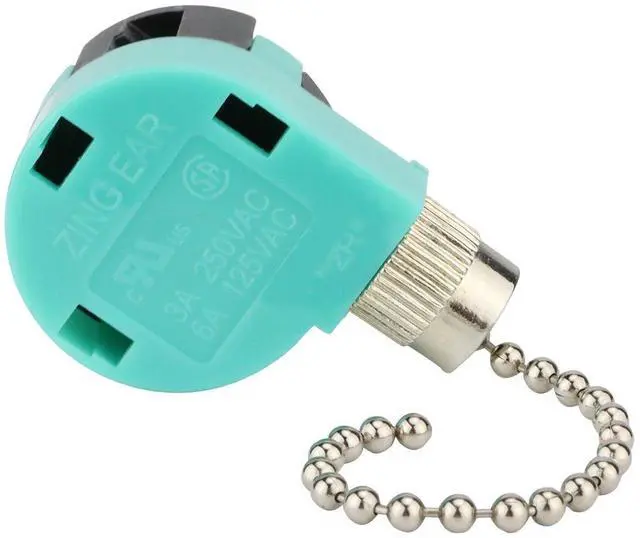
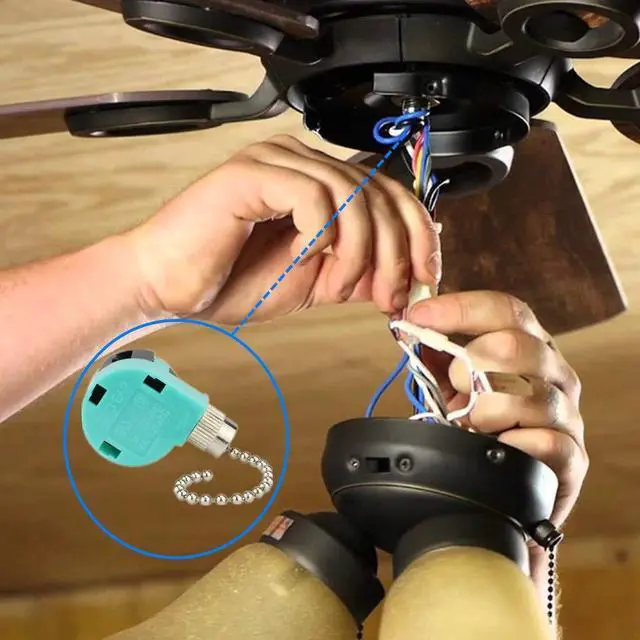
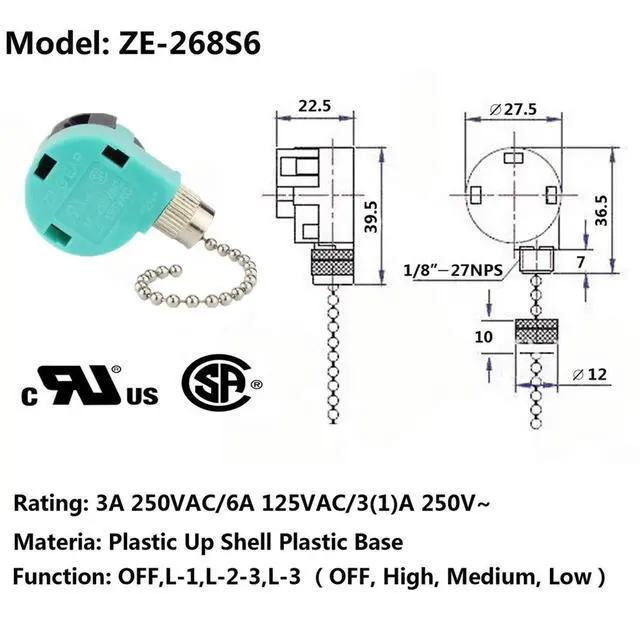
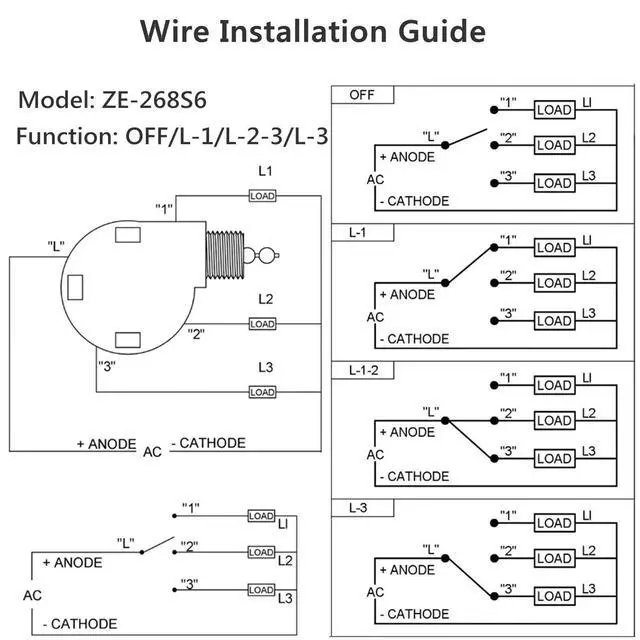
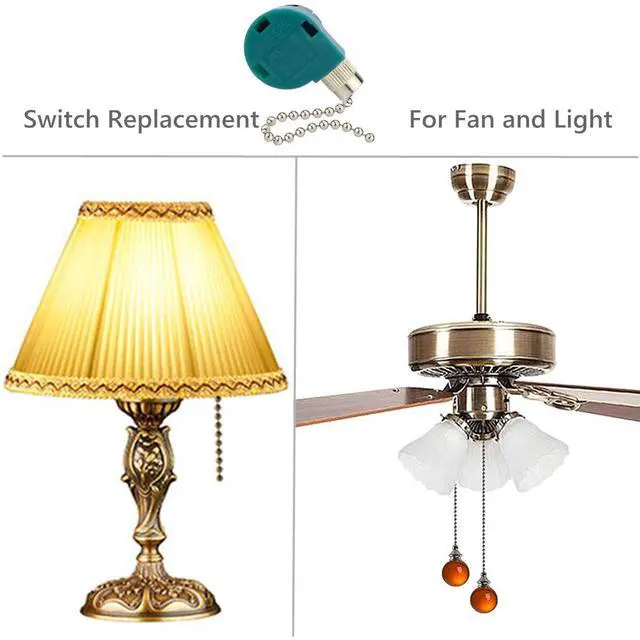
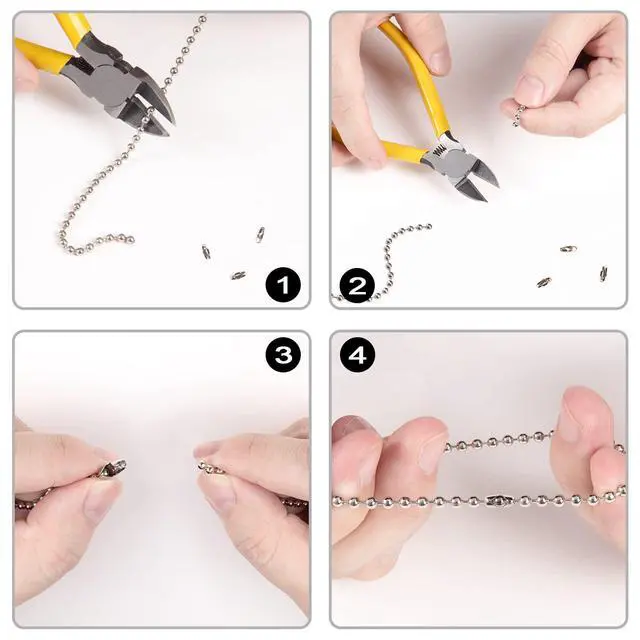



This 3-speed 4 wire fan switch fits many ceiling fans including Hunter, Harbor Breeze, Hampton Bay, Casablanca, Westinghouse, Emerson, and Kichler.
Attention: Before rewiring any ceiling fan. Turn off electrical current at source by turning off circuit breakers.
Steps:
- 1. Write down the color of each wire and the portal number to which they are attached on the switch
- 2. Remove wires from the existing fan switch If wires are hard to remove, insert a paper clip or a large sewing needle into each hole (numbered 1, 2, 3, L)and pull the wire out (repeat this step for each wire)
- 3. Make sure that the Wire lead length is the same length as the line beside the word "STRIP"
- 4. Insert wires into the new switch as in the previous switch(see step 1) Wires should be inserted into the slots on side of the switch not the holes on the surface
Color Codes For Ceiling Fans( Your Fan Wires Color &Position May Vary)
- Harbor Breeze ceiling fan: L=Black, 2=Brown, 1=Gray, 3=Purple OR L=Black, 2=Gray, 1=Brown, 3=Purple
- Harbor Breeze ceiling fan-alternate colors: L=Black, 2=Pink, 1=Yellow, 3=Gray
- Hampton Bay ceiling fan: L=Black, 2=Brown, 1=Purple, 3=Gray OR L=Black, 2=Brown, 1=Gray, 3=Purple
- Hampton Bay ceiling fan -Alternate colors: L=Black, 2=Purple, 1=Red, 3=Yellow
- Hunter ceiling fan: L=Black, 2=Brown, 1=Gray, 3=Green
- Monte Carlo ceiling fan: L=Back, 2=Brown, 1=White, 3=Purple
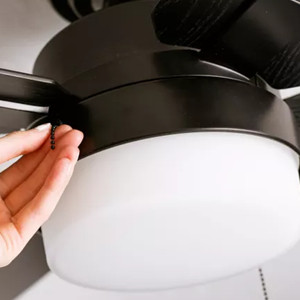
What situation you should replace your ceiling fan pull switch?
A. Your ceiling fan pull switch doesn't work
B. Internal ceiling fan chain break.
When no ceiling fan chain is visible, this likely means that the pull within the ceiling fan has broken near or inside the ceiling fan pull switch. In that case, proceed to replace.

Equipment & Tools
- 6-foot step ladder
- Voltage tester
- Wire stripper
- Manual screwdriver
- Pliers (if needed)
- Soft rag (if needed)
- Pull chain extender or pull chain switch kit
- Electrical wire nuts
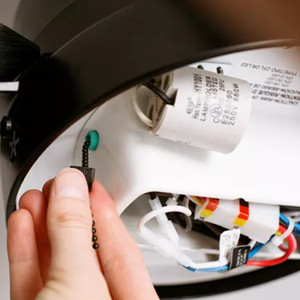
Remove the Metal Collar
Unscrew the metal collar through which the ceiling fan chain should extend. First try screwing off the collar with your fingers, turning counterclockwise. If this does not work, use pliers and a soft rag wrapped around the metal collar to protect the collar and the fan housing from damage.
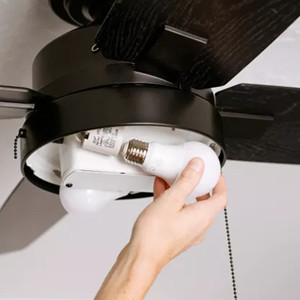
Open the Fan Base
Remove any light bulbs from the ceiling fan. With a manual screwdriver, turn out the screws holding the removable lower section from the ceiling fan motor base. Set the screws aside. Gently pull off the removable section. Leave it attached by its wires to the ceiling fan base.
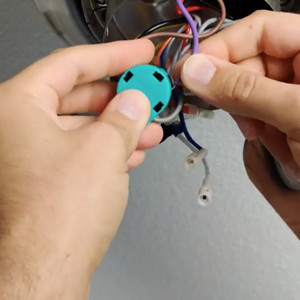
Pull out the Pull Chain Switch
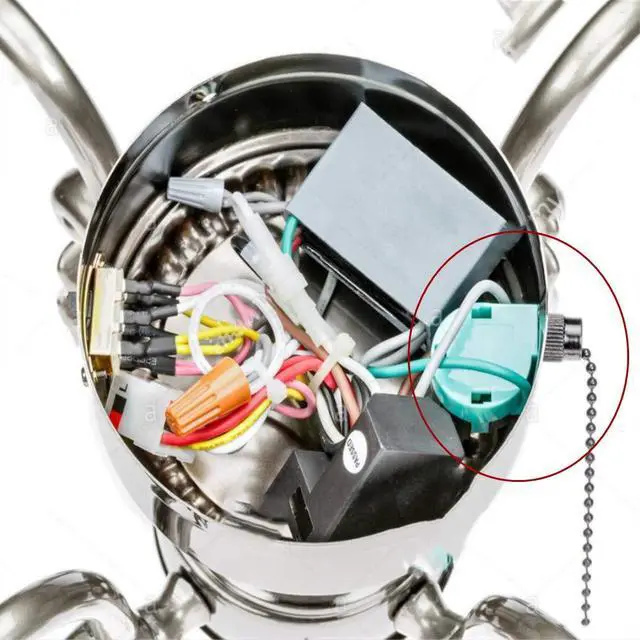
Locate the ceiling fan chain switch. It should be a small plastic unit, often with a transparent side or green one. You may even be able to see the broken pull within the switch unit. Carefully pull this down. It will be usually attached to the fan with three or four wires.
WARNING: Do not attempt to fix the pull chain switch. Instead, it is easier and safer to discard the old switch and replace it with a new switch. Ceiling fan pull switch kits are inexpensive and readily available online.
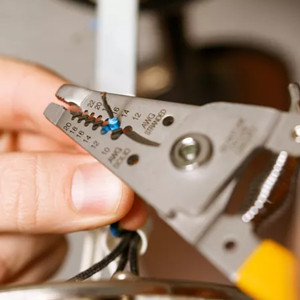
Cut the Wires to the Fan Chain Switch
With the wire stripper, use the cutting section to snip off the three or four wires that attach the ceiling fan chain switch to the ceiling fan base. Leave at least 2 inches of wire attached to the ceiling fan base to make it easier to reattach the new pull chain switch.
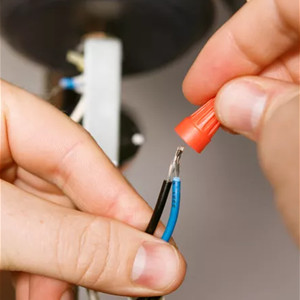
Attach the New Pull Switch to the Ceiling Fan
After stripping the plastic from the wires to expose the copper wire, attach the three or four wires of the new ceiling fan chain pull switch to the fan's wires. Twist together the wires. Top off each connection with a plastic wire nut.
Tips: Be very careful to match the wiring of the old switch with the wiring of the new switch.
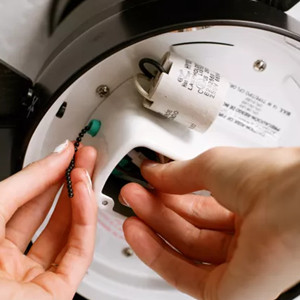
Thread the Pull Chain Through the Hole
Gently press the pull chain switch back into the ceiling fan base. Thread the pull chain through the hole in the housing.
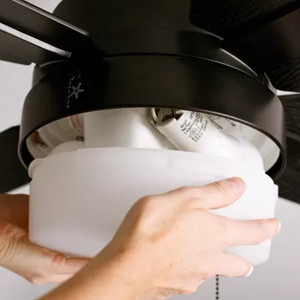
Reassemble and Test the Ceiling Fan
Tighten the metal collar by hand. Reattach the lower section of the ceiling fan. Add any light bulbs. Turn the power back on at the circuit breaker and any wall switches. Test the fan by carefully pulling on the ceiling fan pull.
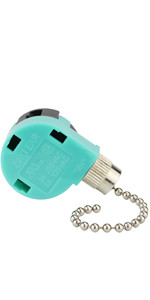 Ceiling Fan Switch ZE-268S6 | 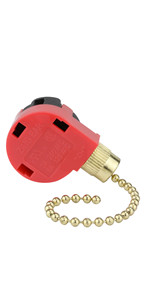 Ceiling Fan Switch ZE-268S1 | 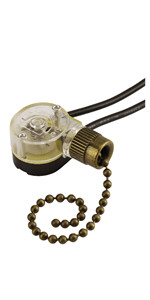 Ceiling Fan Switch ZE-109 | 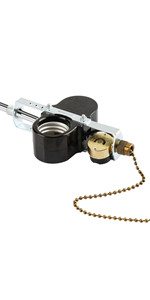 Ceiling Fan Switch ZE-310D+ZE-109M | 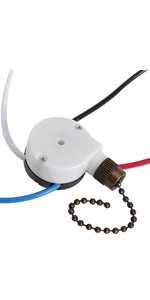 Ceiling Fan Switch ZE-208S | 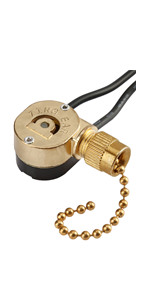 Ceiling Fan Switch ZE-109M | |
|---|---|---|---|---|---|---|
| Customer Reviews | — | — | — | — | — | — |
| Price | — | — | — | — | — | — |
| Function | OFF, L-1, L-2-3, L-3 | OFF, L-1, L-2, L-3 | ON-OFF | ON-OFF | OFF, L-1, L-2, L-3 | ON-OFF |
| Rating | 3A 250VAC/6A 125VAC | 3A 250VAC/6A 125VAC | 3A 250VAC/3A 125VT, 6A 125VAC/6A 125VL | 75W 125V | 3A 250VAC/6A 125VAC | 3A 250VAC/6A 125VAC, 6A 125VL/3A 125VT |
| Material | Plastic Up Shell Plastic Base | Plastic Up Shell Plastic Base | Plastic Up Shell Phenolic Base | Phenolic Base | Plastic Up Shell Phenolic Base | Metal Up Shell Phenolic Base |
| Works with | Ceiling Fan Light | Ceiling Fan Light | Ceiling Fan Light | Ceiling Fan Light | Ceiling Fan Light | Ceiling Fan Light |
| Wire Included | NO | NO | YES | YES | YES | YES |
| Original From | Zing Ear | Zing Ear | Zing Ear | Zing Ear | Zing Ear | Zing Ear |
| Finish | Nickel, Brass, Bronze | Nickel, Brass, Bronze | Nickel, Brass, Bronze, Black Nickel | Nickel, Brass, Bronze, Black Nickel | Nickel, Brass, Bronze, Black Nickel | Nickel, Brass, Bronze, Black Nickel |
This 3-speed 4 wire fan switch fits many ceiling fans including Hunter, Harbor Breeze, Hampton Bay, Casablanca, Westinghouse, Emerson, and Kichler.
Attention: Before rewiring any ceiling fan. Turn off electrical current at source by turning off circuit breakers.
Steps:
- 1. Write down the color of each wire and the portal number to which they are attached on the switch
- 2. Remove wires from the existing fan switch If wires are hard to remove, insert a paper clip or a large sewing needle into each hole (numbered 1, 2, 3, L)and pull the wire out (repeat this step for each wire)
- 3. Make sure that the Wire lead length is the same length as the line beside the word "STRIP"
- 4. Insert wires into the new switch as in the previous switch(see step 1) Wires should be inserted into the slots on side of the switch not the holes on the surface
Color Codes For Ceiling Fans( Your Fan Wires Color &Position May Vary)
- Harbor Breeze ceiling fan: L=Black, 2=Brown, 1=Gray, 3=Purple OR L=Black, 2=Gray, 1=Brown, 3=Purple
- Harbor Breeze ceiling fan-alternate colors: L=Black, 2=Pink, 1=Yellow, 3=Gray
- Hampton Bay ceiling fan: L=Black, 2=Brown, 1=Purple, 3=Gray OR L=Black, 2=Brown, 1=Gray, 3=Purple
- Hampton Bay ceiling fan -Alternate colors: L=Black, 2=Purple, 1=Red, 3=Yellow
- Hunter ceiling fan: L=Black, 2=Brown, 1=Gray, 3=Green
- Monte Carlo ceiling fan: L=Back, 2=Brown, 1=White, 3=Purple
What situation you should replace your ceiling fan pull switch?
A. Your ceiling fan pull switch doesn't work
B. Internal ceiling fan chain break.
When no ceiling fan chain is visible, this likely means that the pull within the ceiling fan has broken near or inside the ceiling fan pull switch. In that case, proceed to replace.
Equipment & Tools
- 6-foot step ladder
- Voltage tester
- Wire stripper
- Manual screwdriver
- Pliers (if needed)
- Soft rag (if needed)
- Pull chain extender or pull chain switch kit
- Electrical wire nuts
Remove the Metal Collar
Unscrew the metal collar through which the ceiling fan chain should extend. First try screwing off the collar with your fingers, turning counterclockwise. If this does not work, use pliers and a soft rag wrapped around the metal collar to protect the collar and the fan housing from damage.
Open the Fan Base
Remove any light bulbs from the ceiling fan. With a manual screwdriver, turn out the screws holding the removable lower section from the ceiling fan motor base. Set the screws aside. Gently pull off the removable section. Leave it attached by its wires to the ceiling fan base.
Pull out the Pull Chain Switch
Locate the ceiling fan chain switch. It should be a small plastic unit, often with a transparent side or green one. You may even be able to see the broken pull within the switch unit. Carefully pull this down. It will be usually attached to the fan with three or four wires.
WARNING: Do not attempt to fix the pull chain switch. Instead, it is easier and safer to discard the old switch and replace it with a new switch. Ceiling fan pull switch kits are inexpensive and readily available online.
Cut the Wires to the Fan Chain Switch
With the wire stripper, use the cutting section to snip off the three or four wires that attach the ceiling fan chain switch to the ceiling fan base. Leave at least 2 inches of wire attached to the ceiling fan base to make it easier to reattach the new pull chain switch.
Attach the New Pull Switch to the Ceiling Fan
After stripping the plastic from the wires to expose the copper wire, attach the three or four wires of the new ceiling fan chain pull switch to the fan's wires. Twist together the wires. Top off each connection with a plastic wire nut.
Tips: Be very careful to match the wiring of the old switch with the wiring of the new switch.
Thread the Pull Chain Through the Hole
Gently press the pull chain switch back into the ceiling fan base. Thread the pull chain through the hole in the housing.
Reassemble and Test the Ceiling Fan
Tighten the metal collar by hand. Reattach the lower section of the ceiling fan. Add any light bulbs. Turn the power back on at the circuit breaker and any wall switches. Test the fan by carefully pulling on the ceiling fan pull.
Ceiling Fan Switch ZE-268S6 | Ceiling Fan Switch ZE-268S1 | Ceiling Fan Switch ZE-109 | Ceiling Fan Switch ZE-310D+ZE-109M | Ceiling Fan Switch ZE-208S | Ceiling Fan Switch ZE-109M | |
|---|---|---|---|---|---|---|
| Customer Reviews | — | — | — | — | — | — |
| Price | — | — | — | — | — | — |
| Function | OFF, L-1, L-2-3, L-3 | OFF, L-1, L-2, L-3 | ON-OFF | ON-OFF | OFF, L-1, L-2, L-3 | ON-OFF |
| Rating | 3A 250VAC/6A 125VAC | 3A 250VAC/6A 125VAC | 3A 250VAC/3A 125VT, 6A 125VAC/6A 125VL | 75W 125V | 3A 250VAC/6A 125VAC | 3A 250VAC/6A 125VAC, 6A 125VL/3A 125VT |
| Material | Plastic Up Shell Plastic Base | Plastic Up Shell Plastic Base | Plastic Up Shell Phenolic Base | Phenolic Base | Plastic Up Shell Phenolic Base | Metal Up Shell Phenolic Base |
| Works with | Ceiling Fan Light | Ceiling Fan Light | Ceiling Fan Light | Ceiling Fan Light | Ceiling Fan Light | Ceiling Fan Light |
| Wire Included | NO | NO | YES | YES | YES | YES |
| Original From | Zing Ear | Zing Ear | Zing Ear | Zing Ear | Zing Ear | Zing Ear |
| Finish | Nickel, Brass, Bronze | Nickel, Brass, Bronze | Nickel, Brass, Bronze, Black Nickel | Nickel, Brass, Bronze, Black Nickel | Nickel, Brass, Bronze, Black Nickel | Nickel, Brass, Bronze, Black Nickel |