


HKCMEMGORY External Optical Drive Universal Troubleshooting Guide
Step 1: Basic Connection & Power Supply (Most Critical) Ensure direct connection: Connect the drive directly to a computer USB port. Avoid using USB hubs, docking stations, or excessively long cables to prevent power issues or signal instability. Desktop users: Prioritize using rear USB ports (front ports may have insufficient power). Verify adequate power: This is a high-power consumption device requiring a stable 5V/1.5A power supply. Symptoms: The drive is recognized but cannot read discs/burning fails/frequent disconnections. Solutions: Keep laptops sufficiently charged; avoid power-saving mode. If power is insufficient, connect an external 5V power source (e.g., phone charger/power bank). Special note (Mac users): Connect to the computer before connecting external power.
Step 2: Computer Recognition Issues When the computer completely fails to recognize the drive: General checks: Try different USB ports. Restart the computer and reconnect. Windows system: Reinstall driver: Right-click Start menu ? Select "Device Manager" ? Click "View" ? Check "Show hidden devices" ? Expand "DVD/CD-ROM drives" ? Right-click the device ? "Uninstall device" ? The system will automatically reinstall the driver after restart. Mac system: Finder settings: The drive icon typically appears only after successful disc reading. Verify "CDs, DVDs, and iOS Devices" is checked in Finder ? Settings ? Sidebar. Disc ejection: Use system commands first; if unsuccessful, use a paperclip for emergency ejection.
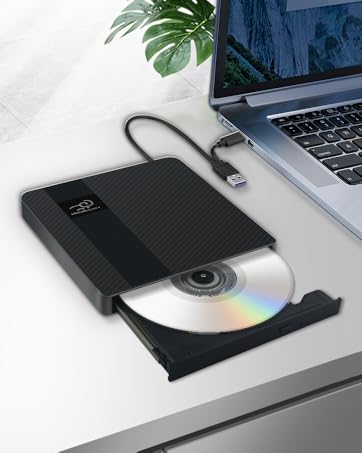
Step 3: Disc Reading & Playback Issues When the drive is recognized but cannot play: Correct playback software: Video DVDs: Use VLC Media Player (Windows Media Player is usually incompatible). Audio CDs: Use Windows Media Player or VLC. System requirements: Windows 10/11 needs an internet connection to download decoders for DVD playback. Check DVD region code: Video DVDs have region restrictions (e.g., USA = Region 1). Setting method (Windows): This PC ? Right-click DVD drive ? Properties ? Hardware ? Select drive ? Properties ? DVD Region tab. Important: Region code can only be changed 4-5 times before being permanently locked. Check the disc itself: Test other discs to isolate issues. Check for scratches/warping/dirt. Ensure blank discs have adequate capacity and correct type.
Step 4: Disc Burning Issues When burning fails/errors occur: Reduce speed: Use CD=10X/DVD=8X for better success rates. Use quality blank discs from reputable brands. Close other programs to free system resources. Convert files to compatible formats (e.g., MPEG-2 for video DVDs).
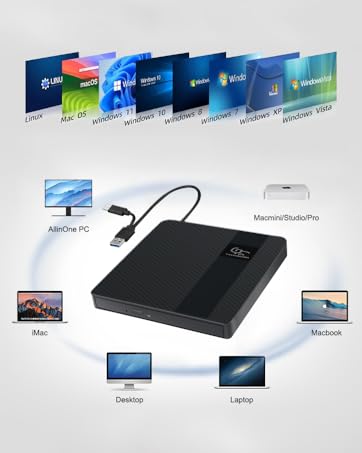
Step 5: Device Compatibility For computer use only: Not compatible with TVs/projectors/car stereos/tablets/phones. Chrome OS: Incompatible with Chromebooks. Projector connection: First connect the drive to the computer, then connect the computer to the projector via a video output interface (e.g., HDMI).


HKCMEMGORY External Optical Drive Universal Troubleshooting Guide
Step 1: Basic Connection & Power Supply (Most Critical) Ensure direct connection: Connect the drive directly to a computer USB port. Avoid using USB hubs, docking stations, or excessively long cables to prevent power issues or signal instability. Desktop users: Prioritize using rear USB ports (front ports may have insufficient power). Verify adequate power: This is a high-power consumption device requiring a stable 5V/1.5A power supply. Symptoms: The drive is recognized but cannot read discs/burning fails/frequent disconnections. Solutions: Keep laptops sufficiently charged; avoid power-saving mode. If power is insufficient, connect an external 5V power source (e.g., phone charger/power bank). Special note (Mac users): Connect to the computer before connecting external power.
Step 2: Computer Recognition Issues When the computer completely fails to recognize the drive: General checks: Try different USB ports. Restart the computer and reconnect. Windows system: Reinstall driver: Right-click Start menu ? Select "Device Manager" ? Click "View" ? Check "Show hidden devices" ? Expand "DVD/CD-ROM drives" ? Right-click the device ? "Uninstall device" ? The system will automatically reinstall the driver after restart. Mac system: Finder settings: The drive icon typically appears only after successful disc reading. Verify "CDs, DVDs, and iOS Devices" is checked in Finder ? Settings ? Sidebar. Disc ejection: Use system commands first; if unsuccessful, use a paperclip for emergency ejection.
Step 3: Disc Reading & Playback Issues When the drive is recognized but cannot play: Correct playback software: Video DVDs: Use VLC Media Player (Windows Media Player is usually incompatible). Audio CDs: Use Windows Media Player or VLC. System requirements: Windows 10/11 needs an internet connection to download decoders for DVD playback. Check DVD region code: Video DVDs have region restrictions (e.g., USA = Region 1). Setting method (Windows): This PC ? Right-click DVD drive ? Properties ? Hardware ? Select drive ? Properties ? DVD Region tab. Important: Region code can only be changed 4-5 times before being permanently locked. Check the disc itself: Test other discs to isolate issues. Check for scratches/warping/dirt. Ensure blank discs have adequate capacity and correct type.
Step 4: Disc Burning Issues When burning fails/errors occur: Reduce speed: Use CD=10X/DVD=8X for better success rates. Use quality blank discs from reputable brands. Close other programs to free system resources. Convert files to compatible formats (e.g., MPEG-2 for video DVDs).
Step 5: Device Compatibility For computer use only: Not compatible with TVs/projectors/car stereos/tablets/phones. Chrome OS: Incompatible with Chromebooks. Projector connection: First connect the drive to the computer, then connect the computer to the projector via a video output interface (e.g., HDMI).


HKCMEMORY external optical drives : More than just connectivity.
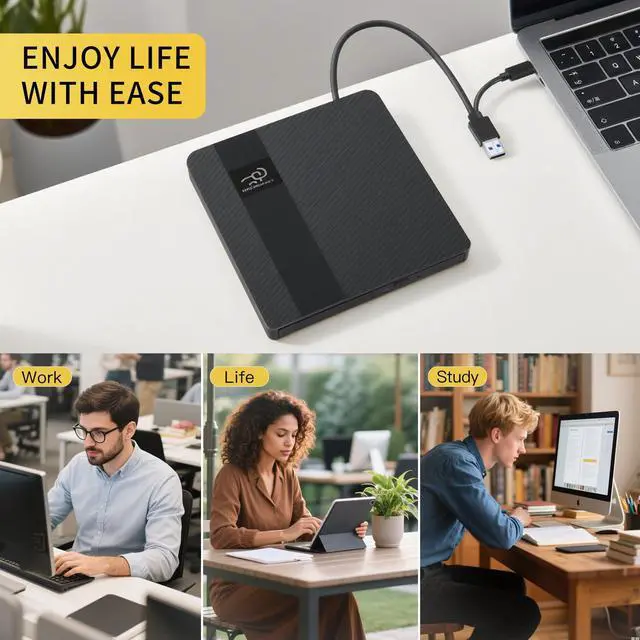
User-centric, crafted with aesthetic innovation. Excellence in performance, your reliable companion.
Empowering your life, everywhere.