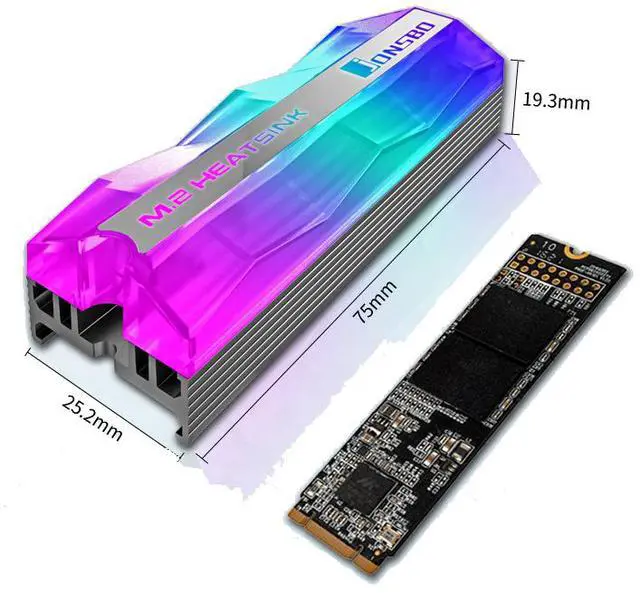
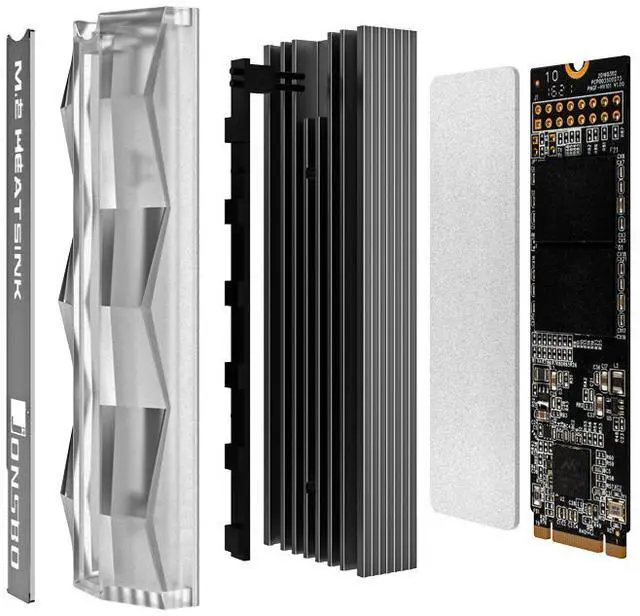
Can effectively solve the problem of M.2 hard disk speed reduction due to high temperature. Aluminum for maximum performance, with 10°C - 20°C cooling effect, Perfectly fit for M.2 SSD.
Matching the thermal pad is soft enough and has Good heat dissipation, and is compatible with the uneven surface of the M.2 SSD. Low viscosity, does not damage the M.2 SSD warranty label
Alloy aluminum oxidation greatly improves the corrosion resistance, hardness, wear resistance, insulation, heat resistance of the cooler, prolongs the M.2 SSD service life.
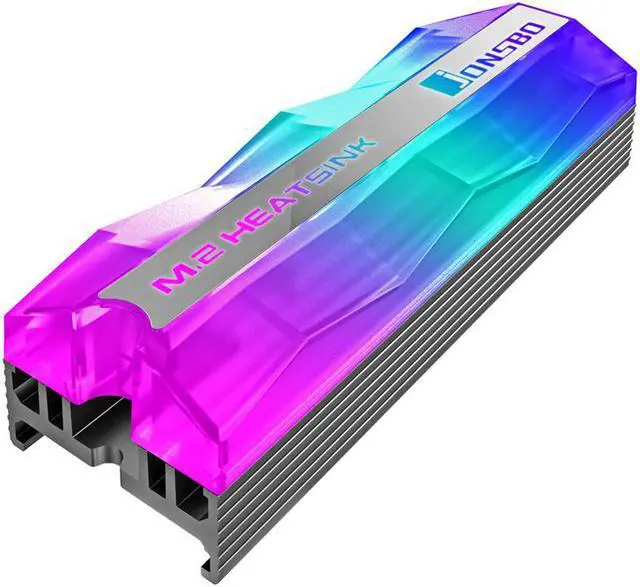
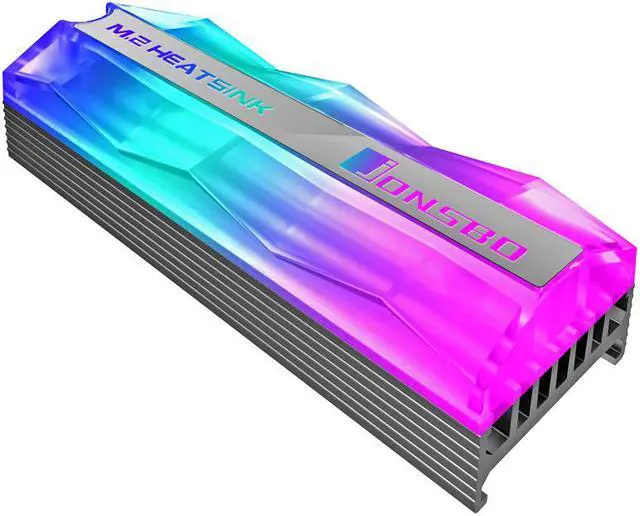
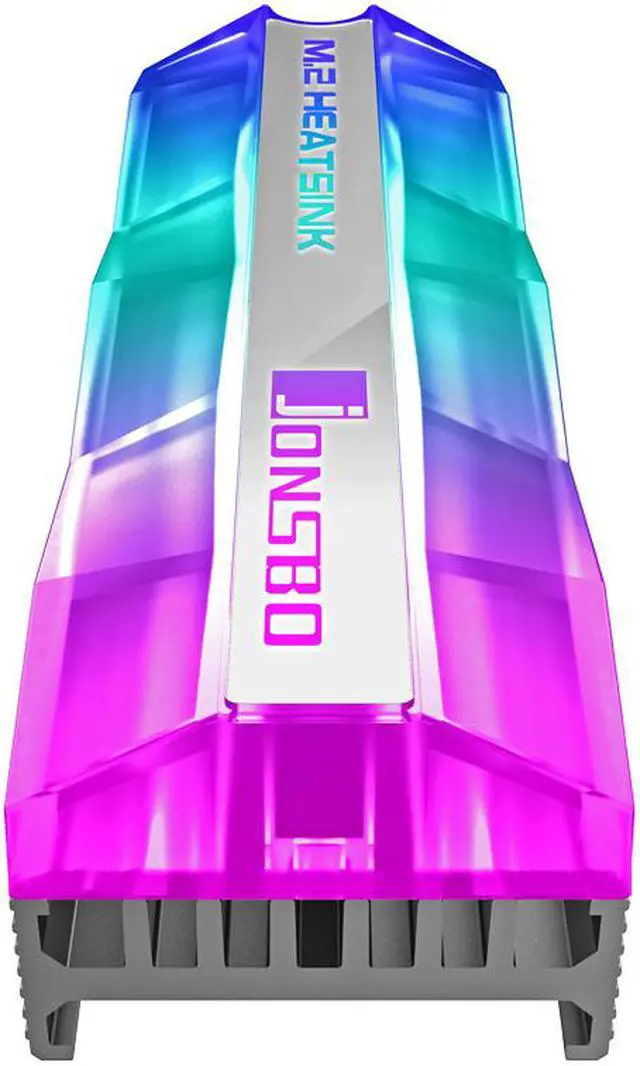
Colored glaze jelly·Performance and appearanceGlass lamp effect composed of 6 lamp beads
Play games and win with speedSlow down or eliminate M.2 high temperature deceleration
Efficient heat dissipation and stable performanceWith the popularity of M.2 hard disks, the read and write performance of the host has been greatly improved, but the high fever that followed has been troubled by the players along with the slowdown. Wadermoon "Glass Jelly" M.2-2 radiator, effectively eliminates or slows down the phenomenon of M.2 high temperature deceleration, and is embellished with color streamer lighting.
Wadermoon Glazed Jelly M.2 radiator is fully compatible with single-sided PCB SSDs, and limited support for some double-sided PCBs M.2 SSDs. When using a double-sided SSD, please pay attention to the position of the buckle (the left and right width of the buckle is 2MM). If there is interference with the original position on the back of your SSD, do not use it, otherwise it will cause and not be limited to damage to the SSD.
It is recommended to use a single-sided chip pellet hard disk. If you use a double-sided chip M.2, please pay attention to whether the buckle position conflicts with the components on the back of the M.2 hard disk.
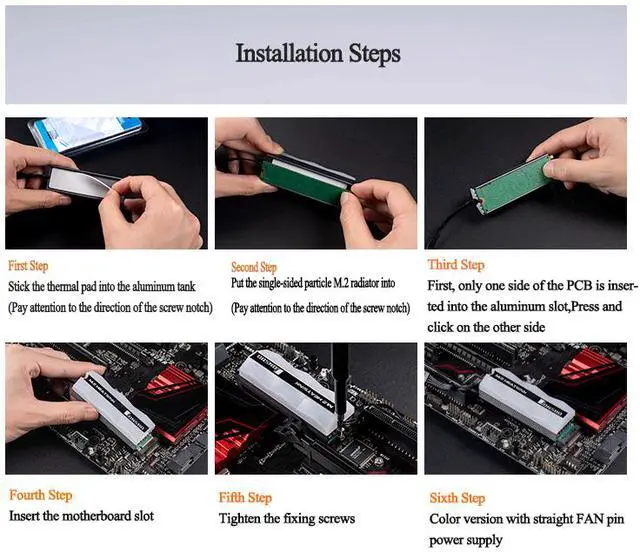
Installation step:First stepStick the thermal pad into the aluminum tank
(Pay attention to the direction of the screw notch)
Second stepPut the single-sided particle M.2 radiator into
(Pay attention to the direction of the screw notch)
Third stepFirst, only one side of the PCB is inserted into the aluminum slot, Press and click on the other side
Fourth stepInsert the motherboard slot
Fifth stepTighten the fixing screws
Sixth stepColor version with straight FAN pin power supply
*The color version can only change color automatically and cyclically, and does not support manual control or use with an external motherboard or controller.