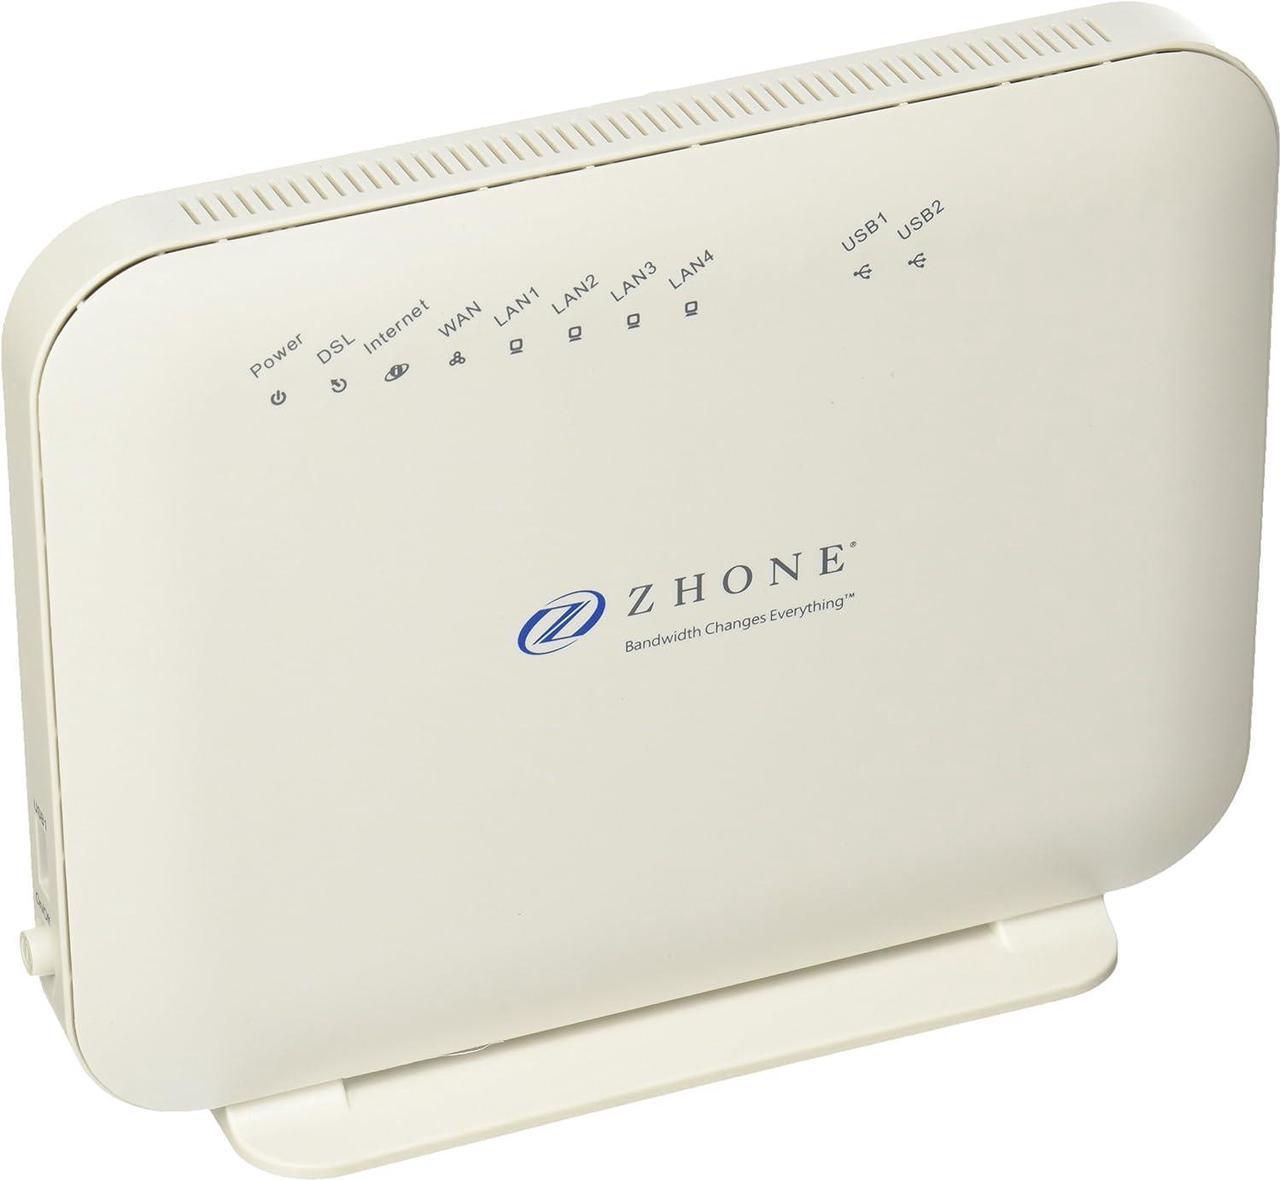
The Zhone 6712-W1 is a versatile Broadband gateway for service provider that is seeking a single hardware that can support ultra-high bandwidth application. VDSL2 technology providing up to 100 Mbps downstream and 50 Mbps upstream (profile 17a) can be used to provide video/data services or triple-play services. ISP can use the same gateway for FTTx deployment by using the Gigabit Ethernet WAN to a GPON device. Inside the home, the 6712-W1 plays a central role in interconnecting all networking devices such as PCs, and game consoles to the Internet. The built-in DLNA server makes sharing digital multimedia files and USB printer via the USB ports. This modem from ZHONE is capable of (if your ISP provider has the service) 100Mbps upload and download - the fastest available at this point for VDSL. Your ISP and the package you purchase will determine the actual bandwidth speed.
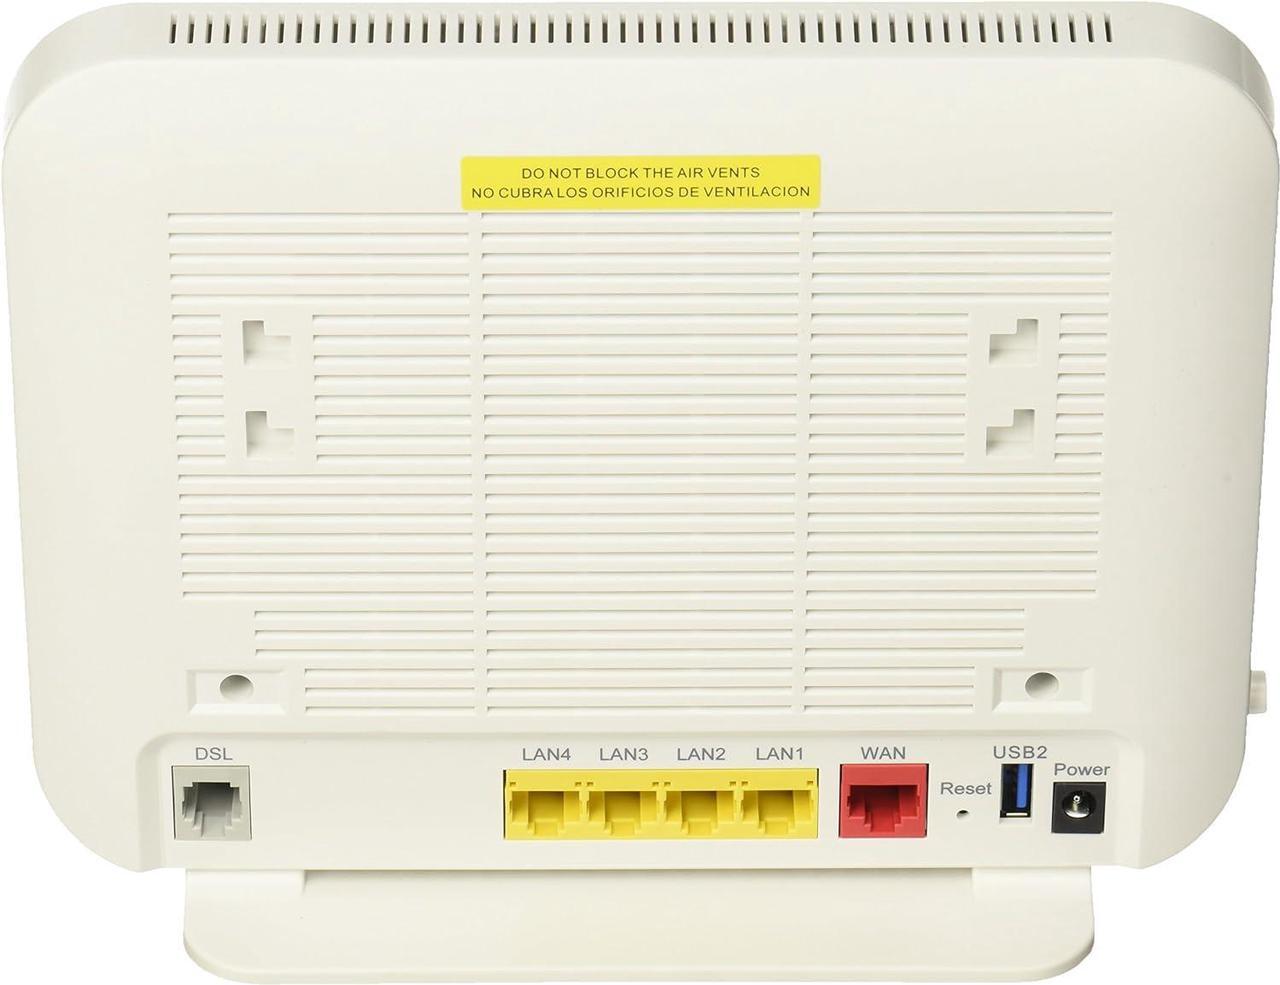
1) Plug in the phone cable from your ISP to the ZHONE and the Ethernet cable from the modem to your computer into appropriate jacks. Plug in the power and let the ZHONE power up (power button on the left needs to be pushed in). Do a full reset (just to clear any settings and to make sure factory defaults are set) by pushing the reset button on back.
2) First see if you can get into the ZHONE login menu using the IP address of the modem: 192.168.1.1. If not, then you need to temporarily change the network adapter settings in your computer (which are usually set to `Obtain an IP address automatically'). Note, this is for Win7 but will be similar to other OS versions. Do this by: a) Start Button b) Control Panel c) Network and Internet d) Network and Sharing Center e) Change adapter settings f) Right click on `Local Area Connection' and choose `Properties' g) Click on `Internet Protocol Version 4 (TCP/IPv4)' h) Click on `Properties' then on `Use the following IP address' i) Add an IP number: 192.168.1.X (you can use any number for `X' from 2 - 250, 1 is for the modem here) j) Click `OK' and `Close' to save changes. * Remember: this is temporary, change the settings back to `Obtain an IP address automatically' after the router is fully setup and you have a link to the internet. This is done by the same above: a) through h) and choose `Obtain an IP address automatically'.
3) Now open a browser and type in 192.168.1.1 to get into the setup menu of the ZHONE
4) Type in the username and password of your ZHONE Modem: Username: admin Password: admin###### (###### is the last 6 numbers of your modems serial number.
5) Click on `Quick Setup' on the left menu
6) Unclick `Automatic Configuration' if it's already clicked.
7) On `ATM PVC Configuration', add the following values: VPI = 0 VCI = 32
8) Leave other configurations modes at default: `Encapsulation Mode': LLC/SNAP-BRIDGING `WAN Service Configuration': PPPoE
9) In the boxes for `PPP Configuration' you need to get your PPP Username and PPP Password from your IPS provider (just give them a call and they'll give it to you).
10) Leave `Use Static IP Address' unchecked.
11) Click the `Apply/Save' box.
12) Your Power Light and DSL Light should be on. Now you'll need to go to the `Advance Setup' section.
13) Click on `Advanced Setup' on left menu.
14) Click on `WAN Service' on the sub menu that pops up.
15) The `Wide Area Network (WAN) Service Setup' will come up.
16) Click on `Add'.
17) The `WAN Service Interface Configuration' will pop up: Leave the default chosen in the box, which is: `atm0/(0_0_32)'.
18) Click `Next' and `WAN Service Configuration' pops up.
19) Leave/confirm defaults: `Select WAN service type:' is PPP over Ethernet (PPPoE) `Enter Service Description' is pppoe_0_0_32 `Network Protocol Selection': is IPV4 Only
20) Click `Next'.
21) Again, add your PPP Username and PPP Password you received from your IPS provider (it may already be in the