

 here!
I’m your shopping assistant for PC builds, upgrades, and everything tech.
Got questions? Ask away!
Start a conversation
here!
I’m your shopping assistant for PC builds, upgrades, and everything tech.
Got questions? Ask away!
Start a conversation



Any questions? Ask CelesteSM will help you find out quickly.
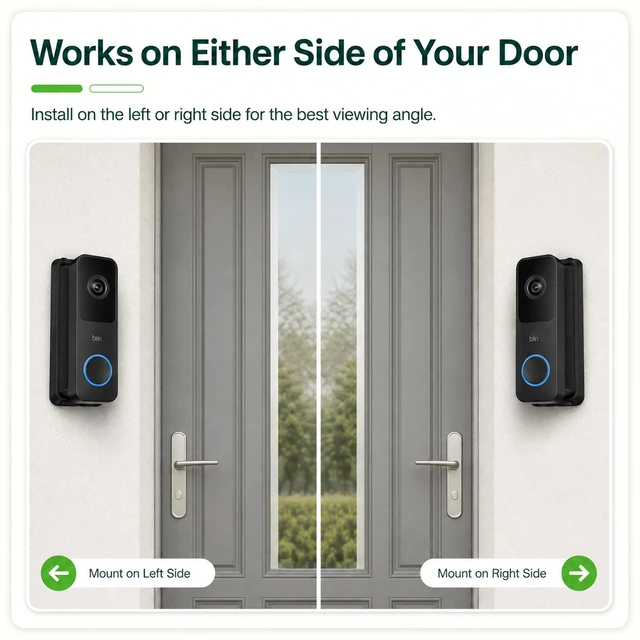
Point Your Doorbell Where Visitors Actually Come From
Most front doors are approached from one side. A doorbell mounted flat to the wall looks straight ahead, so it records the fence or the house opposite and only catches visitors once they are at the door. This wedge turns the camera towards the path, the steps and the spot where parcels are left.
Will It Fit My Doorbell?
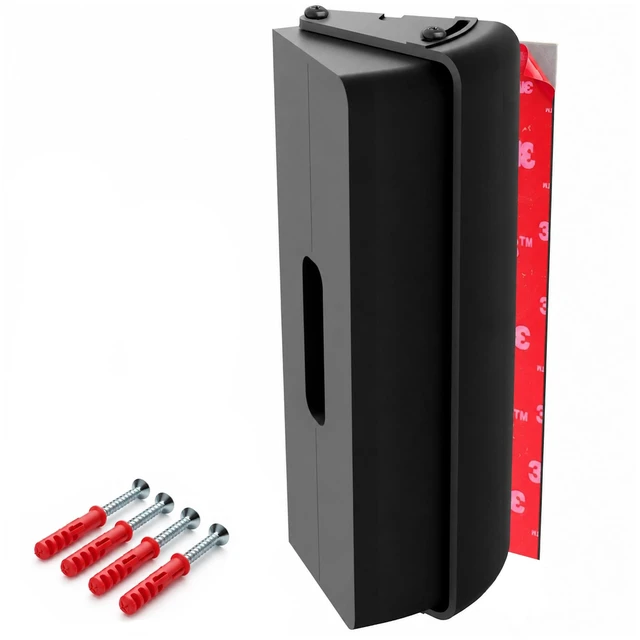
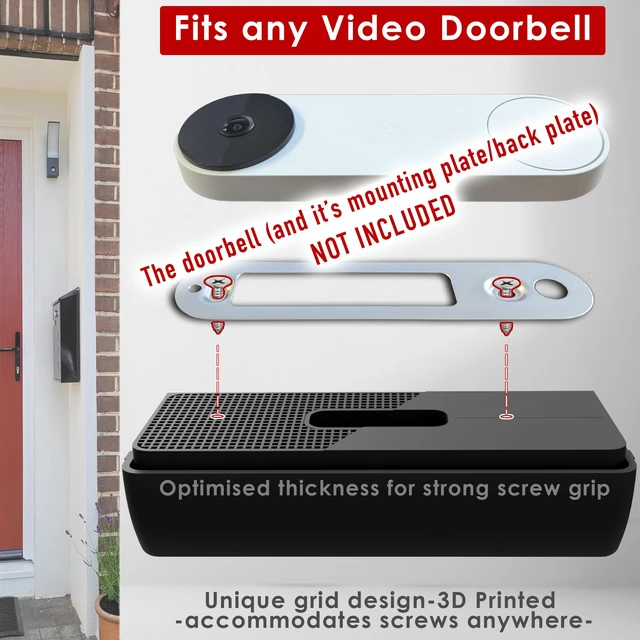
Made for tall, slim doorbells from Eufy, Aosu, Arlo, Blink, Nest, Netatmo, Reolink, Tapo and Wyze. Your doorbell's own back plate screws onto the wedge face. If its mounting holes land inside the 5.7 x 1.82 in fixing area, it fits. Overall the wedge is 6.2 in tall, 2.4 in wide and 1.5 in deep. For shorter, wider doorbells, choose the Regular size. Doorbell not included.
A Punch-Through Screw Grid
Under the thin front skin sits a full screw grid. Push a small screwdriver tip or a punch through the skin where your doorbell's holes sit, then drive the screws straight in. No drilling and no template.
Set the Angle by the Picture, Not by Guesswork
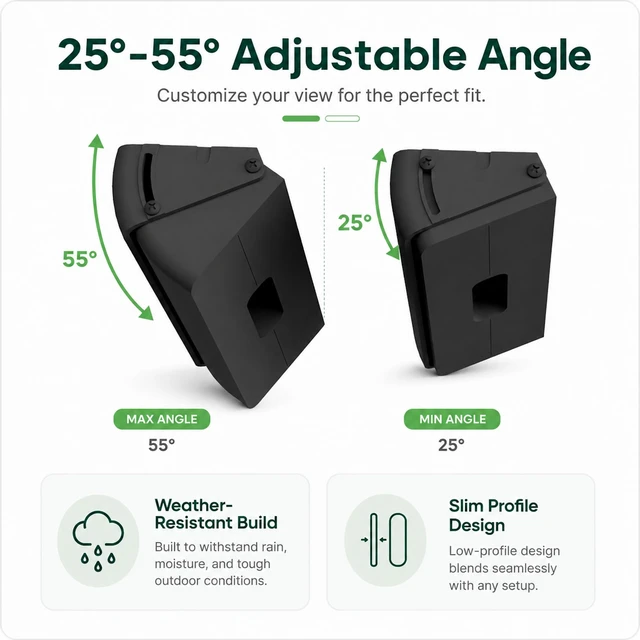
The wedge adjusts smoothly anywhere from 25 to 55 degrees, left or right: 30 degrees, 45 degrees for a corner, or anything between. Open your doorbell app, turn the wedge until the view is right, then tighten the 4 screws that hold the two halves together and the angle locks in place.
Clearer Night Video
A doorbell fitted close to a wall lights that wall up with its own infrared. The wall glares white and the rest of the picture comes out too dark. Angling the doorbell away from the wall fixes it.
One Kit, Either Surface
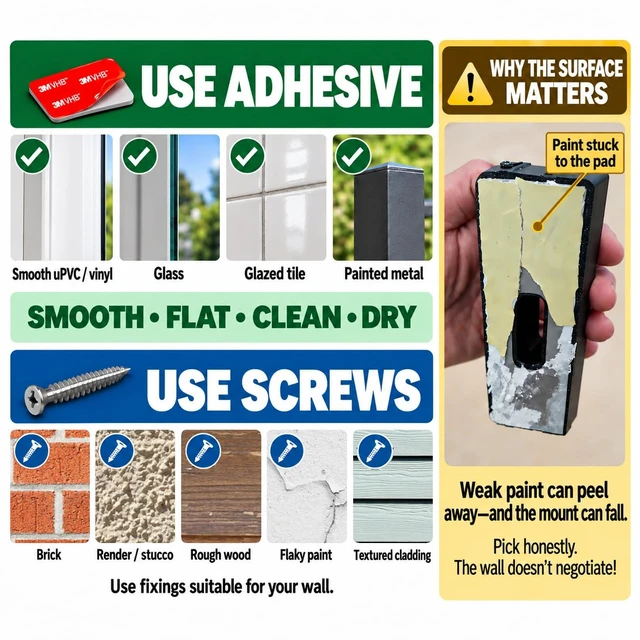
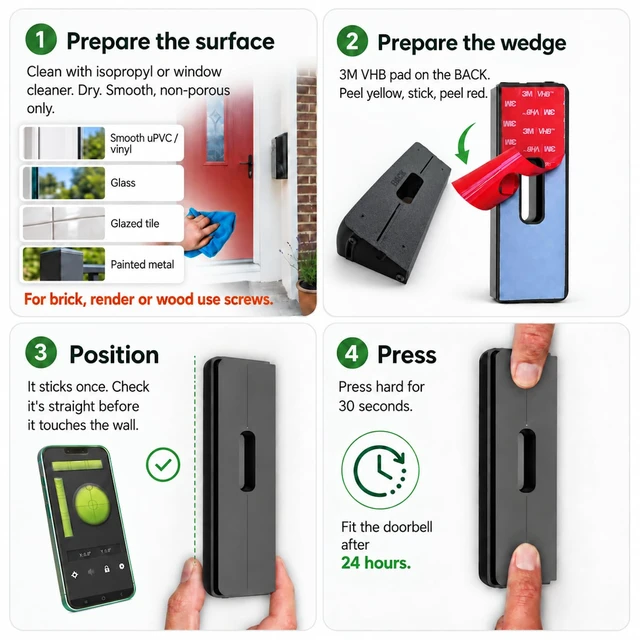
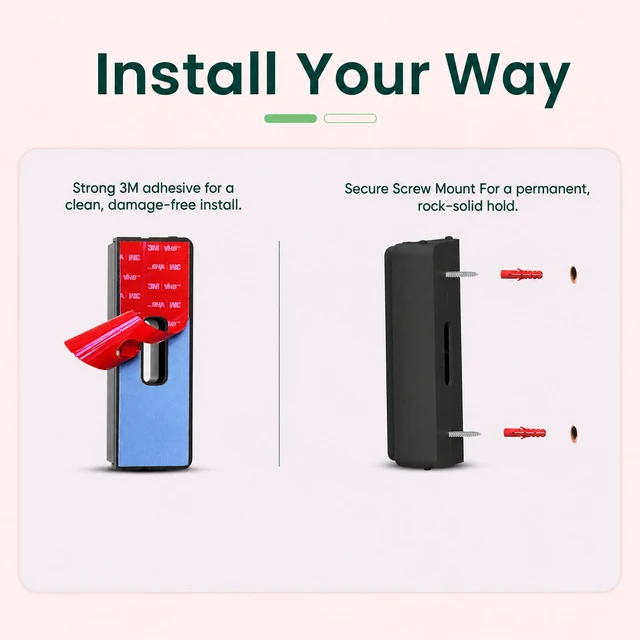
Adhesive pad, using 3M VHB tape: clean, smooth, non-porous vinyl, glass, painted metal or glazed tile, no drilling. Wall screws and wall plugs: brick, stucco, painted, textured or bare wood. Adhesive will not hold on porous surfaces and can lift paint when removed, so please use the screws there.
Solid and Made in the UK
3D printed in the UK from UV-stable PETG. It is plastic rather than metal on purpose: it will not rust or yellow, and it will not sit between your doorbell and its wireless signal the way a metal mount can. Once the 4 screws are tightened the whole wedge is very solid.
In the Box
1 adjustable wedge mount, 1 industrial grade adhesive pad, 4 stainless steel doorbell screws, 8 stainless steel washers in two sizes, 4 galvanized wall screws with wall plugs.