
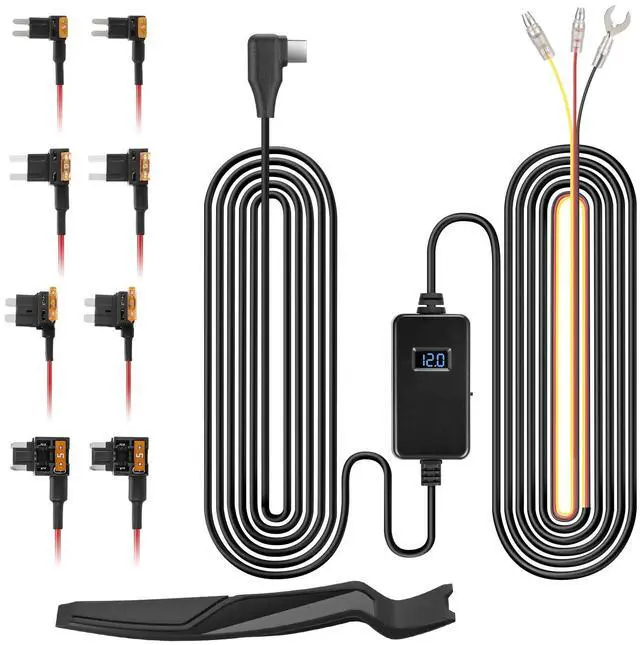


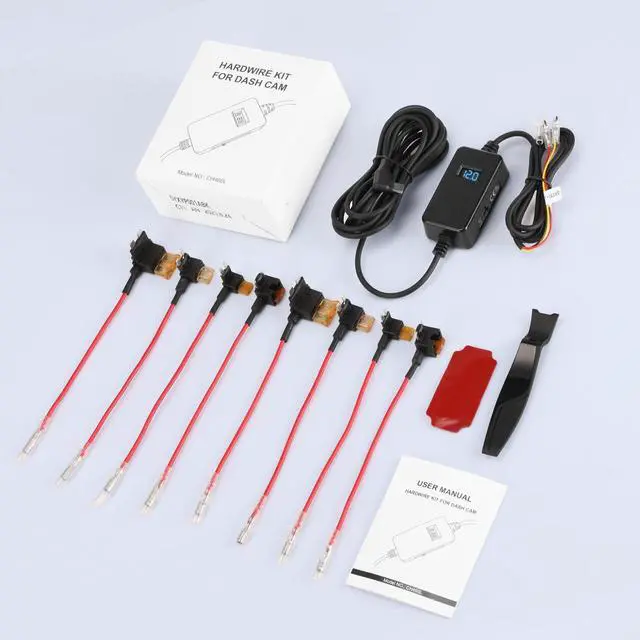


The OMBAR Hardwire Kit compatible with to all OMBAR series dash cam.(T1 & T2)
-Warm tips:
1. Please make sure the ACC and BAT is connected correctly.
2. Please feel free to reach us if any professional help in need.
3. Please use the dedicated hardwire kit for the OMBAR dash cam, Because the other brands of hardwire kits are not available for OMBAR dash cams.
4. The length of this hardwire kit is 11.5ft, various types of vehicles, especially regular passenger cars, sedans, SUVs, and trucks.
5. Therefore, when selecting a voltage hardwire kit, it is recommended to refer to the specifications and requirements of your vehicle and device to ensure compatibility and safety.
6. Note that installation steps may vary by model and situation. It is strongly recommended to refer to the vehicle manual or seek professional help before installation.

Voltage Protection
Automatically cuts power at 11.6V (12V vehicles) or 23.2V (24V vehicles) to prevent battery drain.

Universal Compatibility
Works with cars, trucks, SUVs, and heavy-duty vehicles

24/7 parking mode surveillance
Protect your vehicle and take any potential incidents that may happen.
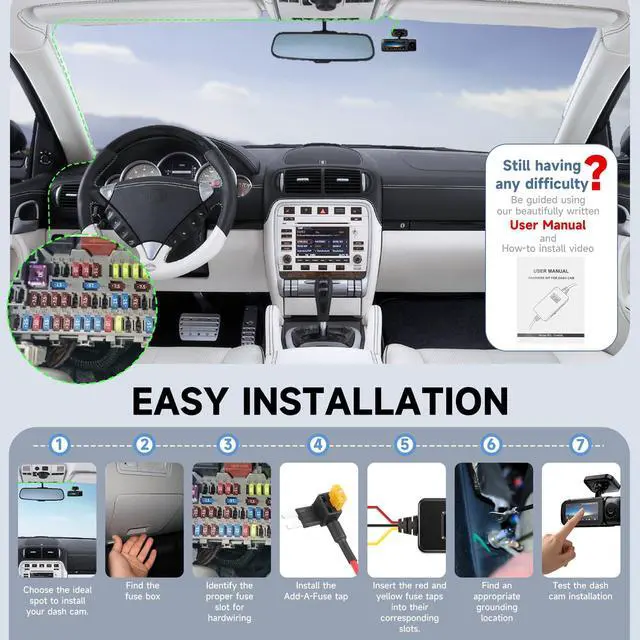
Installation

Step 1: Choose the ideal spot to install your dash cam.
The best place for the dash cam is where it’s easy to use — offering an unobstructed view, easy removal, and a discreet position.

Step 2: Find the fuse box
Refer to your Fuse Box Diagram to identify the location of the fuse box. Access it by lifting a tab or removing a panel manually, or utilize the provided trim tool if necessary

Step 3: Identify the proper fuse slot for hardwiring
Identify the ACC (Accessory) fuse slot in the fuse box, which supplies power when the ignition is activated. Additionally, locate the constant power fuse slot, which provides power regardless of the ignition status.
Installation

Step 4: Install the Add-A-Fuse tap
1. If you are using the previously identified fuse slot that has an existing fuse in it,
then insert that existing fuse into the lower empty slot of the Add-A-Fuse with correct orientation. 2. However, if your previously identified slot is empty and there is no existing fuse in it, then you can just install the Add-A-Fuse directly without needing to install 2nd fuse into the empty slot of an Add-A-Fuse tap.

Step 5: Insert the red and yellow fuse taps into their corresponding slots.
Attach the red wire from the hardwire kit to the ACC fuse slot, and connect the yellow wire to the constant power fuse slot.

Step 6 : Find an appropriate grounding location
Secure the black wire from the hardwire kit to the grounding point by utilizing a ring terminal or an appropriate grounding connector.
The OMBAR Hardwire Kit compatible with to all OMBAR series dash cam.(T1 & T2)
-Warm tips:
1. Please make sure the ACC and BAT is connected correctly.
2. Please feel free to reach us if any professional help in need.
3. Please use the dedicated hardwire kit for the OMBAR dash cam, Because the other brands of hardwire kits are not available for OMBAR dash cams.
4. The length of this hardwire kit is 11.5ft, various types of vehicles, especially regular passenger cars, sedans, SUVs, and trucks.
5. Therefore, when selecting a voltage hardwire kit, it is recommended to refer to the specifications and requirements of your vehicle and device to ensure compatibility and safety.
6. Note that installation steps may vary by model and situation. It is strongly recommended to refer to the vehicle manual or seek professional help before installation.
Voltage Protection
Automatically cuts power at 11.6V (12V vehicles) or 23.2V (24V vehicles) to prevent battery drain.
Universal Compatibility
Works with cars, trucks, SUVs, and heavy-duty vehicles
24/7 parking mode surveillance
Protect your vehicle and take any potential incidents that may happen.
Installation
Step 1: Choose the ideal spot to install your dash cam.
The best place for the dash cam is where it’s easy to use — offering an unobstructed view, easy removal, and a discreet position.
Step 2: Find the fuse box
Refer to your Fuse Box Diagram to identify the location of the fuse box. Access it by lifting a tab or removing a panel manually, or utilize the provided trim tool if necessary
Step 3: Identify the proper fuse slot for hardwiring
Identify the ACC (Accessory) fuse slot in the fuse box, which supplies power when the ignition is activated. Additionally, locate the constant power fuse slot, which provides power regardless of the ignition status.
Installation
Step 4: Install the Add-A-Fuse tap
1. If you are using the previously identified fuse slot that has an existing fuse in it,
then insert that existing fuse into the lower empty slot of the Add-A-Fuse with correct orientation. 2. However, if your previously identified slot is empty and there is no existing fuse in it, then you can just install the Add-A-Fuse directly without needing to install 2nd fuse into the empty slot of an Add-A-Fuse tap.
Step 5: Insert the red and yellow fuse taps into their corresponding slots.
Attach the red wire from the hardwire kit to the ACC fuse slot, and connect the yellow wire to the constant power fuse slot.
Step 6 : Find an appropriate grounding location
Secure the black wire from the hardwire kit to the grounding point by utilizing a ring terminal or an appropriate grounding connector.