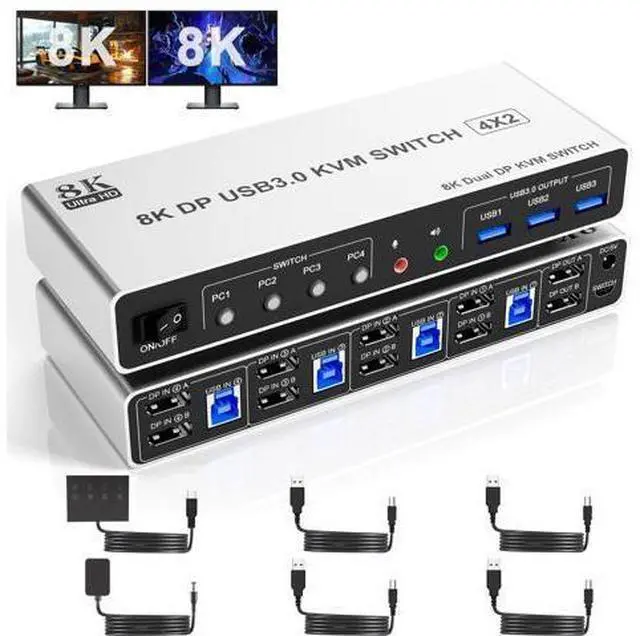
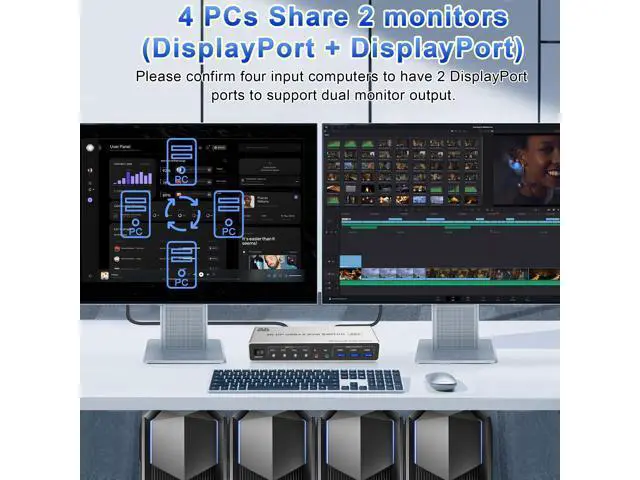
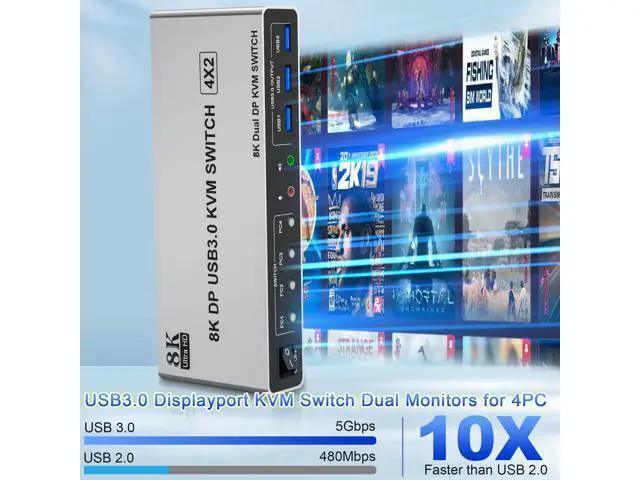
8K@60H 4 Port Displayport USB 3.0 Dual Monitor KVM Switch 4 computers share 2 monitors and 3 USB 3.0 devices
Installation steps:
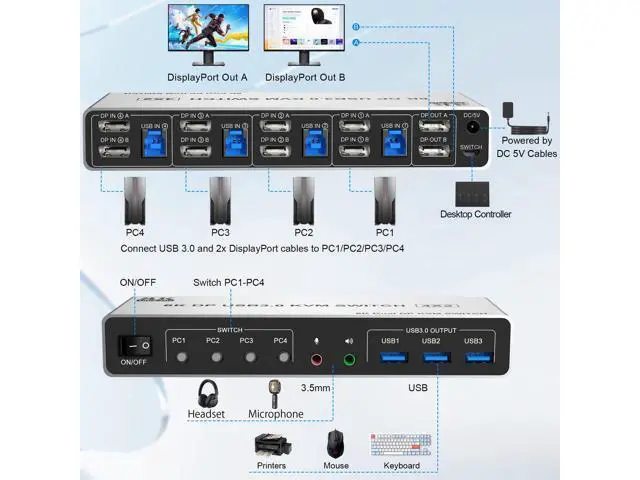
1. Insert the adapter into the KVM;
2. Plug the 2*Displayport cable into the KVM switch and monitor; (Output)
3. Plug the Displayport cable and USB cable into the KVM switch and your computer/laptop (DP cables are not included) (Input) DP IN1 A + DP IN1 B + USB IN1=PC1 DP IN2 A + DPIN2 B + USB IN2=PC2 DP IN3 A + DPIN3 B + USB IN3=PC3 DP IN4 A + DPIN4 B + USB IN4=PC4
4. Insert the mouse and keyboard into the KVM switch
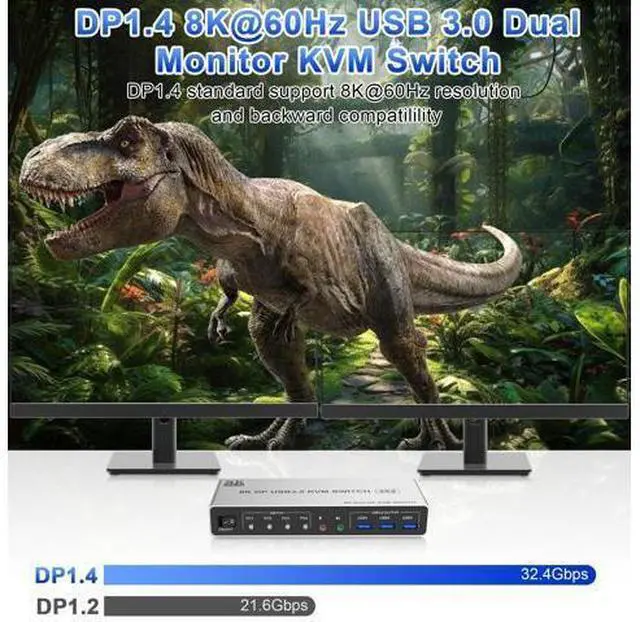
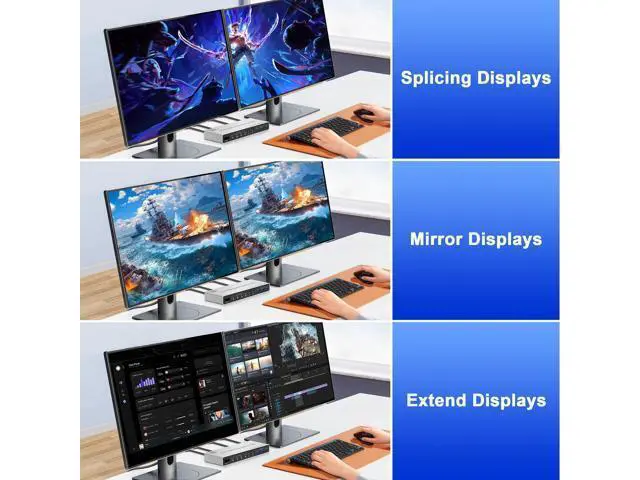
5. If needed, you can connect a microphone and audio port Ultra HD 8K@60Hz Dual Monitor KVM Switch Supports up to 8K@60Hz/4K@144Hz, Ultra HD, HDR 10, Dolby vision, 3D effect. 3 Display Modes Extended Display Mirrored Display Spliced Display Audio and microphone output KVM switch 4 computers displayport comes with a 3.5 mm Audio Jack port with a DAC chip inside, which can be inserted into a 3-segment 3.5 mm earpiece device, and a 3.5 mm microphone interface, which can be inserted into a 3-segment microphone Switch by Panel button Push-button design allows for one-touch switching using a button on the KVM Switch box, eliminating the need to plug and unplug cables frequently, saving space and time. Wired Remote Control LED Indicator When switching to which PC, the LED will tell you whether PC1 or PC2 or PC3 or PC4 is active. Additional Features 8K Displayport Switch with
USB 3.0 Ports: Dual monitor Displayport KVM switch with 3 USB 3.0 ports which can recognize keyboard, mouse, printer, scaner and other USB devices. Plug and play without any software needed. The transmission speed of USB 3.0 is as high as 5Gbps, while USB 2.0 offers data transfer speeds of only 480Mbps. Great Compatibility & 2
Switching Modes: 4 IN 2 OUT Displayport KVM Switch driver-free for Windows, Linux, Mac, Unix, Ubuntu, Raspberry and most other major OS. Plug and play. You can press the button on the panel or use the wired remote controller (included in the package) to switch the computers. The LED indicate the active computer.
Important: After connecting the computers and the monitors through KVM, you need to set the screen output mode on the computer (press Windows+P) and select the output mode in the pop-up window on the screen. We offer 24 months warranty.
Tips 1: If you encounter problems when using the KVM connection, please contact us for after-sales support in time.
Tips 2: hotkey switching is not supported.