Compatible with 778c HD, 788ci HD, 788ci HD DI, 798ci HD SI, 859ci HD, 859ci HD DI, 899ci HD SI, 959ci HD, 959ci HD DI, 999ci HD SI, 1159ci HD, 1159ci HD DI, 1199ci HD SI. Requires AS EC QDE adapter cable and Ethernet cable for installation, ensuring seamless connectivity and enhanced functionality.
For enhanced compatibility, it works with All APEX, SOLIX, ONIX, ION models, 858c, 858c HD, 858c DI, 858c HD DI, 898c SI, 898c HD SI, 958c, 958c HD, 958c DI, 958c HD DI, 998c SI, 998c HD SI, 1157c, 1158c, 1158c DI, 1197c SI, 1198c SI - no adapter required or step up to the Radar.
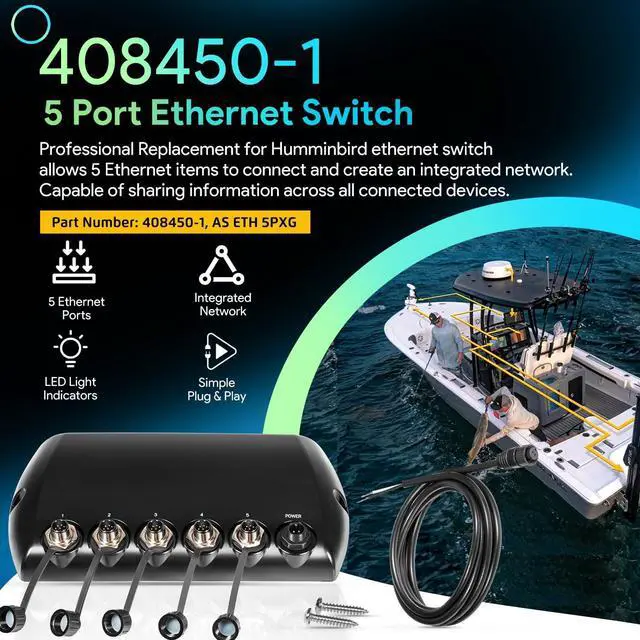
Compatible with Humminbird multiple head units, share transducers, add an NMEA 2000 network or step up to the Radar.
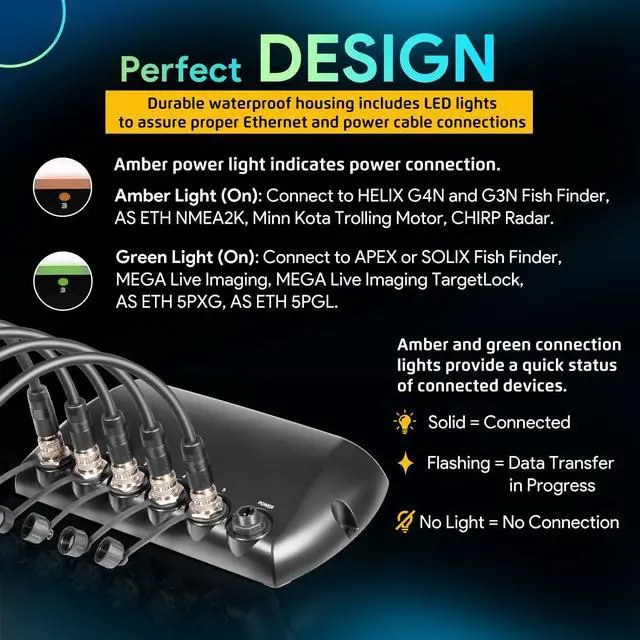
Compatible with all APEX, All SOLIX, HELIX G4N and HELIX G3N fish finder models.
Works with 12V & 24V electrical systems
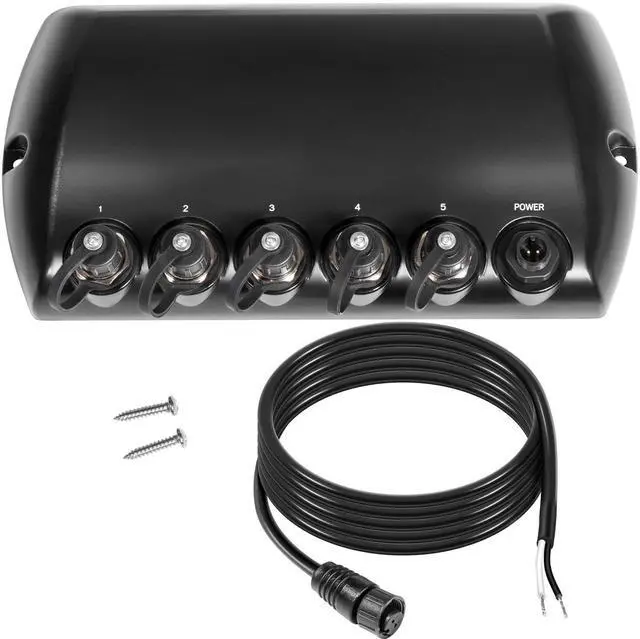
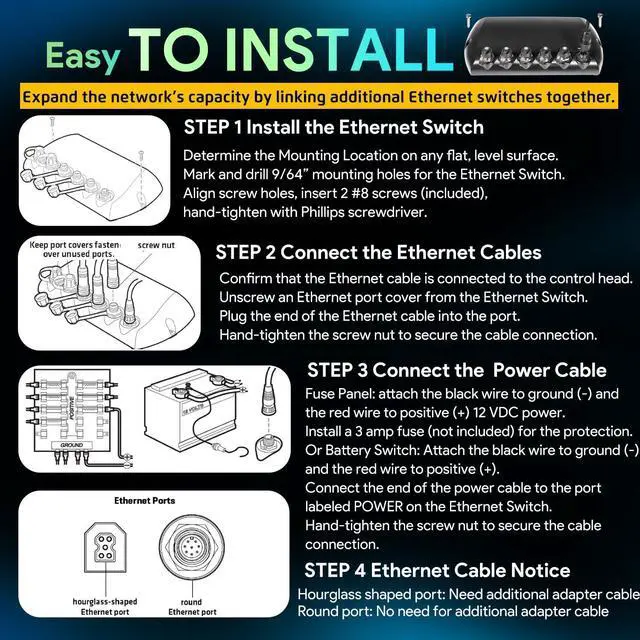
Position the switch on the mounting surface and mark the screw holes.
Remove the switch and drill two 9/64" holes (use progressive drill bits on fiberglass).
Reinstall the switch, align the holes, and hand-tighten two #8 screws. (Hand-tighten only)
Optionally, seal with marine-grade silicone.
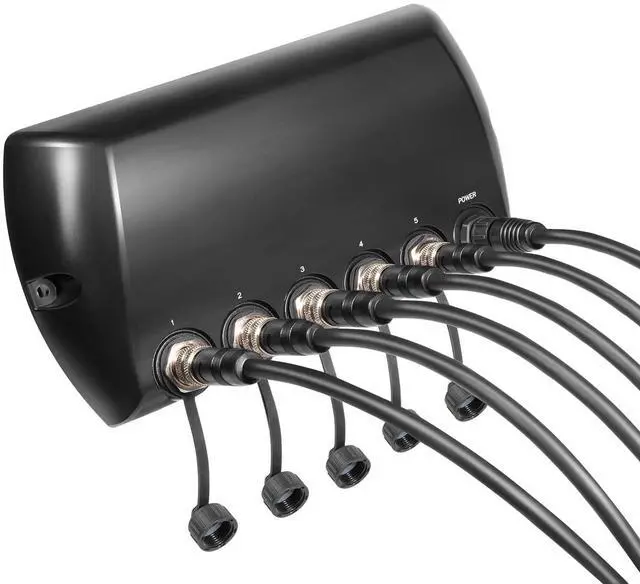
Steps: 1. Attach to control head; 2. Plug into port; 3. Hand-tighten. Seal unused ports; keyed ports block reversal.
Warm Tips: Connect up to 5 cables (any order). Avoid water; apply grease in wet zones. No looping cables on one switch or linking switches with multiple cables. Max 3 switches chained.
WARNING: The Ethernet Switch power cable (included) can be connected to a main fuse panel or a battery switch with an inline fuse. It is not recommend connecting to a battery without a fuse and a switch.
CAUTION: Make sure that the power cable is disconnected from the Ethernet Switch at the beginning of this procedure.
NOTE: The manufacturer is not responsible for over-voltage or over-current failures. The Ethernet Switch must have adequate protection through the proper selection and installation of a 3 amp fuse (separate purchase required).
1a. Fuse Panel: If a fuse terminal is available, use crimp-on type electrical connectors (not included) that match the terminal on the fuse panel. Depending on your control head model, attach the black wire to ground (-) and the red wire to positive (+) 12 VDC power. Install a 3 amp fuse (not included) for the protection of the accessory. or...
1b. Battery Switch: Install the battery switch (not included) using the instructions provided with it. You will also need to obtain and install an inline fuse holder and a 3 amp fuse (not included) for the protection of the accessory. Attach the black wire to ground (-) and the red wire to positive (+).
WARNING! If you are unable to obtain a battery switch and are forces to connect the power cable directly to the battery, be aware that this will drain the battery.
2. Connect the end of the power cable to the port labeled POWER on the Ethernet Switch. The ports are keyed to prevent reversed installation, so be careful not to force the connector into the connector port.
3. Hand-tighten the screw nut to secure the cable connection.
Ethernet Cable Notice: Eview the Ethernet Port
Check the Ethernet port on your control head. If the port is shaped like an hourglass, you will need additional Ethernet adapter cable for the installation. If the port is round, the Ethernet cable can be connected directly to the control head Ethernet port without an adapter cable.
5 Port Ethernet Switch