Your Browsing History
 WDS400T4X0E")
- Free 30-day Returns
$18.99
Ships from China.

Meet Your Seller

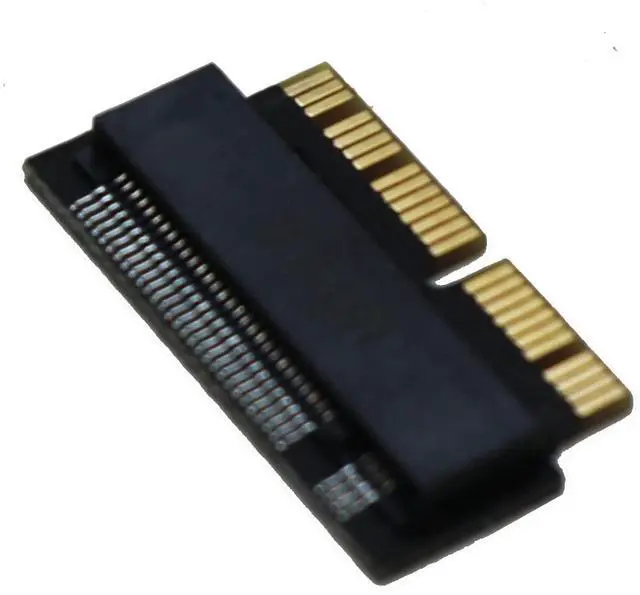


Vszerda NGFF M.2 nVME SSD Adapter Card for Upgrade MacBook Air(2013-2016 Year) and MacBook PRO(Late 2013-2015 Year)
Limited time offer, ends 07/31 By Jinwen Electronics
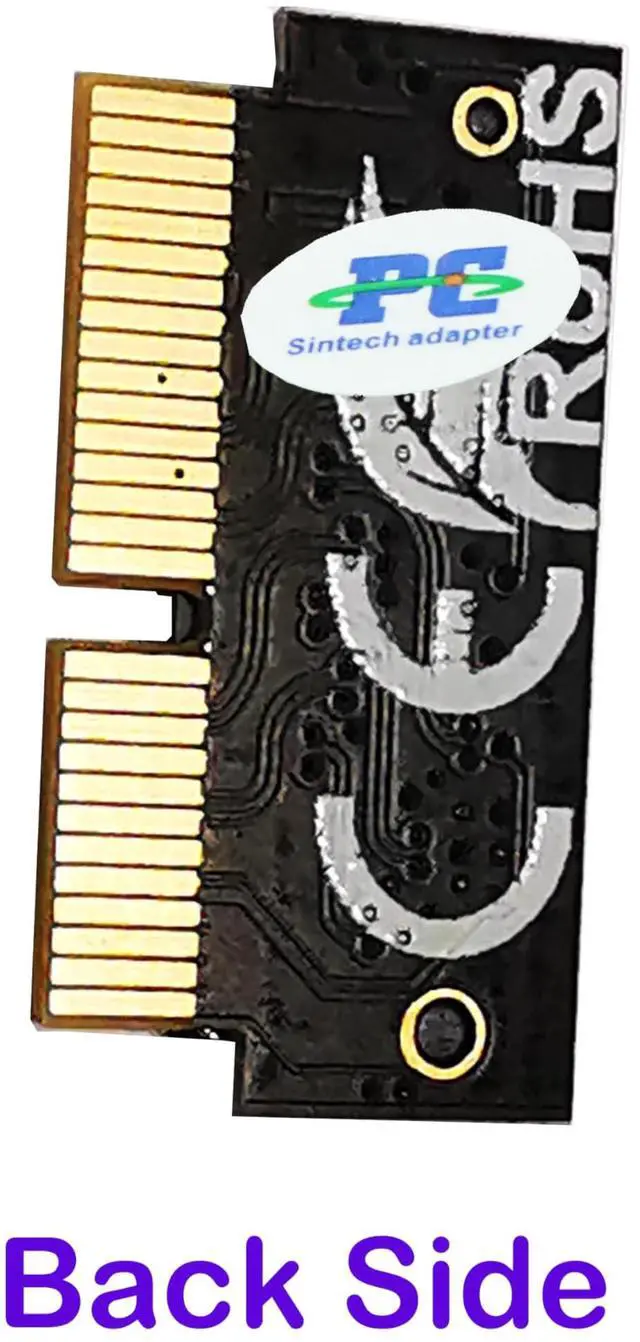
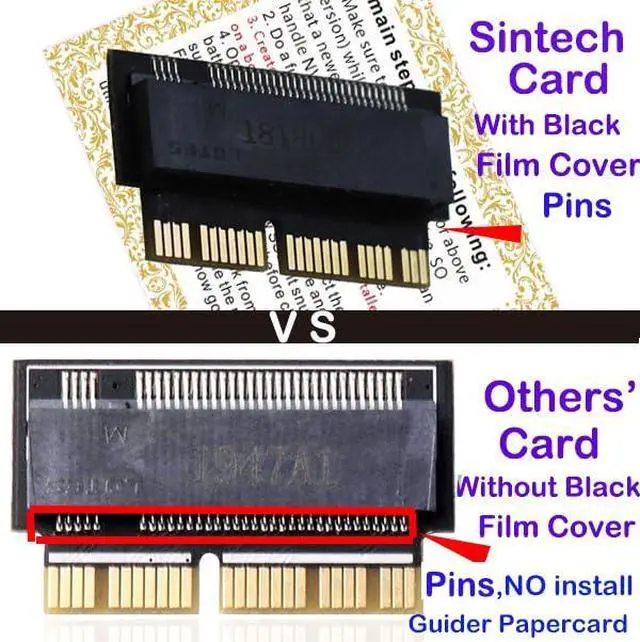
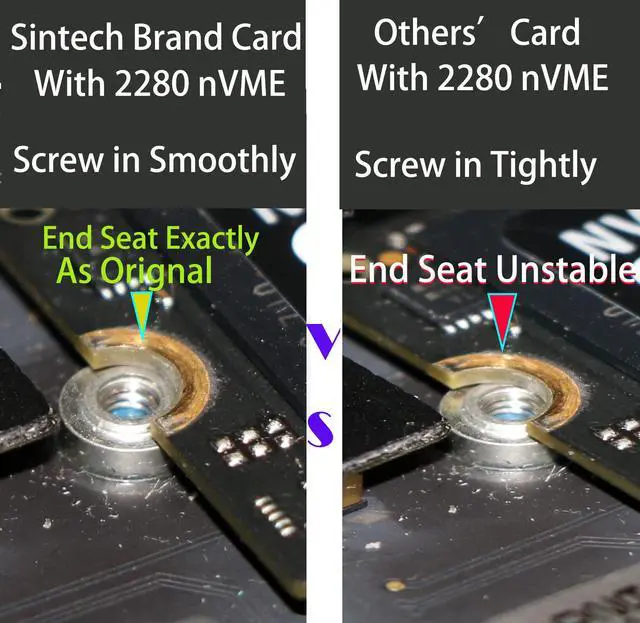
- Notice: The card comes with blak film covering pins and Sintech install guide paper-card.[ONLY Sintech Adapter sell Sintech-brand]
- Support Adata NVMe SSD : SX6000, SX7000, SX8200, SX8200 Pro etc,Corsair : MP500, MP510,Crucial : P1,HP: ex920, ex950
- Support Intel NVMe SSD : 600p, 660p, 760p,Toshiba XG3-XG4-XG5-XG5p-XG6 line,Samsung: 960 Evo, 960 Pro, 970 Evo, 970 Pro,WD:v1, v2 and v3,MyDigital: SBX - BPX
- NOT Support: PM981,950 Pro ,WD Blue NvME SN570 /SN770
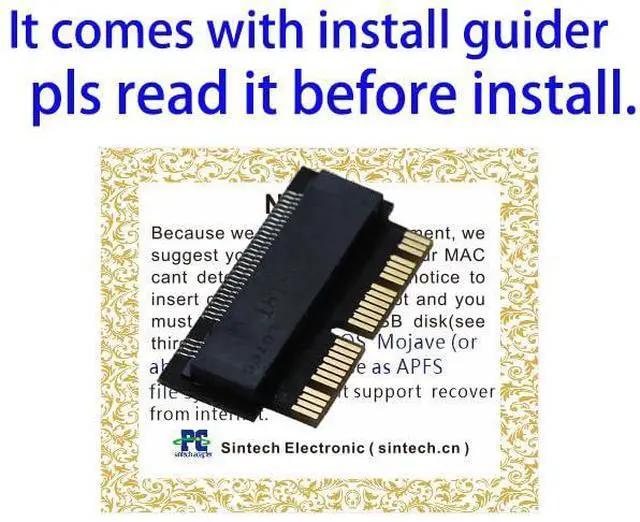
- Important Notice: It can't support recovering from internet,important to prepare bootable USB disk driver(M.2 PCIe has no OS systerm inside,it must be erased first),if you don't know how to do this, you can ask for help. There is hibernation for all 2013-2014 Macs,you can set it to resolve this problem as guider in attached photo.If you meet unbootable after installing MAC OS,pls reset "NVRAM" by Hold Down "CMD+Option+P+R".

+
+
Overview
Specs
Reviews
Any questions? Our AI beta will help you find out quickly.
Try me now
NOTICE:because too many customers can use it,I suggest you to try it again if your MAC can't detect nVME SSD. Pls notice to insert card fully into SSD slot and you must prepare bootable USB disk(see third point) with High Sierra to format M.2 SSD first, it can't support recover from internet. main steps are as following:
1. Make sure to move to High Sierra while still on your old drive, so that a newer firmware is installed that can handle NVME.
2. Do a full backup to your TimeMachine.
3. Create a High Sierra Installer on a bootable USB stick.
4. Open the macbook and disconnect the battery while switching out the drive and make sure both adapter and new SSD sit snug. Finally reconnect the battery before closing the shell.
5. Insert the Installer USB stick from step 2, and press the option key while the machine starts. Once it's up you can now go to the disk utils to format
Warranty & Returns
Warranty, Returns, And Additional Information
Warranty
- Please contact the Seller directly for warranty information. Warranty information may also be found on the Manufacturer's website.
- CONTACT
Return Policies
- Return for refund within: 30 days
- Return for replacement within: 30 days
- This item is covered by Jinwen Electronics Return Policy
Manufacturer Contact Info
- For a directory of all our manufacturers, please click below.
- Manufacturers Directory
LOADING...