Your Browsing History


Any questions? Our AI beta will help you find out quickly.
Fully compliant with PCI-Express Base Specification Revision1.1
Single-Lane(x1)PCI-Express with throughput up to 2.5Gbps
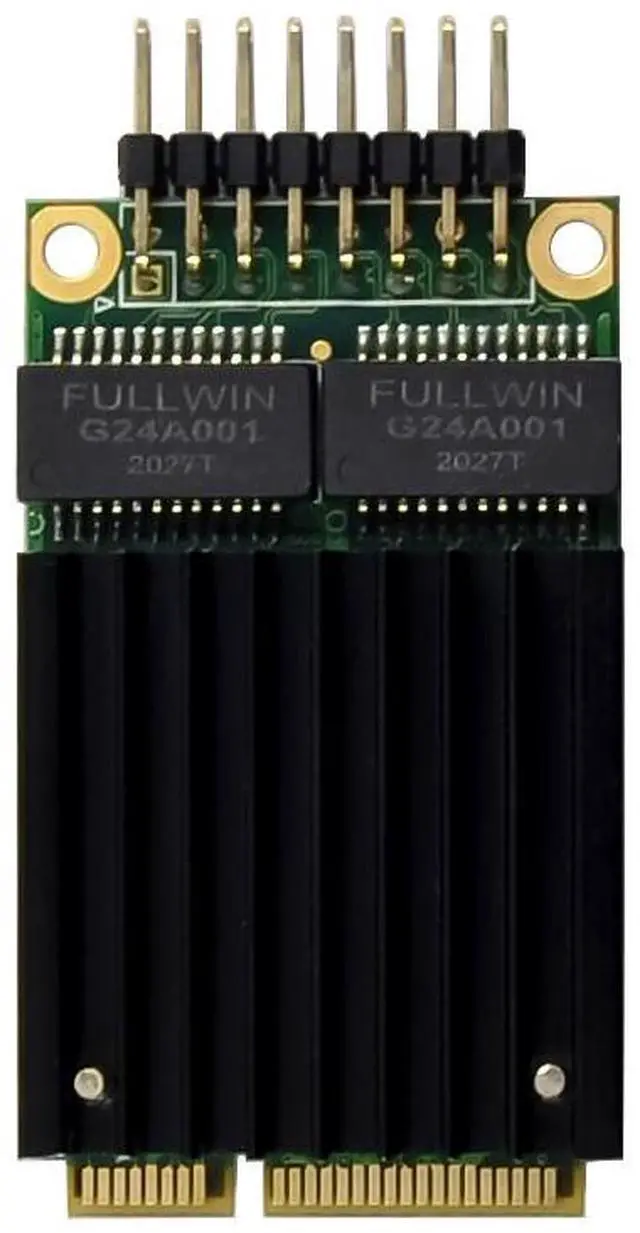
Compatible with PCI-E MINI Card Electromechanical specification revision1.2
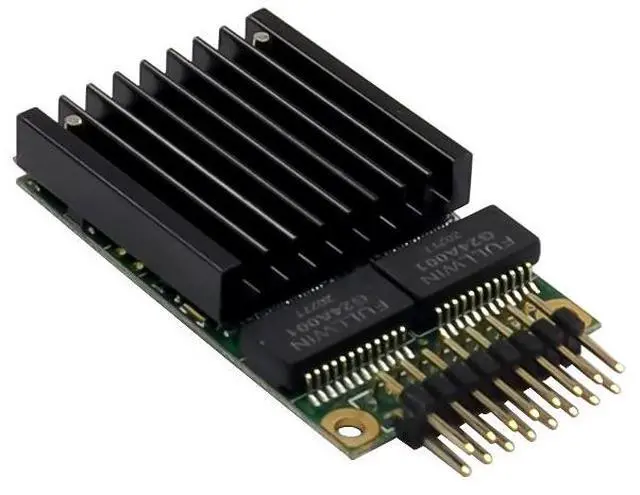
Compatible with Full size MINI card type form factor
Fully Plug and Play compatible
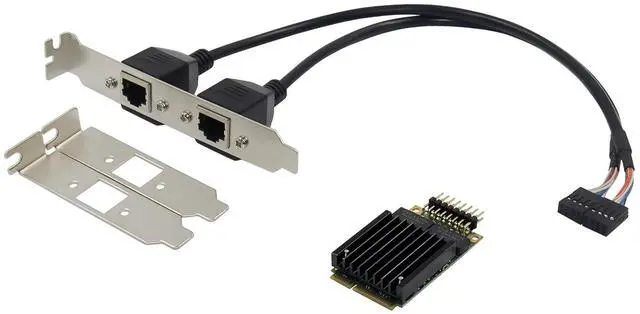
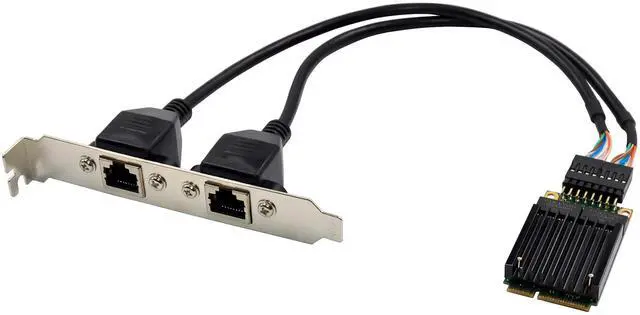
It supports two independent Gigabit network channels
Complies with the IEEE802.3ab ,IEEE802.3u and IEEE802.3 specifications
IEEE802.3ab auto negotiation support
Half duplex at 10/100Mbp operation and full duplex operation at all supported speeds
Chipset: 2*82583V&ASM1182E
Flow control support compliant with the 802.3x specification
VLAN support compliant with the 802.1Q specification
Auto MDI,MDI-X crossover at all speeds
TCP segmentation capability compatible with large send offloading features
Support up to 256KB TCP segmentation(TSOV2)
Drivers for Win7 / Win8 / Win10 / Vista / Sever2008 / Sever 2012 / Linux / DOS
Package content
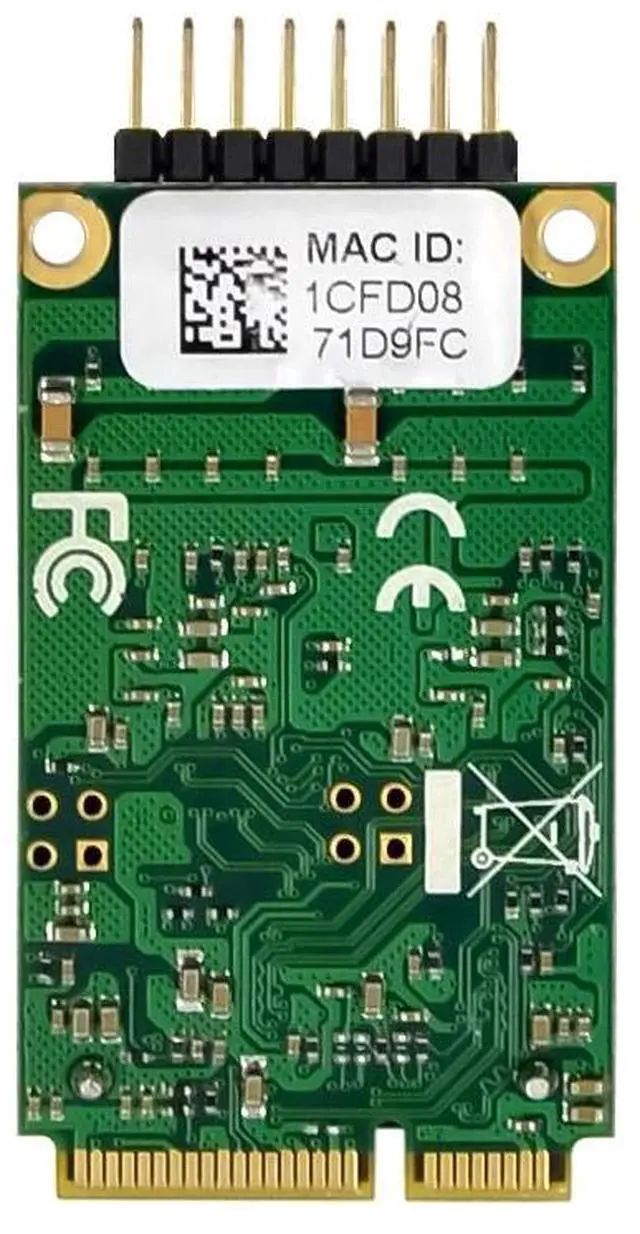
1 x Mini PCIe Intel 82583V 2-PORT Gigabit network adapter-main card
2 x 8-Pin network cable
1 x Users Manual
1 x CD
2 x Low profile bracket
System Requirements
Windows XP , Vista,7,8 and 10 32/64bit
Windows server2003,2008,and 2012 32/64bit
LINUX, DOS
One available MINI PCIe slot
Hardware installation
1.Turn off your computer and all external devices connected to it.
2.Open the computer case. Refer to your computer user manual for more details
3.Find an available Mini PCIe slot and remove the slot bracket, Save the bracket screw for later use.
4.Insert the main card to the Mini PCIe slot firmly and evenly, take care not to force it into the slot. Once you have properly positioned the main card into the slot, secure it with the screw you have just saved.
5.Find an empty expansion slot on the back panel of the computer case and remove the metal bracket. Save the bracket for later use.
6.Place the bracket on the expansion slot on the back panel and secure it with the bracket screw you have just saved.
7.Connect the system to network by inserting the CAT-5 or above cable into RJ45 Port.
8.Secure the computer case and Connect POWER cable switch on your computer.
Install Drivers and software
Windows Operating Systems
You must have administrative rights to the operating system to install the drivers.
1.insert the CD driver bound with Intel network driver into your CD-ROM drive(also you can download the latest drivers from support website):
2.if the Found New Hardware Wizard screen is displayed, click Cancel
3.start the autorun located in the software package, the autorun may automatically start after you have extracted files.
4.Click install Drivers and Software
5.Follow the instructions in the install wizard to finish it
Installing Linux Drivers from Source Code
1.Download and expand the base driver tar file.
2.Compile the driver module
3.Install the module using the modprobe command
4.Assign an IP address using the ifconfig command
Support
More information and settings, please refer to the Intel Adapter User Guides or you can contact us.