
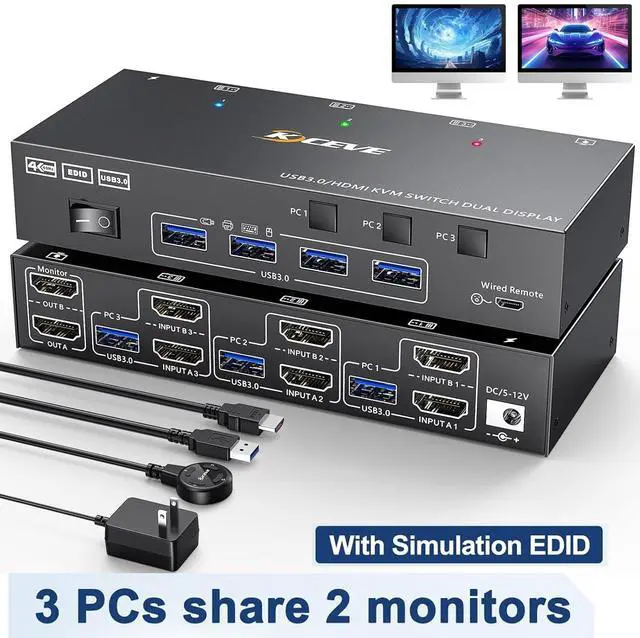


3PC Dual Monitor,Save Your Desk Space,3PC Share 4 USB Devices and 2 Monitors.
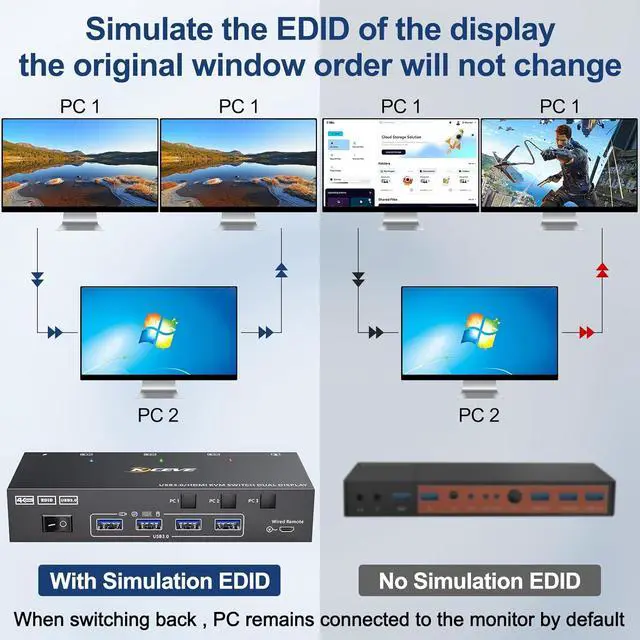
EDID emulation: When switching between PC1/ PC2/PC3 in the locked screen state, and then switching back to PC1/PC2, the window arrangement remains unchanged.
4K Ultra HD: 3 in 2 out HDMI 2 monitor Support 4K@60Hz, 1920x1080P@60Hz @120Hz,@144Hz and backward compatible with lower resolutions.
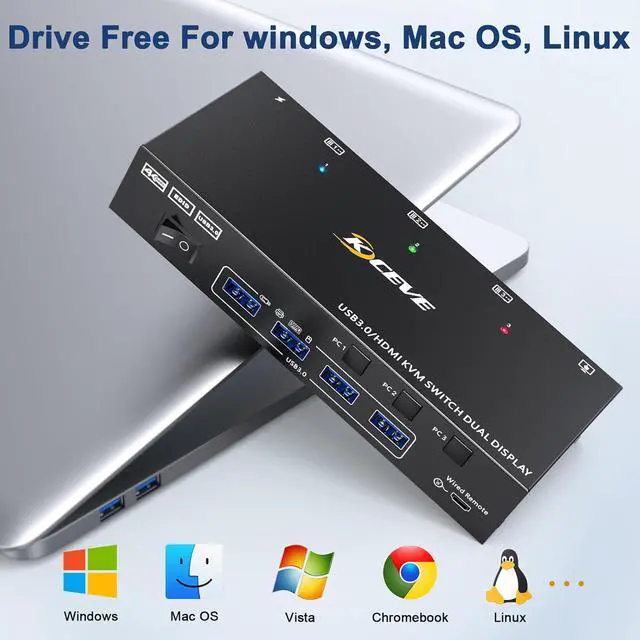
Driver free: 3 port kvm switch Driver-free for Windows, Mac, Linux, Unix, Ubuntu.Plug and play.
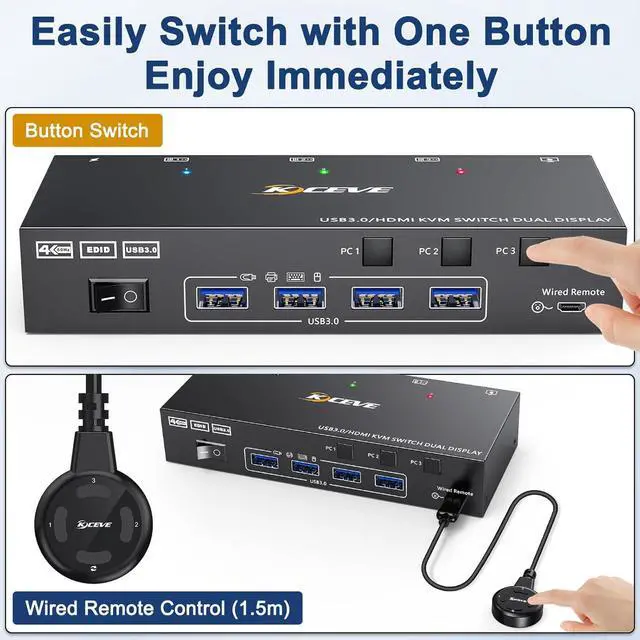
Wired remote:Dual monitor kvm switch with wired remote,Tidy up desktop space by using the remote to switch between computers.
LED: The design of the LED lights on the panel indicates the currently running computer.
4 USB 3.0 port:The kvm switch with upgraded USB 3.0 version ensure data transfer more faster and stable, it's a great solution to solve many USB device disconnected issue during use.

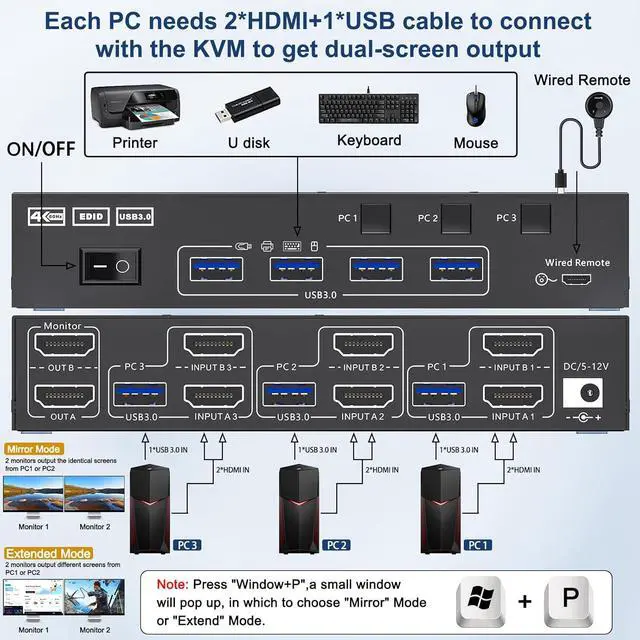
Each PC needs 2 HDMI cables + 1 USB 3.0 cable to connect with the KVM to ensure the keyboard, mouse and 2 monitors work properly.
Connection steps:
Step 1. Connect 2*HDMI cables+1*USB cable between PC 1 and KVM (USB 3.0, INPUT A1, INPUT B1).
Step 2. Connect 2*HDMI cables+1*USB cable between PC 2 and KVM (USB 3.0, INPUT A2, INPUT B2).
Step 3. Connect 2*HDMI cables+1*USB cable between PC 3 and KVM (USB 3.0, INPUT A3, INPUT B3).
Step 4. Connect 2*HDMI cables between the KVM (OUT A, OUT B) and the monitors.
Step 5. Connect the keyboard,mouse and other USB devices to the USB3.0 ports on the KVM.
Step 6. Insert the wired remote to remotely switch between PC 1,PC 2 and PC 3.


1. Simulate the EDID of the display, when the monitor is switched between two computers, the original window order will not change.
2. The KVM dual monitor switch adapts to EDID and intelligently detects the resolution of your computer, adaptable to a variety of complex application environments. The dual monitor KVM switch HDMI was designed to work across various operating systems, such as Windows, UNIX, Mac, Linux, etc.

DC12V port for power supply
External power supply is not required for normal USB device.
DC12 power adapter is included. When connected high power consumption USB device, you will need to connect power adapter to ensure it's connection stable.

Wired remote
Wired remote that supports remote switching for easy management of desktop cables.

One-click to turn on/off
Simply use the on/off button on the KVM when not in use, no need to unplug the cables.
