Your Browsing History
- Free 30-day Returns
$249.88
Ships from China.
Meet Your Seller
CKLau 8K30Hz 4K144Hz Dual Monitor KVM Switch Displayport 1.4, 2 Port USB 3.0 DP KVM Switch 2 Monitors 2 Computers with Cables, Digital Display
Limited time offer, ends 07/22 By YuXuan Technology
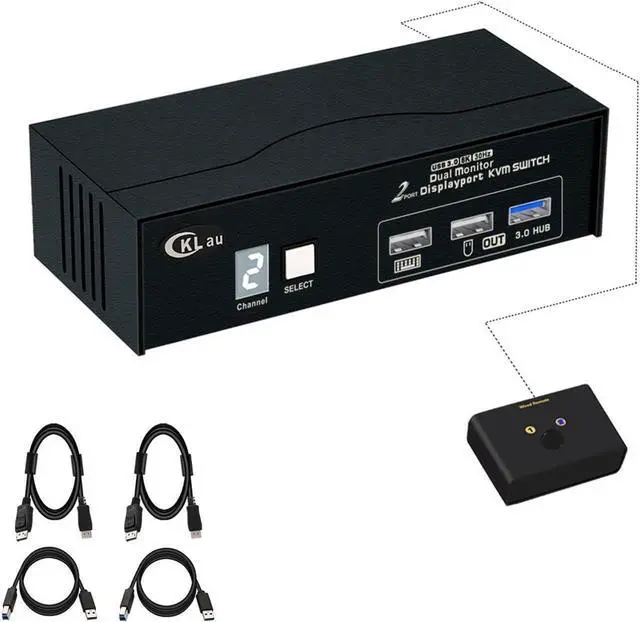
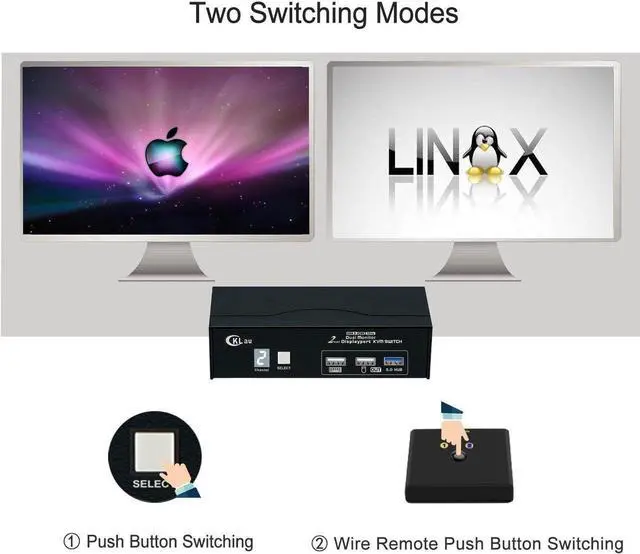
- 1. Displayport KVM Switch Dual Monitor: This KVM switch allows 2 computers sharing one set of keyboard & mouse, 2 monitor, and 1 pcs USB 3.0 peripheral device. With wired remote push button switch. (Tips: This KVM switch without simulation EDID function, and it required each of your computers with 2 video output, otherwise, only 1 monitor have display.)
- 2. Displayport 2 Computers 2 Monitors Switch: Resolution compatible 7680x4320@30Hz, 5120x2880@50/60Hz, 3840x2160@60/120/144Hz, 3840x1620@60/120/144Hz, 3440x1600@60/120/144Hz, 3440x1440@60/120/144Hz, 3840x1080@60/120/144/165/240Hz, 3200x1800@60/120/144/165/240Hz, 2560x1440@60/120/144/165/240Hz, 2048x1536@60/120/144/165/240Hz, 2048x1280@60/120/144/165/240Hz, 2048x1080@60/120/144/165/240Hz, 1920x1200@60/120/144/165/240Hz, 1920x1080@60/120/144/165/240Hz, etc.
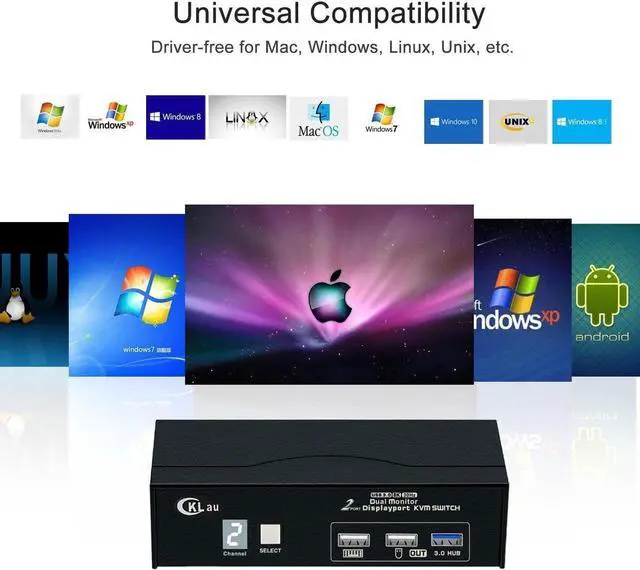
- 3. Displayport 1.4 Dual Monitor KVM Switches: Supports most of keyboard & mouse, monitors, operating system. Suit for home, office, multimedia conference room, booking hall, etc.
+
+
Overview
Specs
Reviews
Any questions? Our AI beta will help you find out quickly.
Try me now
Installation Step;
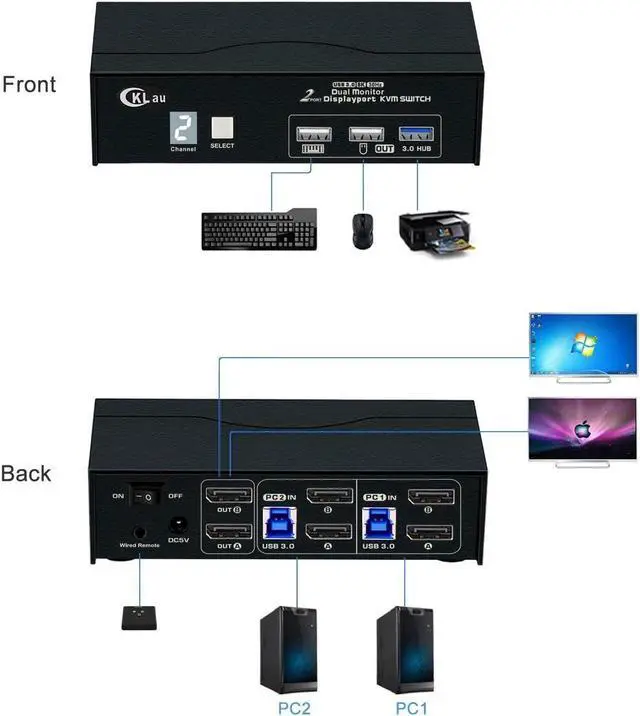
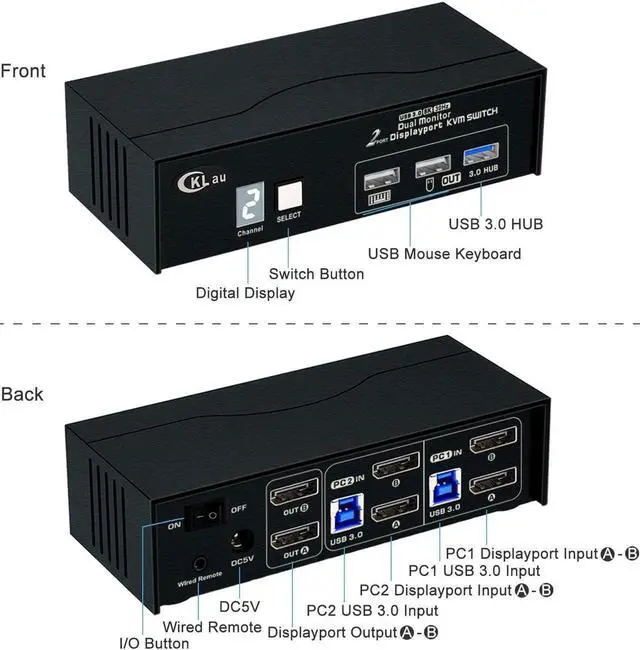
1. Connect the KVM switch and computers by USB 3.0 cables, and Displayport 1.4 cables which come with the KVM switch (If you want to connect 2 computers and 2 monitors, you need to buy another 2 pcs Displayport 1.4 cables separately);
2. Connect the KVM switch and your monitors by Displayport 1.4 cables;
3. Plug the mouse into the mouse slot of the KVM switch, and plug the keyboard into the keyboard slot of the KVM switch, plug the wired remote push-button switch or other USB peripheral device into the KVM switch if needed;
4. If one of your computers operates on BIOS, you need to turn off all your computers at first and start by turning on that computer, entering your password, logging into the system, and waiting for the display. Then, switch to the second computer and turn it on. If both computers are BIOS-based, follow
this sequence: start by powering on the KVM, then switch on the first BIOS computer, enter your password, log into the system, switch the KVM to the second computer, and finally, turn on the second BIOS computer. In summary, avoid starting both BIOS computers simultaneously, as it may cause issues like a black screen or disable your keyboard and mouse.
Package:
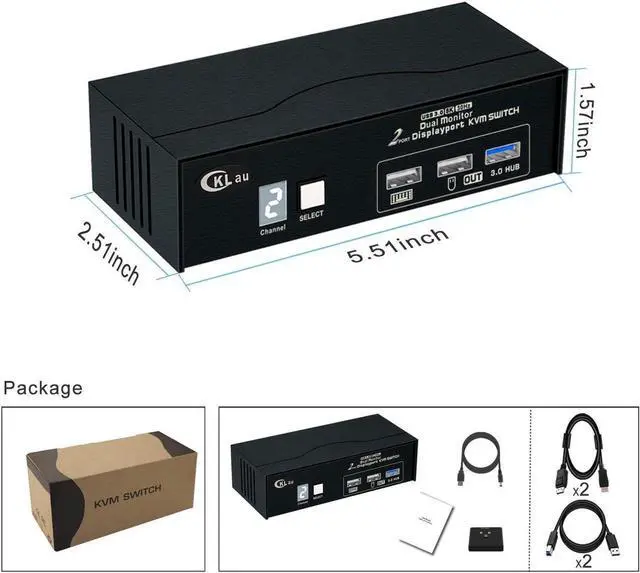
1 x 2 port Displayport KVM switch
2 x USB 3.0 cables
2 x Displayport 1.4 cables
1 x wired remote push button
1 x power cable
1 x manual
Tips:
1. The KVM switch comes with a power cable, We suggest you plug it into the KVM switch and your wall charger, to keep power stable and avoid damaging your devices cause the power supply is not stable.
2. This DP 1.4 Dual Monitor KVM switch is without emulation EDID function, Windows size and location may be moving after switching between computers. And it requires each of your computers with 2 or multi-video output. If your computer only with 1 video output, only 1 monitor has display.
3. If you want to get 8K30Hz or 4K144Hz resolution, your devices(include computers, docking station, adapter) all should support that resolution. The KVM switch is like a bridge for transferring computers' signals to monitors, it can't change your devices' resolution. For example, your computers and monitors all support 4K144Hz, but one of your computers needs to use an adapter, and this adapter only supports 4K60Hz, then this computer only supports 4K60Hz but not 4K144Hz.

1. Connect the KVM switch and computers by USB 3.0 cables, and Displayport 1.4 cables which come with the KVM switch (If you want to connect 2 computers and 2 monitors, you need to buy another 2 pcs Displayport 1.4 cables separately);
2. Connect the KVM switch and your monitors by Displayport 1.4 cables;
3. Plug the mouse into the mouse slot of the KVM switch, and plug the keyboard into the keyboard slot of the KVM switch, plug the wired remote push-button switch or other USB peripheral device into the KVM switch if needed;
4. If one of your computers operates on BIOS, you need to turn off all your computers at first and start by turning on that computer, entering your password, logging into the system, and waiting for the display. Then, switch to the second computer and turn it on. If both computers are BIOS-based, follow
this sequence: start by powering on the KVM, then switch on the first BIOS computer, enter your password, log into the system, switch the KVM to the second computer, and finally, turn on the second BIOS computer. In summary, avoid starting both BIOS computers simultaneously, as it may cause issues like a black screen or disable your keyboard and mouse.
Package:
1 x 2 port Displayport KVM switch
2 x USB 3.0 cables
2 x Displayport 1.4 cables
1 x wired remote push button
1 x power cable
1 x manual
Tips:
1. The KVM switch comes with a power cable, We suggest you plug it into the KVM switch and your wall charger, to keep power stable and avoid damaging your devices cause the power supply is not stable.
2. This DP 1.4 Dual Monitor KVM switch is without emulation EDID function, Windows size and location may be moving after switching between computers. And it requires each of your computers with 2 or multi-video output. If your computer only with 1 video output, only 1 monitor has display.
3. If you want to get 8K30Hz or 4K144Hz resolution, your devices(include computers, docking station, adapter) all should support that resolution. The KVM switch is like a bridge for transferring computers' signals to monitors, it can't change your devices' resolution. For example, your computers and monitors all support 4K144Hz, but one of your computers needs to use an adapter, and this adapter only supports 4K60Hz, then this computer only supports 4K60Hz but not 4K144Hz.
Warranty & Returns
Warranty, Returns, And Additional Information
Warranty
- Please contact the Seller directly for warranty information. Warranty information may also be found on the Manufacturer's website.
- CONTACT
Return Policies
- Return for refund within: 30 days
- Return for replacement within: 30 days
- This item is covered by YuXuan Technology Return Policy
Manufacturer Contact Info
- For a directory of all our manufacturers, please click below.
- Manufacturers Directory
LOADING...