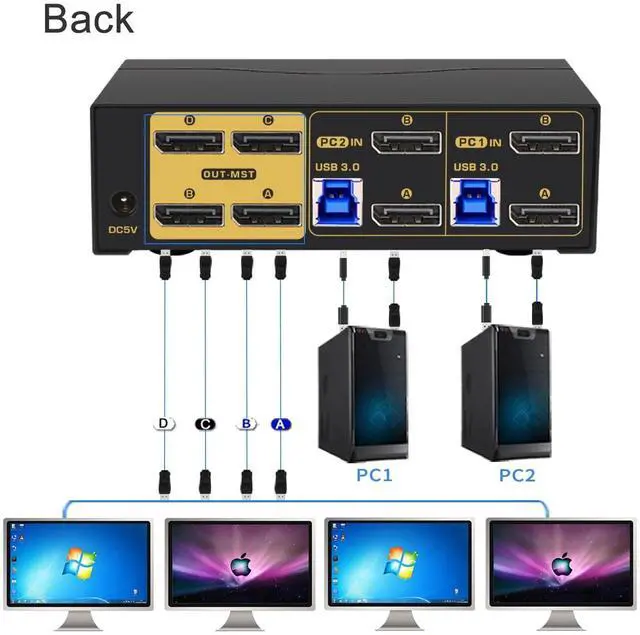
1. Connect the KVM switch and computers by USB 3.0 cables, and Displayport 1.4 cables which come with the KVM switch;
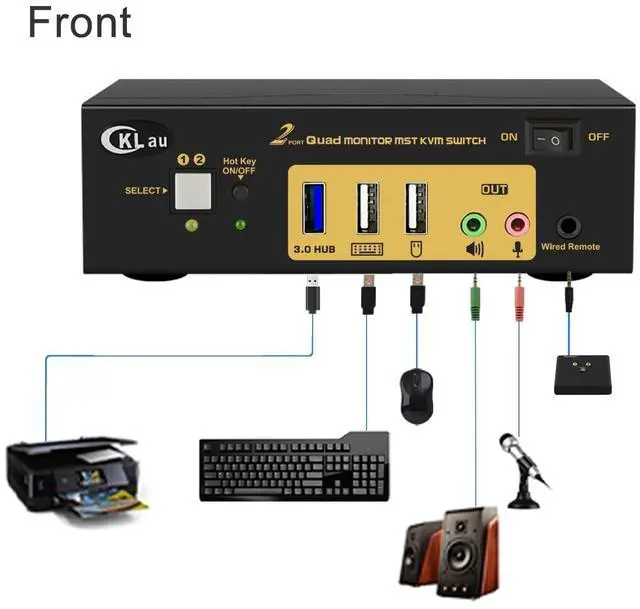
2. Plug the mouse into the mouse slot of the KVM switch, and plug the keyboard into the keyboard slot of the KVM switch;
3. Connect the KVM switch and your monitors by Displayport cables;
4. Plug your speaker/ microphone/wired remote push button controller into the KVM switch if needed.
5. If one of your computers operates on BIOS, you need turn off all your computer, and start by turning on that computer, entering your password, logging into the system, and waiting for the display. Then, switch to the second computer and turn it on. If both computers are BIOS-based, follow this sequence: start by powering on the KVM, then switch on the first BIOS computer, enter your password, log into the system, switch the KVM to the second computer, and finally, turn on the second BIOS computer. In summary, avoid starting both BIOS computers simultaneously, as it may cause issues like a black screen or disable your keyboard and mouse.
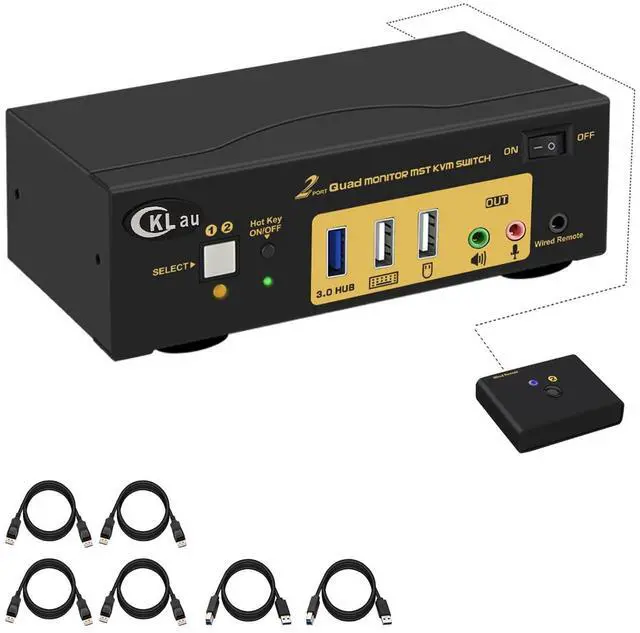
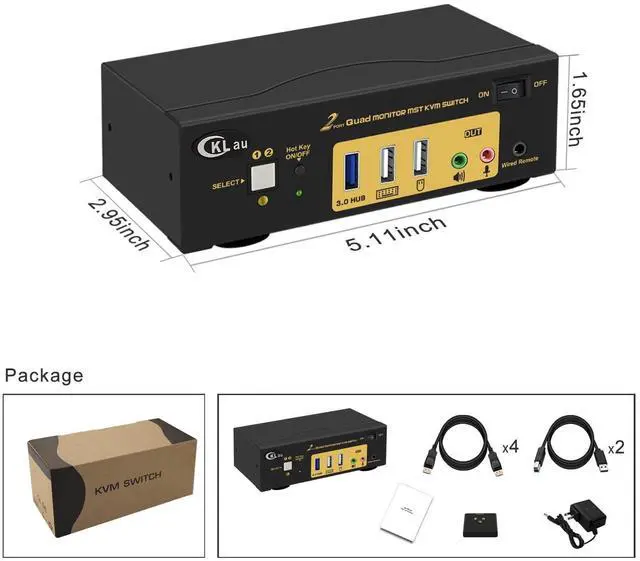
Package includes:
1 x KVM switch
4 x Displayport 1.4 cables
2 x USB 3.0 cables
1 x DC 5V 2A Power adapter
1 x manual
1 x wired remote push button switch
Warm Tips:
1. This MST KVM switch is without emulation EDID function, windows size and location may be changed after switching between computers;
2. This MST KVM switch requires each of your computers/laptops to support Displayport 1.2 or Displayport 1.4, and you should set your devices as 4K@60Hz before using.
With audion & microphone output, you can share headset/speaker between two computers.
With a HOTKEY ON/OFF key, you can turn on/turn off hotkey function by press this button.
With 1 pcs extra USB 3.0 Hub, data transferring rate up to 5Gbps/s (10 times faster than USB 2.0).
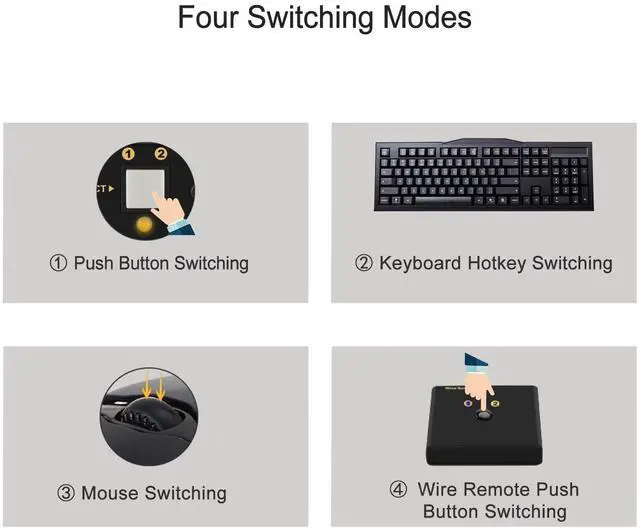
The default hotkey key is the right CTRL. Switching operates:
Num Lock + Num Lock + 1 / 2 + Enter,
or Ctrl + Ctrl + 1 / 2 + Enter,
or Scroll Lock+ Scroll Lock+1 / 2 + Enter
Only need to click the mouse wheel 2 times, and then it will switch to another computer.
You can press the button one time, then it will switch to another computer.
You can press the button of the wired remote switch one time, it will switch to another computer.
CKLau 2x4 Displayport KVM Switch MST 2 Displayport In, 4 Displayport Out, for 2 Computers Sharing 4 Monitors Installation steps CKLau 2 Port Quad Monitor KVM Switch Displayport MST Connect Diagram More Advantage Support 4 Switching Way Keyboard switching Mouse switching Manual button switching Wired remote push-button switching