


Adiding Lights
Adding a touch of radiance to your evenings.

Adiding is a global provider of LED lighting solutions, founded by a team of optoelectronics industry experts with extensive R&D and management experience. We specialize in the development and production of high-quality, energy-efficient LED fixtures for a diverse range of applications.
Adiding Lights: Efficient. Bright. Sustainable.
2-year Replacement Support!
Adiding Bright LED Lights
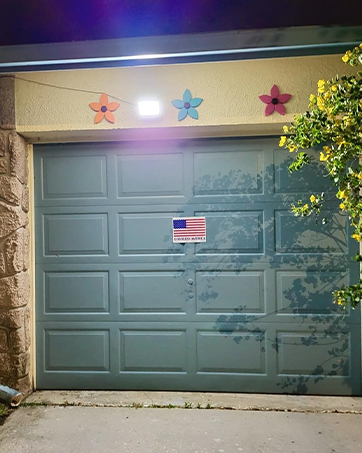
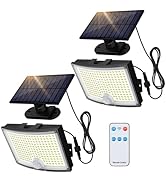
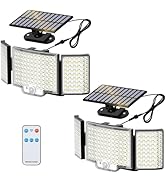
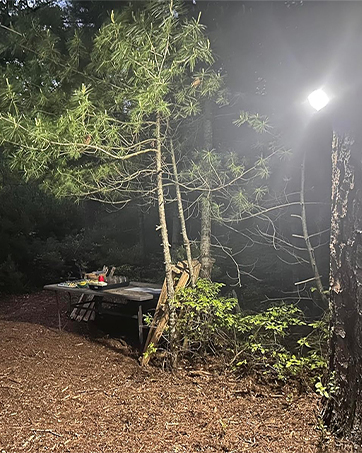
Solar Motion Lights Outdoor
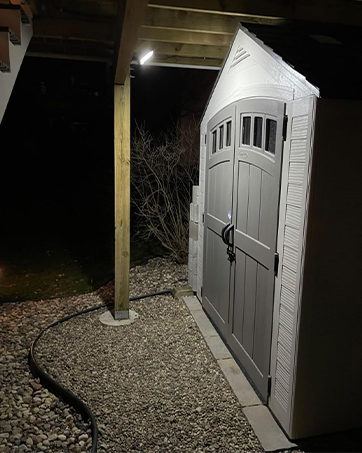
Solar Flood Lights Outdoor
Solar Powered Outdoor Lights
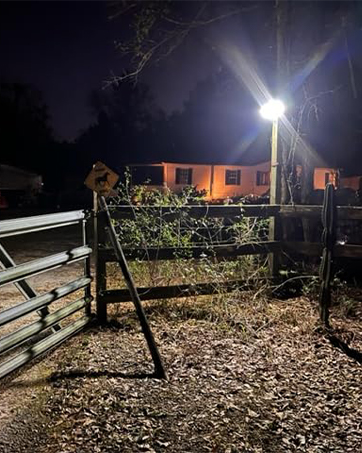
Solar Security Light
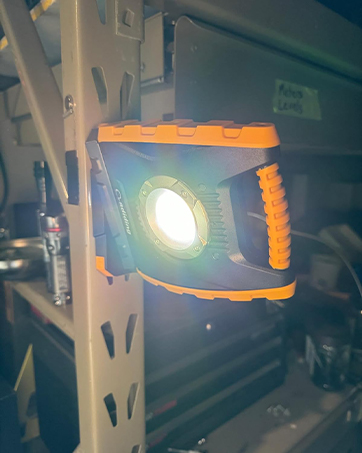
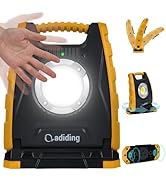
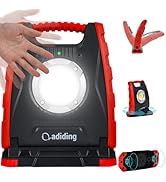
Magnetic Work Light
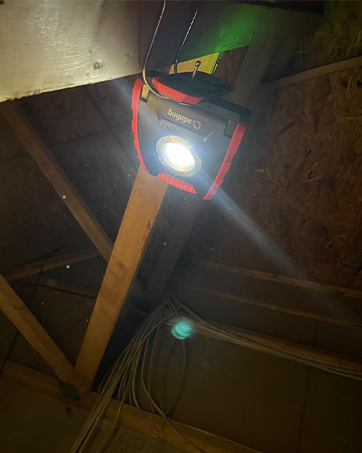
Rechargeable Work Light
Customer First!
Adiding puts customers in the first place from beginning to end. Adiding takes full responsibility for its customers with a professional service team working around the clock to solve any problems during the course of pre-sales, on-purchase, and after-sales. Customer idea is always the constant motivation to keep Adiding moving forward.


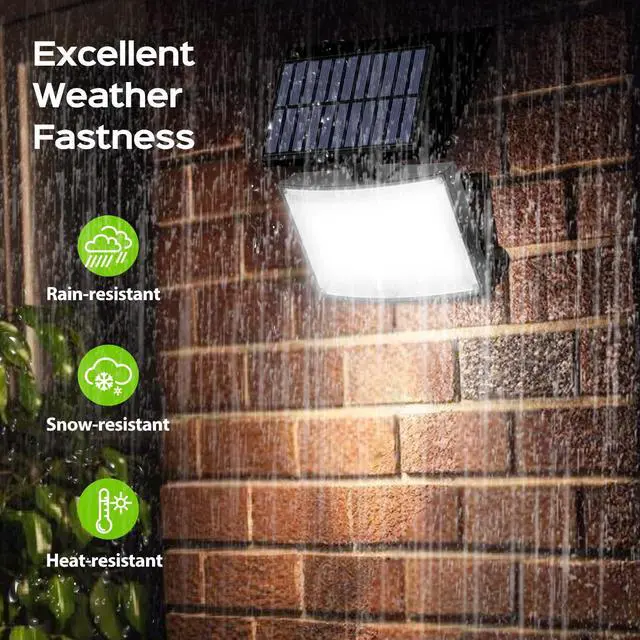
Warm Tips & Notes
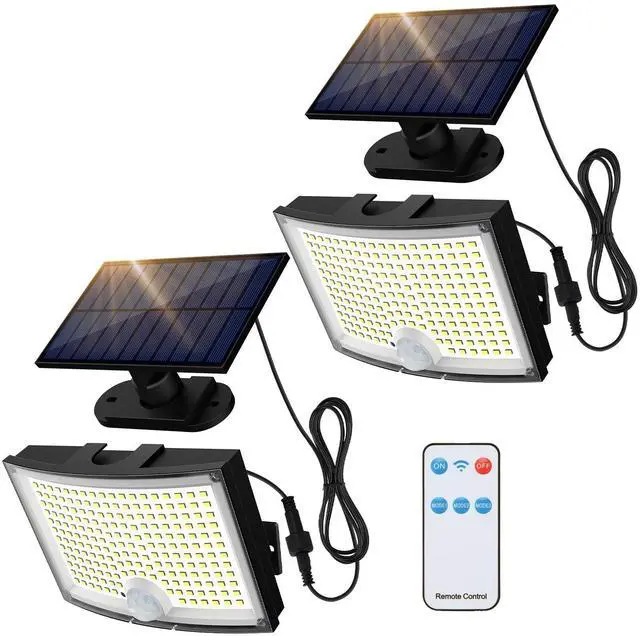
[Item Dimensions] Solar Panel: L 5.5", H 3.4". Light Body: L 6.1", H 4.1".
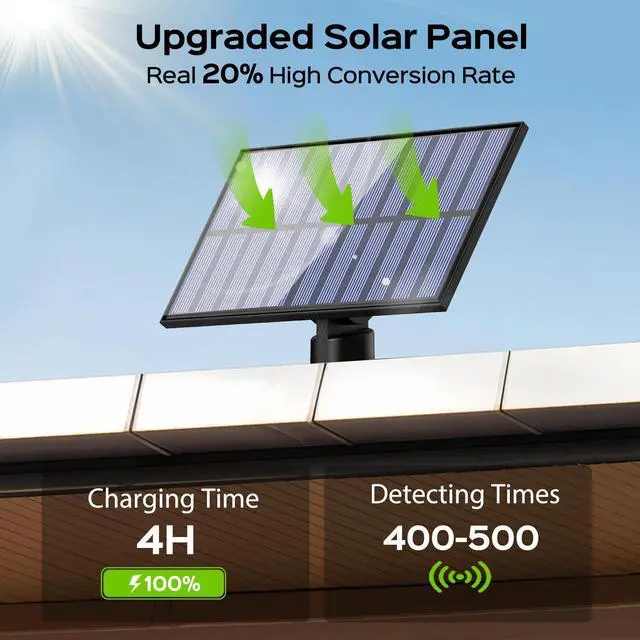
[Initial Charge for Solar Light] To ensure the solar flood light has power when activated and operates at its optimal performance, we recommend charging it in direct sunlight for 1-2 days for the first time.
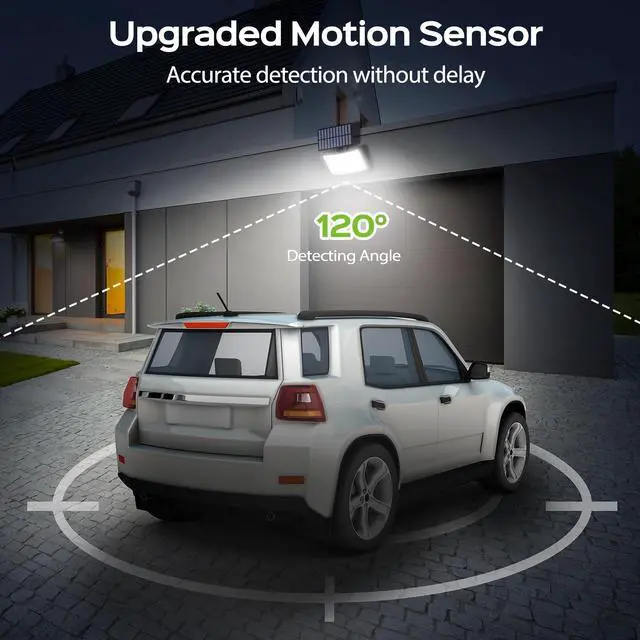
[Activating The Outdoor Solar Lights] The initial state of the solar motion light is "OFF". It can only be used normally after pressing the button on the back of the light body to activate it.
[Use The Remote Controller] Please make sure you have activated the solar security lights by pressing the light body button first. And then pull out the clear isolation tab of the remote controller.
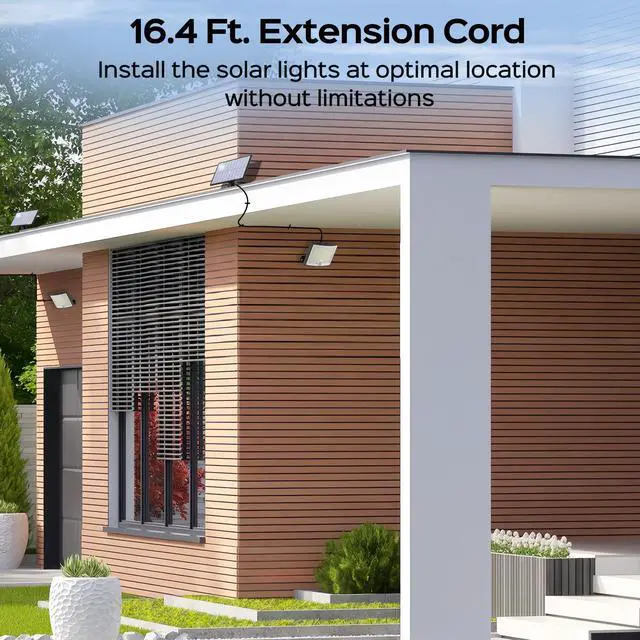
[Auto ON and OFF] The solar powered outdoor lights automatically turn on and off as determined by the ambient brightness around the solar panel. Solar outdoor lights charge during the day and automatically turn on the selected lighting mode at night. If you want to use the solar lights during the daytime, please disconnect the cable connection between the solar panel and the light body. Please note that this will shorten the charging time of the solar powered lights.
[About the ON and OFF of Solar Lights] The solar motion lights outdoor will turn off during the day (charging) or at night (when the solar panel is illuminated by another light source). The solar sensor lights outdoor will turn on when it is dark or the solar panel is shaded ( based on the selected mode). When installing the solar motion sensor outdoor lights, please ensure it is not exposed to the other light source to avert misidentification.
[Suggestions for Lighting Modes] We recommend usingmodes 1 and 2 for illumination. The dim light, lasting all night with low brightness, serves as a form of directional guidance to help people find their way in dark environments.
[Take Off the Sticker from the Lamp Surface] There is a Mounting Direction Indication Sticker on the light body(Please do not install the solar light upside down). Tear off the entire film on the light body and the sticker will be come off with it.
[Installation Direction] Please follow the instructions on the Mounting Direction Indicator Sticker to install the solar light correctly. When installing, the sensor should be underneath to allow the standing water to flow out through the 2 water outlets. This will avoid the problem of being soaked by standing water and causing damage like other solar lights for outside.
[Peace of Mind After Purchase] Our products are managed and delivered by . Whatever questions or issues, please let us know first. We offer2 years replacement supportand are available 24/7 to provide you with more efficient solutions.


Warm Tips & Notes
[Item Dimensions] Solar Panel: L 5.5", H 3.4". Light Body: L 6.1", H 4.1".
[Initial Charge for Solar Light] To ensure the solar flood light has power when activated and operates at its optimal performance, we recommend charging it in direct sunlight for 1-2 days for the first time.
[Activating The Outdoor Solar Lights] The initial state of the solar motion light is "OFF". It can only be used normally after pressing the button on the back of the light body to activate it.
[Use The Remote Controller] Please make sure you have activated the solar security lights by pressing the light body button first. And then pull out the clear isolation tab of the remote controller.
[Auto ON and OFF] The solar powered outdoor lights automatically turn on and off as determined by the ambient brightness around the solar panel. Solar outdoor lights charge during the day and automatically turn on the selected lighting mode at night. If you want to use the solar lights during the daytime, please disconnect the cable connection between the solar panel and the light body. Please note that this will shorten the charging time of the solar powered lights.
[About the ON and OFF of Solar Lights] The solar motion lights outdoor will turn off during the day (charging) or at night (when the solar panel is illuminated by another light source). The solar sensor lights outdoor will turn on when it is dark or the solar panel is shaded ( based on the selected mode). When installing the solar motion sensor outdoor lights, please ensure it is not exposed to the other light source to avert misidentification.
[Suggestions for Lighting Modes] We recommend usingmodes 1 and 2 for illumination. The dim light, lasting all night with low brightness, serves as a form of directional guidance to help people find their way in dark environments.
[Take Off the Sticker from the Lamp Surface] There is a Mounting Direction Indication Sticker on the light body(Please do not install the solar light upside down). Tear off the entire film on the light body and the sticker will be come off with it.
[Installation Direction] Please follow the instructions on the Mounting Direction Indicator Sticker to install the solar light correctly. When installing, the sensor should be underneath to allow the standing water to flow out through the 2 water outlets. This will avoid the problem of being soaked by standing water and causing damage like other solar lights for outside.
[Peace of Mind After Purchase] Our products are managed and delivered by . Whatever questions or issues, please let us know first. We offer2 years replacement supportand are available 24/7 to provide you with more efficient solutions.
Adiding Lights
Adding a touch of radiance to your evenings.
Adiding is a global provider of LED lighting solutions, founded by a team of optoelectronics industry experts with extensive R&D and management experience. We specialize in the development and production of high-quality, energy-efficient LED fixtures for a diverse range of applications.
Adiding Lights: Efficient. Bright. Sustainable.
2-year Replacement Support!
Adiding Bright LED Lights
Solar Motion Lights Outdoor
Solar Flood Lights Outdoor
Solar Powered Outdoor Lights
Solar Security Light
Magnetic Work Light
Rechargeable Work Light
Customer First!
Adiding puts customers in the first place from beginning to end. Adiding takes full responsibility for its customers with a professional service team working around the clock to solve any problems during the course of pre-sales, on-purchase, and after-sales. Customer idea is always the constant motivation to keep Adiding moving forward.