Your Browsing History
- Free 30-day Returns
$8.99

Meet Your Seller
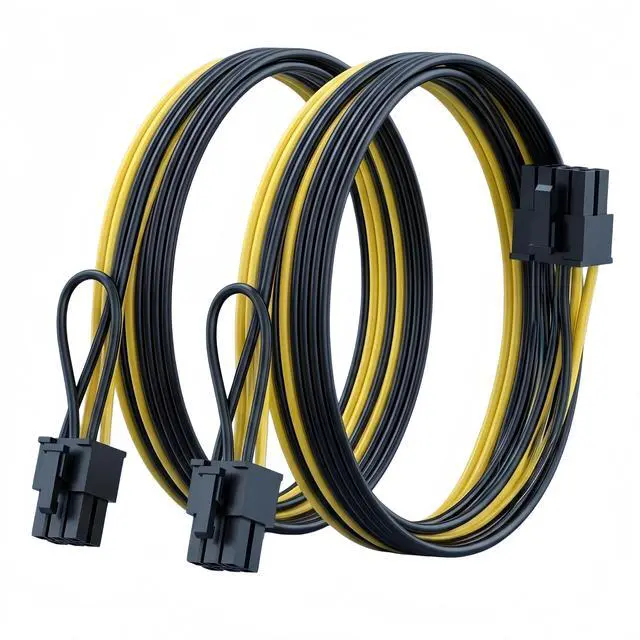


2-Pack PCIe 6 Pin to 8 Pin (6+2) Power Cable 20Inch GPU Converter for Cooler Master Thermaltake PSU with Standard 6-Pin Port, for ASUS ASRock Gigabyte Radeon Sapphire NVIDIA Tesla Graphics Card
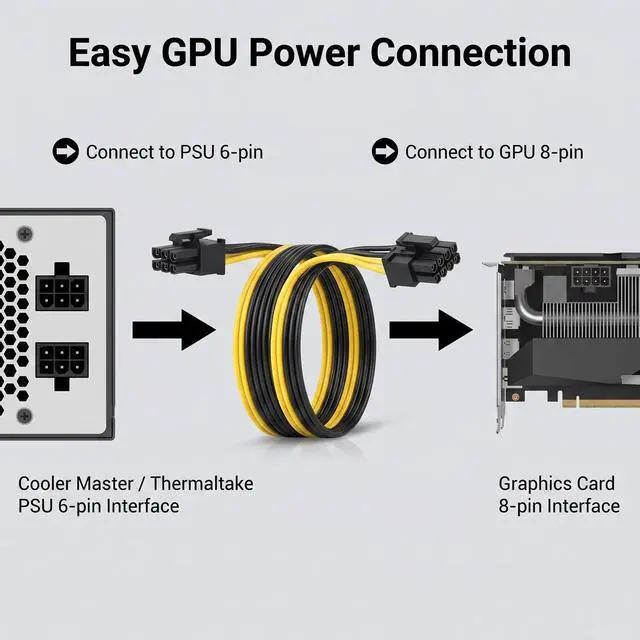
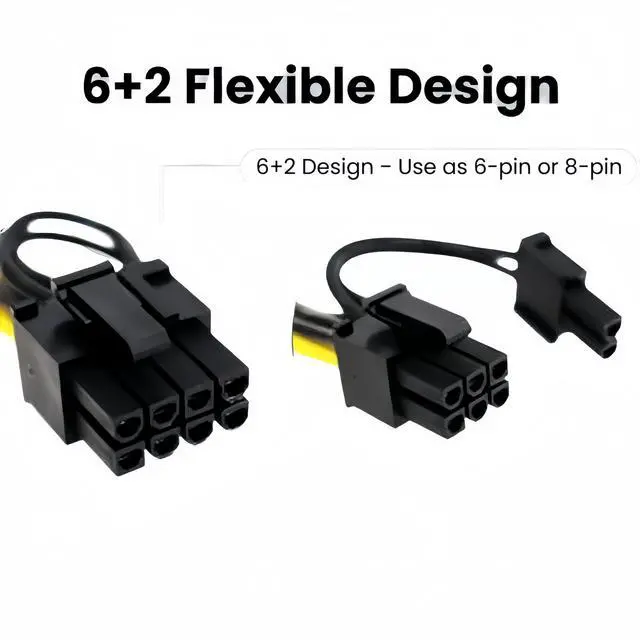
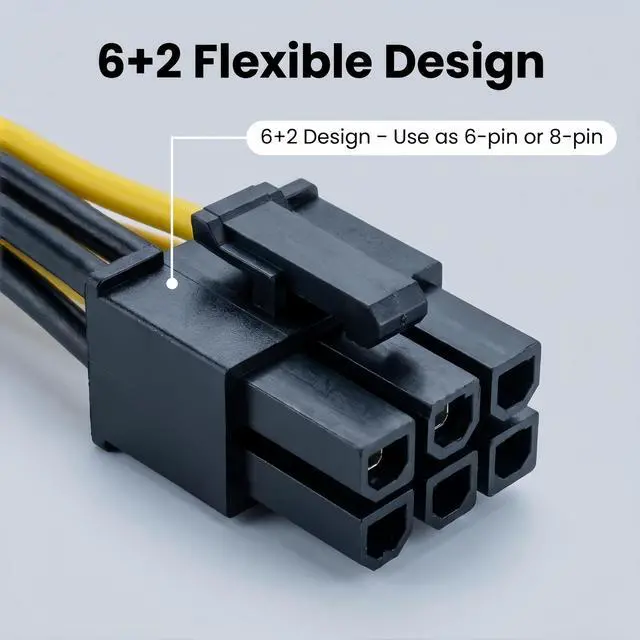
- CONVERT 6-PIN TO 8-PIN (6+2) POWER YOUR GPU WITHOUT UPGRADING PSU Transform a standard 6-pin PCIe power output from your power supply into an 8-pin (6+2) PCIe male connector for your graphics card. Perfect for powering modern GPUs that require 8-pin power connections when your PSU only has 6-pin ports available. The 6+2 design allows you to use it as either a 6-pin or 8-pin connector by sliding the extra 2-pin section on or off.
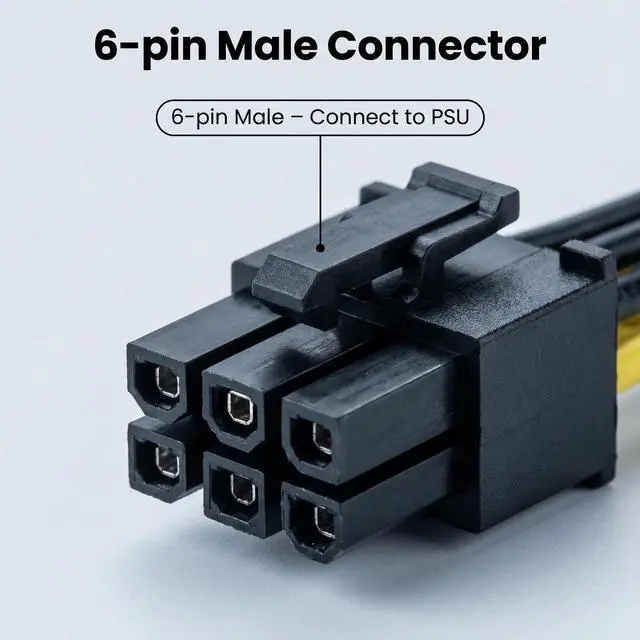
- COMPATIBLE WITH COOLER MASTER & THERMALTAKE PSUs PLUS UNIVERSAL 6-PIN STANDARD Specifically tested and verified to work with Cooler Master and Thermaltake power supplies that feature standard 6-pin PCIe ports. Also compatible with any other power supply brand that uses the industry-standard 6-pin PCIe connector pinout (e.g., EVGA, Corsair, Seasonic, Antec but please verify your PSUs pinout before use). The 6-pin male connector follows the standard PCIe specification.
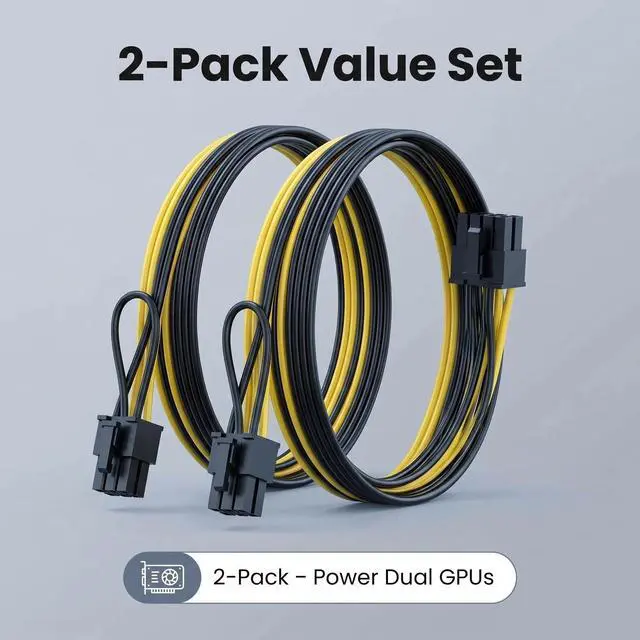
- 2-PACK INCLUDED POWER MULTIPLE GPUs OR DUAL-PORT CARDS Each kit includes two (2) adapter cables, allowing you to power two separate graphics cards or a single high-end GPU that requires dual 8-pin power connections. A cost-effective solution without upgrading your entire power supply.
- PREMIUM 18AWG CONSTRUCTION SAFE & RELIABLE POWER DELIVERY Built with high-quality 18AWG tinned copper wire for stable power delivery and minimal voltage drop. Each cable is factory-tested to ensure reliable performance under load. The 20-inch (51cm) length.
+
+
Overview
Specs
Reviews
Any questions? Our AI beta will help you find out quickly.
Try me now
About this item
Specifications
- CONVERT 6-PIN TO 8-PIN (6+2) POWER YOUR GPU WITHOUT UPGRADING PSU Transform a standard 6-pin PCIe power output from your power supply into an 8-pin (6+2) PCIe male connector for your graphics card. Perfect for powering modern GPUs that require 8-pin power connections when your PSU only has 6-pin ports available. The 6+2 design allows you to use it as either a 6-pin or 8-pin connector by sliding the extra 2-pin section on or off.
- COMPATIBLE WITH COOLER MASTER & THERMALTAKE PSUs PLUS UNIVERSAL 6-PIN STANDARD Specifically tested and verified to work with Cooler Master and Thermaltake power supplies that feature standard 6-pin PCIe ports. Also compatible with any other power supply brand that uses the industry-standard 6-pin PCIe connector pinout (e.g., EVGA, Corsair, Seasonic, Antec but please verify your PSUs pinout before use). The 6-pin male connector follows the standard PCIe specification.
- 2-PACK INCLUDED POWER MULTIPLE GPUs OR DUAL-PORT CARDS Each kit includes two (2) adapter cables, allowing you to power two separate graphics cards or a single high-end GPU that requires dual 8-pin power connections. A cost-effective solution without upgrading your entire power supply.
- PREMIUM 18AWG CONSTRUCTION SAFE & RELIABLE POWER DELIVERY Built with high-quality 18AWG tinned copper wire for stable power delivery and minimal voltage drop. Each cable is factory-tested to ensure reliable performance under load. The 20-inch (51cm) length provides ample reach for routing inside mid-tower and full-tower cases.
- UNIVERSAL GPU COMPATIBILITY WORKS WITH WIDE RANGE OF GRAPHICS CARDS The 8-pin (6+2) male end works with graphics cards from all major manufacturers, including: ASUS, ASRock, Gigabyte Gaming and workstation GPUs Radeon, Sapphire AMD-based graphics cards NVIDIA Tesla Data center and compute GPUs NVIDIA RTX / GTX series, AMD RX series
- OPTIMAL 20-INCH (51CM) CABLE LENGTH Total length of 20 inches (51cm) provides enough reach for routing from your PSU to the graphics card with slack for clean cable management, without excessive excess that clutters your case.
- CRITICAL INSTALLATION & SAFETY WARNINGS Power Budget Warning: This adapter does not create additional power it shares power from the source 6-pin connector. Ensure your PSU has sufficient total wattage for your GPU. Secure Connections: Always push connectors firmly until they click into place. Loose connections can cause overheating or component damage. Do NOT reverse the connection: The 6-pin male end must be plugged into the PSUs PCIe cable, and the 8-pin (6+2) end must be plugged into the graphics card. The two ends are not interchangeable.
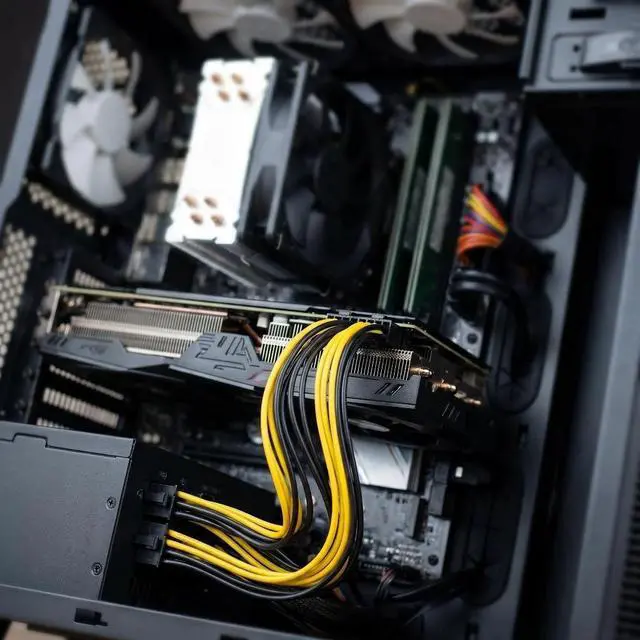
Does your power supply have unused 6-pin PCIe ports, but your new graphics card requires 8-pin power connectors? This 2-Pack PCIe 6 Pin to 8 Pin (6+2) Adapter Cable is the simple, cost-effective solution.
Instead of buying a new power supply, simply connect these adapter cables to your existing 6-pin PCIe ports and power your modern GPU with confidence.
Specifications
| Cooler Master | Compatible (with standard 6-pin PCIe port) |
| Thermaltake | Compatible (with standard 6-pin PCIe port) |
| Other PSUs | Check pinout Most follow the standard 6-pin PCIe, but verify before use |
| Connector A (PSU Side) | 1x PCIe 6-pin Male |
| Connector B (GPU Side) | 1x PCIe 8-pin (6+2) Male |
| Cable Length | 20 inches / 51 cm (including connectors) |
| Wire Gauge | 18AWG Tinned Copper |
| Maximum Power | 150W (shared from 6-pin source, which is rated for 75W check your PSU) |
| Quantity | 2 cables per pack |
| Compatible GPUs | ASUS, ASRock, Gigabyte, Radeon, Sapphire, NVIDIA Tesla, and all standard GPUs |
*The 6-pin PCIe connector follows a standard pinout (12V, 12V, 12V, GND, GND, GND). Most major brands (EVGA, Corsair, Seasonic, Antec) adhere to this standard, but always verify your PSUs documentation before use.*
The 8-pin (6+2) output works with virtually all graphics cards that require 6-pin or 8-pin power:
NVIDIA Series:
- RTX 40 Series: 4060, 4070, 4080, 4090
- RTX 30 Series: 3060, 3070, 3080, 3090
- RTX 20 Series, GTX 16/10 Series
- Tesla Series: Tesla K80, M40, M60, P40, P100, V100, T4, A100 (with appropriate power adapters)
AMD Series:
- RX 7000 Series: 7600, 7700, 7800, 7900
- RX 6000 Series: 6600, 6700, 6800, 6900
- RX 5000/500 Series
Brand Compatibility:Learn more about the Detailed Specifications
First Listed on Newegg March 24, 2026
Warranty & Returns
Warranty, Returns, And Additional Information
Warranty
- Please contact the Seller directly for warranty information. Warranty information may also be found on the Manufacturer's website.
- CONTACT
Return Policies
- Return for refund within: 30 days
- Return for replacement within: 30 days
- This item is covered by lilila-reeUS Return Policy
Manufacturer Contact Info
- For a directory of all our manufacturers, please click below.
- Manufacturers Directory
LOADING...