

- Free 30-day Returns
Meet Your Seller
PrimoChill Basic 14mm PETG Kit
- All in One Kit Designed/Tested to Work Together with Zero Issues
- Superior Strength to Acrylic Tubing
- Environmentally Responsible, Safe, and Non Toxic Product
- Trusted/Experienced Brand. PrimoChill
Any questions? Our AI beta will help you find out quickly.
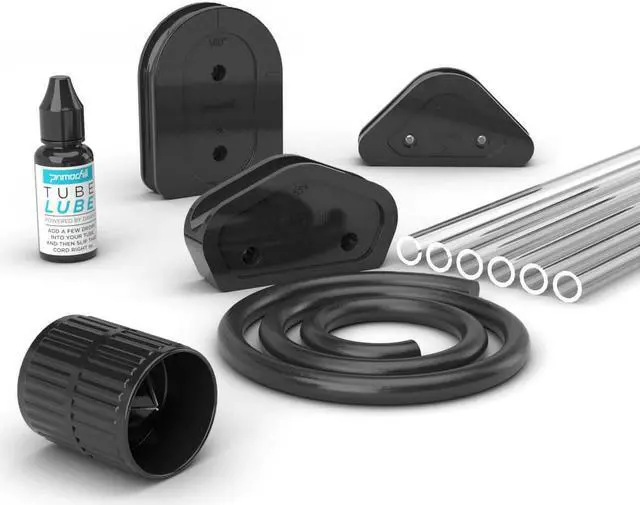
PrimoChill is making PETG even easier to work with. Using our basic kit you have the PETG required for any system and some basic tools to get started. The Reamer/Deburring Tool is provided to clean up the ends of your tube after cutting them to length. This chamfer finish will clean up any burrs and allow for a smoother finish. The combination of Tube Lube and bending insert are included to use in conjunction with the provided 45/90/180 Degree Water Cooling Bending Set. This combo allows you to creates bends of any angle with precision using the heat gun of your choice.
KEY_TAB
Features
- All in One Kit Designed/Tested to Work Together with Zero Issues
- Trusted/Experienced Brand. PrimoChill
- Superior Strength to Acrylic Tubing
- Thicker Wall for Safer Operation
- Environmentally Responsible, Safe, and Non Toxic Product
Specifications
- PETG Inner Diameter: 10mm
- PETG Outer Diameter: 14mm
- PETG Wall Thickness : 2mm
- PETG Length: 30in.
Compatibility
- Fittings:14mm OD Rigid Fittings
Parts Included
- 6 Pieces of 30 inch PETG tube
- 14mm OD 45/90/180 Degree Water Cooling Bending Set
- Reamer/Deburring Tool
- 10mm Bending Insert
- Tube Lube
Warnings
With the use of different components, materials, fluids, and flow rates, results may vary with the appearance of your tubing. Rigid Acrylic Tube is designed to work with a large variety of cooling components, however the use of alcohols, Ethylene Glycol and as well as any other harmful chemicals is strictly prohibited and will void your warranty.
Not responsible for any damage caused by or when using this product. Please use at your own risk.
Installation
PLEASE NOTE: When using a bending insert with PETG, remember it is meant to have a tight fit. If it is loose, the rigid tube will collapse, kink, form air pockets and flat spots when heated. The tighter the fit, the better the result. This process requires patience, but will become easier the more you practice.
The bending insert requires some stretching and lubricating to get it in the rigid tube. Steps to success are below:
1. Stretch the bending insert. Remove any excess that isnt stretched.
2. Ream the rigid tube with the reamer first for best results. This will ensure a clean opening for easier insertion.
3. Lubricate by applying several drops of Tube Lube on the bending insert itself and then place several more drops into the rigid tube.
4. Work the bending insert into the rigid tube. The more you use the insert, the easier this process will become.
Warranty & Returns
Warranty, Returns, And Additional Information
Warranty
- Please contact the Seller directly for warranty information. Warranty information may also be found on the Manufacturer's website.
- CONTACT
Return Policies
- Return for refund within: 30 days
- Return for replacement within: 30 days
- This item is covered by Tyler Direct Return Policy
Manufacturer Contact Info
- For a directory of all our manufacturers, please click below.
- Manufacturers Directory