


Speedball Intermediate Screen Printing Kit

Bring Prints to Life
This kit features all you need to get started with the 'Drawing Fluid & Screen Filler' and 'Photo Emulsion' methods of screen printing! Detailed instructions are included with every kit.
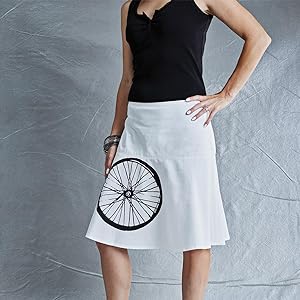
Turn Artwork Into Fashion
Using the Drawing Fluid & Screen Filler method is ideal for hand-drawn and painterly imagery, which offers great detail without the need for exposure.

Express Yourself Without Limits
The Photo Emulsion technique allows artists to transform any black and white design into a custom screen-printed project. Its best for high fidelity and detail.
Drawing Fluid & Screen Filler Method
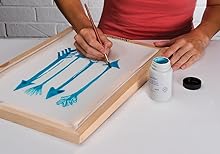
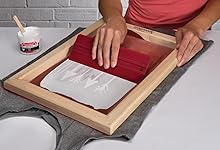
Step 1: Draw Your Image
You can sketch your image out on paper or draw directly onto the screen. Anything drawn with fluid will become your printed image.

Step 2: Coat Your Screen
The purpose of screen filler is to coat all areas of the screen which you do not want to print.
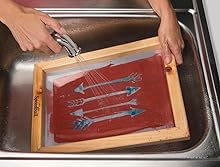
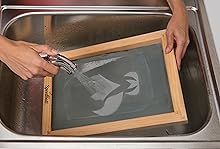
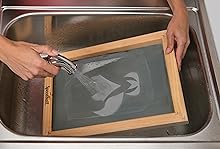
Step 3: Wash Drawing Fluid
Rinse your screen with cold water to wash away the blue drawing fluid revealing your desired image.
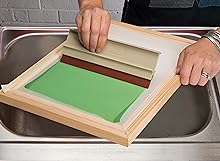
Step 4: Creating Your Print
Oh boy, oh boy, now we get to print! Pulling your squeegee is the heart of the craft of screen printing.
Photo Emulsion Method
Mixing Emulsion & Coating
Photo Emulsion is a 2-step process where the emulsion has to be 'activated' by adding sensitizer. The goal; coat the screen to thoroughly permeate the mesh without over saturating.

Artwork & Exposure
The most effective artwork has a clear distinction between the black image and the white background. A clean and crisp exposure requires even and accurate pressure between the screen and your artwork.
Wash Out Stencil
Using a spray nozzle or hose, apply a forceful spray of water to both sides of your screen until all unwanted emulsion is gone and you can easily see your stencil/image.
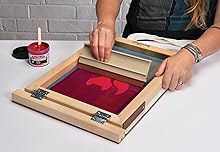
Creating Your Print
The time has come! After all your hard work, it's time to see your project come to life. Place ink at the top of the screen and pull your squeegee evenly to create your print.
 Beginner Paper Stencil Kit | 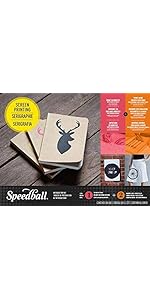 Introductory Kit |  Essential Tools Kit |  Intermediate Kit | 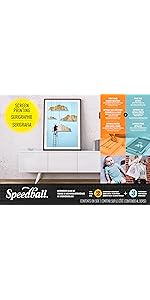 Intermediate Deluxe Kit |  Advanced All-In-One Kit | |
|---|---|---|---|---|---|---|
| Customer Reviews | — | — | — | — | — | — |
| Price | — | — | — | — | — | — |
| Level 1: Cut Paper Stencil | ? | ? | no data | no data | no data | no data |
| Level 2: Drawing Fluid & Screen Filler Method | no data | ? | ? | ? | ? | no data |
| Level 3: Photo Emulsion | no data | no data | ? | ? | ? | ? |
| Fabric Ink Quantity | 1 | 2 | no data | 2 | 2 | 4 |
| Acrylic Ink Quantity | no data | 1 | no data | no data | 4 | no data |
| Light Source Included | no data | no data | no data | no data | no data | ? |
Speedball Intermediate Screen Printing Kit
Bring Prints to Life
This kit features all you need to get started with the 'Drawing Fluid & Screen Filler' and 'Photo Emulsion' methods of screen printing! Detailed instructions are included with every kit.

Turn Artwork Into Fashion
Using the Drawing Fluid & Screen Filler method is ideal for hand-drawn and painterly imagery, which offers great detail without the need for exposure.

Express Yourself Without Limits
The Photo Emulsion technique allows artists to transform any black and white design into a custom screen-printed project. Its best for high fidelity and detail.
Drawing Fluid & Screen Filler Method
Step 1: Draw Your Image
You can sketch your image out on paper or draw directly onto the screen. Anything drawn with fluid will become your printed image.
Step 2: Coat Your Screen
The purpose of screen filler is to coat all areas of the screen which you do not want to print.
Step 3: Wash Drawing Fluid
Rinse your screen with cold water to wash away the blue drawing fluid revealing your desired image.

Step 4: Creating Your Print
Oh boy, oh boy, now we get to print! Pulling your squeegee is the heart of the craft of screen printing.
Photo Emulsion Method
Mixing Emulsion & Coating
Photo Emulsion is a 2-step process where the emulsion has to be 'activated' by adding sensitizer. The goal; coat the screen to thoroughly permeate the mesh without over saturating.
Artwork & Exposure
The most effective artwork has a clear distinction between the black image and the white background. A clean and crisp exposure requires even and accurate pressure between the screen and your artwork.
Wash Out Stencil
Using a spray nozzle or hose, apply a forceful spray of water to both sides of your screen until all unwanted emulsion is gone and you can easily see your stencil/image.

Creating Your Print
The time has come! After all your hard work, it's time to see your project come to life. Place ink at the top of the screen and pull your squeegee evenly to create your print.
 Beginner Paper Stencil Kit |  Introductory Kit | Essential Tools Kit | Intermediate Kit |  Intermediate Deluxe Kit | Advanced All-In-One Kit | |
|---|---|---|---|---|---|---|
| Customer Reviews | — | — | — | — | — | — |
| Price | — | — | — | — | — | — |
| Level 1: Cut Paper Stencil | ? | ? | no data | no data | no data | no data |
| Level 2: Drawing Fluid & Screen Filler Method | no data | ? | ? | ? | ? | no data |
| Level 3: Photo Emulsion | no data | no data | ? | ? | ? | ? |
| Fabric Ink Quantity | 1 | 2 | no data | 2 | 2 | 4 |
| Acrylic Ink Quantity | no data | 1 | no data | no data | 4 | no data |
| Light Source Included | no data | no data | no data | no data | no data | ? |