
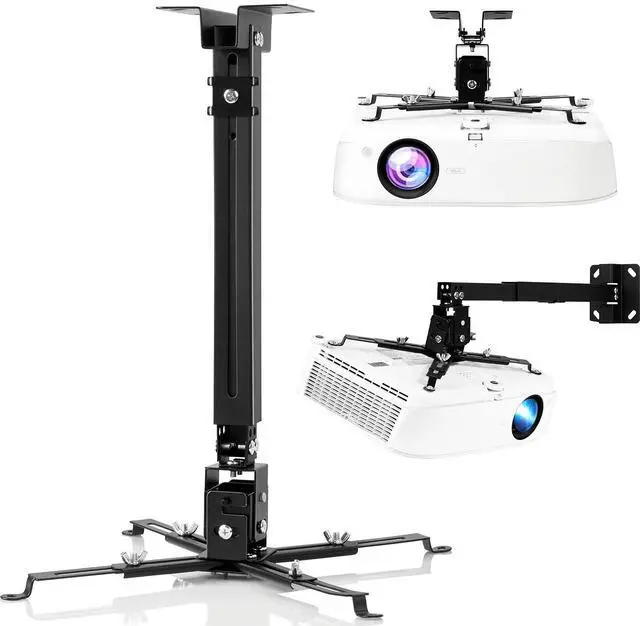
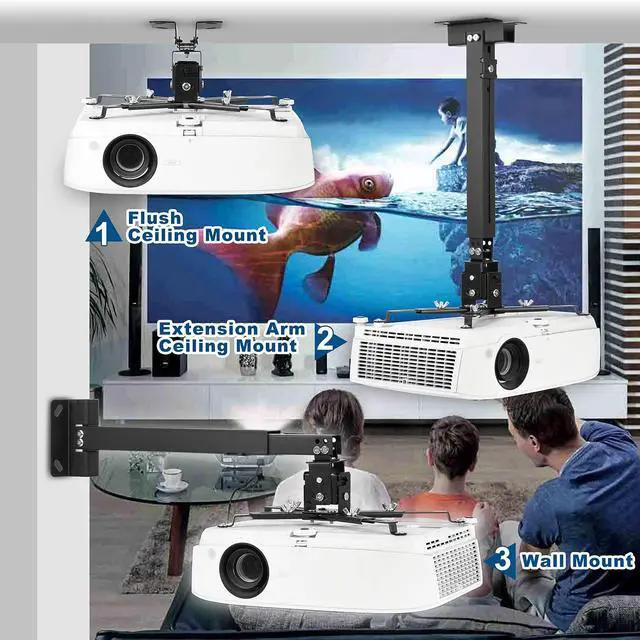


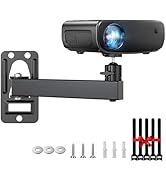
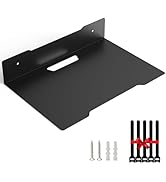
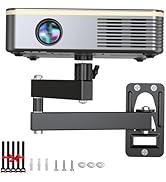
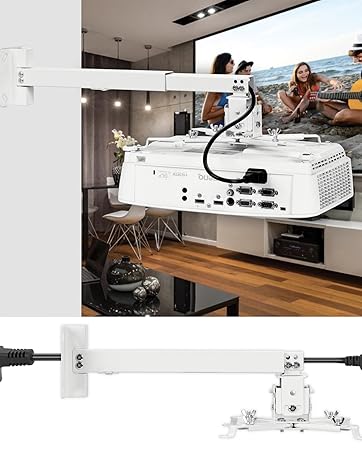
DAWASAPAT Projector Mount 3-In-1 Retractable Projector Ceiling Mount Wall Mount Bracket with Extendable Pole


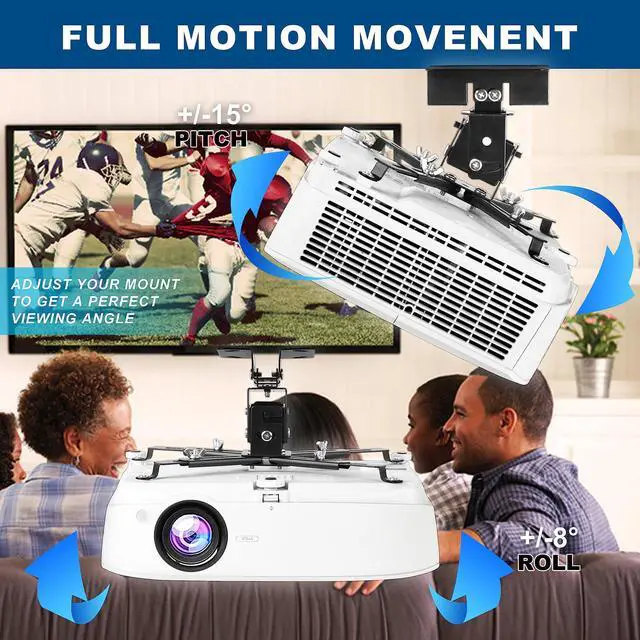
Sturdy Connection

Angle Adjustable

Great Hardwares

Will this projector mount fitting for me? Please check the following detail:
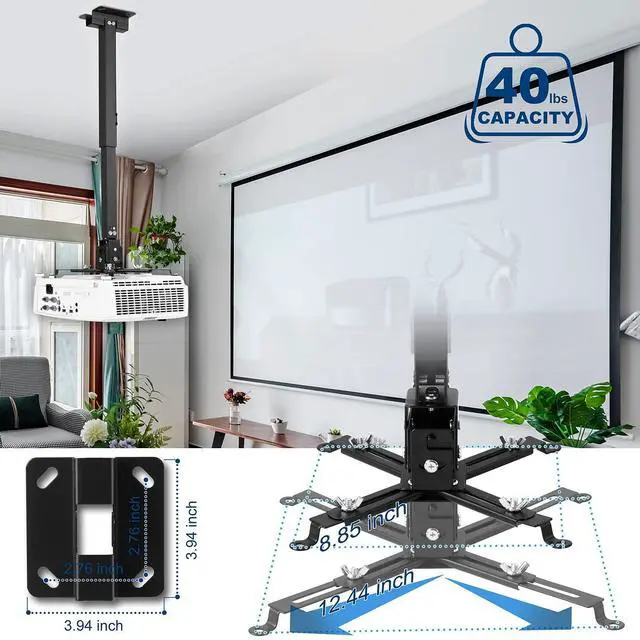
- Our universal extending ceiling projector mount fits the majority of projectors on the market. Check the mounting holes on the top of your projector and measure the distance between each hole. Your projector mounting hole must be between 8.85" -12.44”.
- Please check the wood studs on your ceiling. This mount can also be used on concrete and brick ceiling. NOTE: does NOT support vaulted ceiling and drywall.
- Please check the weight of your projector, the projector weight should be less than 40 lbs.
- Notice!!!
- The projector mount must be installed on a level ceiling or wall but not an arched one. If it is not installed correctly, it may fall and cause property damage or personal injury.
- This product contains small accessories. If accidentally swallowed, there is a danger of suffocation. Please keep these accessories away from children.
About the pack list and installation
- PLEASE don't get overwhelmed by the number of parts.
- Go ahead and identify these parts:
- Mounting Plate/Extension Arm/Bracket/Pan & Tilt Swivel/Expansion boltsx4/M5x11 bolts/M4x4 bolts/M3x4 bolts/Washerx4/Small Platex2
- Attach Projector to Bracket:
- Through this whole part, keep in mind which way the projector will point. Identify the mounting bolt holes on your projector. If only has 3, just only use 3 of the parts.
- Slip the bracket into the primary arms and roughly line them up with the projector's holes. If you need to, loosen the M5 bolts to allow the primary arms to pivot. Insert the M5 through the bottom of the extender arms and screw the top twist head onto it, leave them loose. Now attach the extender arms to the projector. Used a washer between the extender arm and projector but it doesn't really matter either way. You want the bolts going into the projector tight. However, leave the other bolts semi-loose– manipulating these arms is how you'll rotate your projector on the horizontal axis.
- Now, hook the metal square bit with rods into the bracket. Screw in the M5 bolts in the holes on each of the sides– loosening, repositioning, and tightening these is how you'll tilt your projector's front/back or left/right vertically. Leave them semi loose for now.
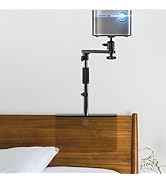
- Extension Arm
- If you want to slip your power cable and HDMI (or whatever) cords through the arm, now's the time. Recombine the parts to have your 2-piece extension bar. Attach the extension bar to the ceiling mount with (four) of the M5.
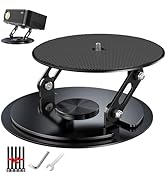
- Ceiling mount
- You should now have two main pieces: (1) a projector with the bracket and bottom mount on it, and (2) the ceiling mount with the extension bar attached. Use a stud detector (if you have wooden joists/beams) to find the place where you want to screw in the projector. If you have steel/metal joists/beams, don't drill into those [if you don't know which type you have, google to see how to find out); instead you'll be doing this into the drywall ceiling, but try to keep it close to a joist for a slightly better degree of strength. Place the mount on the ceiling and mark the center of the 4 holes as best you can to have a template for your drilling. Get a drill and make appropriate holes. Just don't put a naked screw into dry wall– if you strip the drywall during installation, your projector could fall.
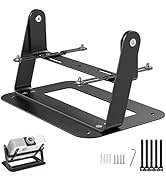
- Combine the parts and adjust the projection
- You can now attach your projector and bracket to the bottom of the extension bar with four more of the M5 screws.Plug it in and see how well the image lines up with your screen. Every time you manipulate the projector/bracket/etc. HOLD ONTO THE PART ABOVE IT, you don't want to put undue tension/stress on the ceiling mount.

DAWASAPAT
The Lighter Way To Enjoy Your Life

DAWASAPAT Projector Mount 3-In-1 Retractable Projector Ceiling Mount Wall Mount Bracket with Extendable Pole

Sturdy Connection
Angle Adjustable
Great Hardwares
Will this projector mount fitting for me? Please check the following detail:
- Our universal extending ceiling projector mount fits the majority of projectors on the market. Check the mounting holes on the top of your projector and measure the distance between each hole. Your projector mounting hole must be between 8.85" -12.44”.
- Please check the wood studs on your ceiling. This mount can also be used on concrete and brick ceiling. NOTE: does NOT support vaulted ceiling and drywall.
- Please check the weight of your projector, the projector weight should be less than 40 lbs.
- Notice!!!
- The projector mount must be installed on a level ceiling or wall but not an arched one. If it is not installed correctly, it may fall and cause property damage or personal injury.
- This product contains small accessories. If accidentally swallowed, there is a danger of suffocation. Please keep these accessories away from children.
About the pack list and installation
- PLEASE don't get overwhelmed by the number of parts.
- Go ahead and identify these parts:
- Mounting Plate/Extension Arm/Bracket/Pan & Tilt Swivel/Expansion boltsx4/M5x11 bolts/M4x4 bolts/M3x4 bolts/Washerx4/Small Platex2
- Attach Projector to Bracket:
- Through this whole part, keep in mind which way the projector will point. Identify the mounting bolt holes on your projector. If only has 3, just only use 3 of the parts.
- Slip the bracket into the primary arms and roughly line them up with the projector's holes. If you need to, loosen the M5 bolts to allow the primary arms to pivot. Insert the M5 through the bottom of the extender arms and screw the top twist head onto it, leave them loose. Now attach the extender arms to the projector. Used a washer between the extender arm and projector but it doesn't really matter either way. You want the bolts going into the projector tight. However, leave the other bolts semi-loose– manipulating these arms is how you'll rotate your projector on the horizontal axis.
- Now, hook the metal square bit with rods into the bracket. Screw in the M5 bolts in the holes on each of the sides– loosening, repositioning, and tightening these is how you'll tilt your projector's front/back or left/right vertically. Leave them semi loose for now.
- Extension Arm
- If you want to slip your power cable and HDMI (or whatever) cords through the arm, now's the time. Recombine the parts to have your 2-piece extension bar. Attach the extension bar to the ceiling mount with (four) of the M5.
- Ceiling mount
- You should now have two main pieces: (1) a projector with the bracket and bottom mount on it, and (2) the ceiling mount with the extension bar attached. Use a stud detector (if you have wooden joists/beams) to find the place where you want to screw in the projector. If you have steel/metal joists/beams, don't drill into those [if you don't know which type you have, google to see how to find out); instead you'll be doing this into the drywall ceiling, but try to keep it close to a joist for a slightly better degree of strength. Place the mount on the ceiling and mark the center of the 4 holes as best you can to have a template for your drilling. Get a drill and make appropriate holes. Just don't put a naked screw into dry wall– if you strip the drywall during installation, your projector could fall.
- Combine the parts and adjust the projection
- You can now attach your projector and bracket to the bottom of the extension bar with four more of the M5 screws.Plug it in and see how well the image lines up with your screen. Every time you manipulate the projector/bracket/etc. HOLD ONTO THE PART ABOVE IT, you don't want to put undue tension/stress on the ceiling mount.
DAWASAPAT
The Lighter Way To Enjoy Your Life

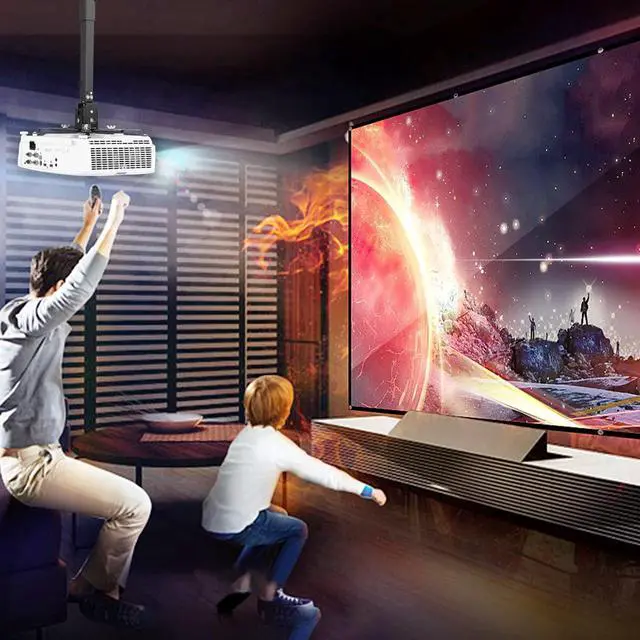
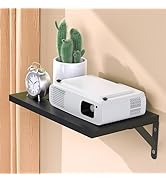
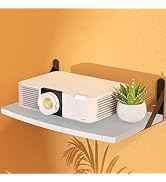
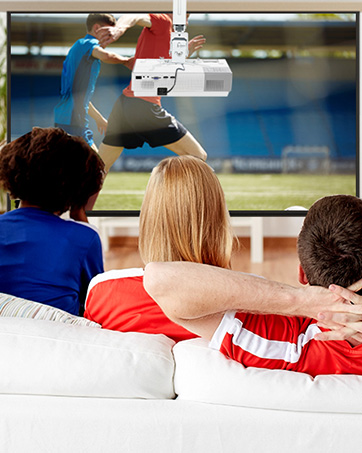
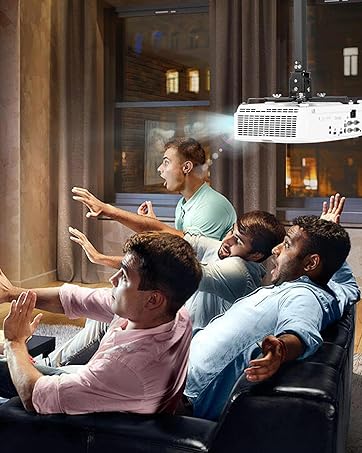
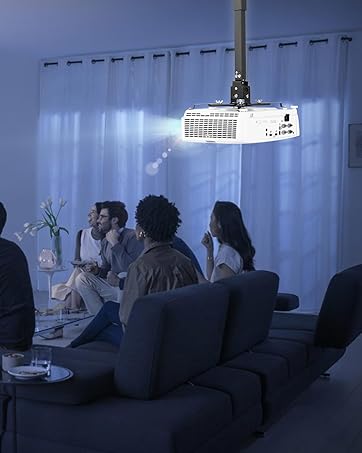
DAWASAPAT projector mount enhance your home theater experience dramatically, letting you position your project precisely where you want it, out of the way and unobtrusive so you can get lost in your favorite movies.


Better living all the time


Enhance theater experience


Any type you will like


