
![Main image of USB to HDMI Adapter [1080P Full HD, Built-in Driver] HDMI Adapter for Laptop to Monitor USB 3.0 to TV Screen Converter for MacOS/Windows 11/10/8.1/8/7 Computers Desktops PC MacBook](https://c1.neweggimages.com/productimage/nb640/C21AD2511160YJXMAAB.jpg)
![Alt view image 2 of 7 - USB to HDMI Adapter [1080P Full HD, Built-in Driver] HDMI Adapter for Laptop to Monitor USB 3.0 to TV Screen Converter for MacOS/Windows 11/10/8.1/8/7 Computers Desktops PC MacBook](https://c1.neweggimages.com/productimage/nb640/C21AD2511160YJXLD0D.jpg)
![Alt view image 3 of 7 - USB to HDMI Adapter [1080P Full HD, Built-in Driver] HDMI Adapter for Laptop to Monitor USB 3.0 to TV Screen Converter for MacOS/Windows 11/10/8.1/8/7 Computers Desktops PC MacBook](https://c1.neweggimages.com/productimage/nb640/C21AD2511160YJXNCB1.jpg)
![Alt view image 4 of 7 - USB to HDMI Adapter [1080P Full HD, Built-in Driver] HDMI Adapter for Laptop to Monitor USB 3.0 to TV Screen Converter for MacOS/Windows 11/10/8.1/8/7 Computers Desktops PC MacBook](https://c1.neweggimages.com/productimage/nb640/C21AD2511160YJXOB7A.jpg)
![Alt view image 5 of 7 - USB to HDMI Adapter [1080P Full HD, Built-in Driver] HDMI Adapter for Laptop to Monitor USB 3.0 to TV Screen Converter for MacOS/Windows 11/10/8.1/8/7 Computers Desktops PC MacBook](https://c1.neweggimages.com/productimage/nb640/C21AD2511160YJXPX84.jpg)
![Alt view image 6 of 7 - USB to HDMI Adapter [1080P Full HD, Built-in Driver] HDMI Adapter for Laptop to Monitor USB 3.0 to TV Screen Converter for MacOS/Windows 11/10/8.1/8/7 Computers Desktops PC MacBook](https://c1.neweggimages.com/productimage/nb640/C21AD2511160YJXWG23.jpg)
![Alt view image 7 of 7 - USB to HDMI Adapter [1080P Full HD, Built-in Driver] HDMI Adapter for Laptop to Monitor USB 3.0 to TV Screen Converter for MacOS/Windows 11/10/8.1/8/7 Computers Desktops PC MacBook](https://c1.neweggimages.com/productimage/nb640/C21AD2511160YJXW5B0.jpg)


30 days free re-tu-rn and 18 months wa-rr-an-ty!
- Herfair is committed to provided you with a simple and cost-effective way to connect between electronic devices, let you easy to use and manage your electronic peripherals.
- But if the product you received has any problem or it doesn't meet your expectation, please do not hesitate to reach out Herfair so that we can deal with it and give you a acceptable solution, thank you!
![Wii to HDMI Adapter Cable [1080P/720P] Wii HDMI Picture Quality Upscaler Resolution Enhancer Wii ...](//c1.neweggimages.com/sellingpilot/modules/product/a-plus/6b7a9b38fc3183f87235c55d2230280f5807aadf5157ad673789f83faa165884.jpg)
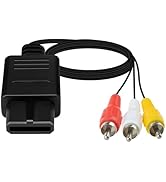
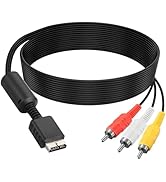
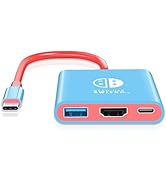
Video Games Cables & Adapters
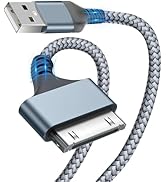
USB Powering Cables
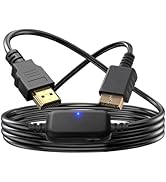
Small to Big Screen Adapters

![Herfair USB to HDMI Adapter [1080P Full HD] HDMI Splitter for Dual Monitors USB 3.0 to Extended D...](//c1.neweggimages.com/sellingpilot/modules/product/a-plus/f3ac4fa3c5bf74390b6616c464f697b710e8c50004557a8ff70eb3016b3e3d5c.jpg)
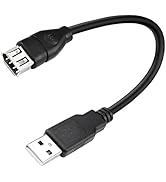
USB Hubs
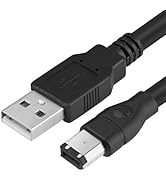
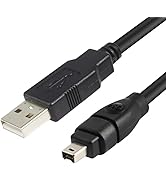
Firewire IEEE 1394 Cables
USB Adapters
How did we get our start?
Herfair started with a laptop in 2017, we have struggled from the initial ignorance to now, so far we have served more than one million customers and will continue to serve.
What problem are we solving?
We specialize in a wide range of accessories for electronics and aim to bring you the most useful products at the most reasonable cost so that your device could be used again.
What services or warranties do we have?
We provide a 180-day service for all our products, so if you have any issue or feel unsatisfied, you could just PM us for a satisfactory solution.

![Wii to HDMI Adapter Cable [1080P/720P] Wii HDMI Picture Quality Upscaler Resolution Enhancer Wii ...](http://c1.neweggimages.com/sellingpilot/modules/product/a-plus/6b7a9b38fc3183f87235c55d2230280f5807aadf5157ad673789f83faa165884.jpg)


![Herfair USB to HDMI Adapter [1080P Full HD] HDMI Splitter for Dual Monitors USB 3.0 to Extended D...](http://c1.neweggimages.com/sellingpilot/modules/product/a-plus/f3ac4fa3c5bf74390b6616c464f697b710e8c50004557a8ff70eb3016b3e3d5c.jpg)


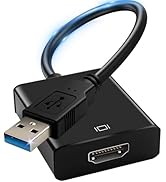
Before you placed an order for this USB 3.0 A to HDMI Adapter, please double check:
- This is a USB 3.0 A to HDMI Adapter, not USB-C or VGA or Displayport, you need to confirm what you need before ordering!
- This product must connected directly to your computer/laptop, not support thru any hub/dock/adapter or it will not work!
- This product requires driver to work and it had built-in, all you need to do is install the corresponding driver for your system!
- After successfully installed the corresponding driver for your system, you must reboot your system otherwise this product will still not work!
- This product will not work with ChromeBook, ChormeOS, Linux, Roku or any other stream media player and any other system devices that's not Windows/MacOS! You need to confirm your device before ordering!
If the product just doesn't work, please check:
- did you connected the product directly to your laptop/computer instead of thr any hub/dock/dongle?
- did you installed the built-in driver and restarted the computer?
- did the resolution of your monitor 1080P or have set to 1080P before connected?
- did you check the display source of monitor and change it to the corresponding connected HDMI?
If the product just cannot work after eliminating all 4 questions above, please reach to Herfair for full re-fu-nd!
USB 3.0 A male to HDMI female adapter requires Driver & has nothing to do with USB C / VGA / Displayport / Light-ening / DVI interface/port/connector!


- This USB A to HDMI Adapter is not compatible with Rokus, Media Player, Sound Bar and any other devices that's operating system is not within above picture!
- Also it is NOT a plug and play product, it must install the built-in driver to work! If you mind, please look somewhere else!

Connected thru hub, dock, station, dongle will not work!

How to install the driver and using this USB 3.0 to HDMI Adapter:

Step 1:
Connected this usb a to hdmi into your laptop, and then wait for about 3 seconds for the AutoPlay popped out on your laptop screen.

Step 2:
Click Open folder to view files on the AutoPlay page, and then you will see 1 folder and 2 driver files.
MacBook user please install the file named 'UsbDisplay_macOS_V3.0.8.35_20240604_1857.dmg' which is on the left side.
Windows users please install the file named 'WinUSBDisplay_Windows_V4.1.8.15'. (Windows 11 supported)

Step 3:
After installed the corresponding driver, your system will ask you to restart the computer, please select Yes to reboot your system otherwise this hdmi usb adapter will not work.

Step 4:
After reboot your computer, you can now use a HDMI cable (not included) to hook up the adapter to your monitor. The screen shows up the content and start to enjoy!
Tips: if the monitor does not show anything, please check if the display source has been correctly selected or lower the resolution into 1080P first then reconnect.
USB to HDMI Adapter for TV Comes with Manual, You Can Also Check Below Description As Well:
Manual for Windows:
- Connected the product to the USB 3.0 port of your computer, then you will hear a notice sound and see a new driver in your computer.
- Double click to open the new driver which named 'USBDISPLAY', you will see one folder and two files.
- Double click the file named 'WinUSBDisplay' and follow the lead to install the driver for Windows system.
- After successfully installed the driver, it will ask you to reboot the computer immediately or reboot later, save all your opening files and reboot. MUST DONE, OTHERWISE NOT WORKING!
- After rebooted, connected your HDMI screen and start to enjoy. Normally it will auto detects the resolution of your monitor and display the best, but if your computer pops out the resolution notice, you need to manually adjust it to 1920*1080 for the best effect.
Manual for MacOS:
- Connected the product to the USB 3.0 port of your computer, then you will see a 'Allow Accessory Connection' dialog box poped out, please click 'Allow'.
- After Allowed, you will see a 'USBDISPLAY' disk driver on your desktop, double click to open it and you will see see one folder and two files.
- Double click the file named 'UsbDisplay_macOS' and follow the lead to install the driver for MacOS system.
- After successfully installed the driver, reboot your system and then a 'Record Screen' dialog box will poped out.
- Click 'Open System Settings' button to enter the 'Screen Recording and System Recording' dialog box, click to turn on 'MacUsbDisplay' and then click the 'Modify Settings' button to complete the driver installation.
- Adjust the resolution parameters, open the 'System Preferences' in the 'Display' option to select the 1920*1080 resolution, display normally and start to enjoy.
Important Note: package only contains 1x USB A to HDMI Adapter and 1x Manual, NOT included hdmi cable or anything else!
(the User Manual is written in both English and Chinese, one side for Windows system and the other side for MacOS system. Any problem please reach to Herfair for solution!)
Before you placed an order for this USB 3.0 A to HDMI Adapter, please double check:
- This is a USB 3.0 A to HDMI Adapter, not USB-C or VGA or Displayport, you need to confirm what you need before ordering!
- This product must connected directly to your computer/laptop, not support thru any hub/dock/adapter or it will not work!
- This product requires driver to work and it had built-in, all you need to do is install the corresponding driver for your system!
- After successfully installed the corresponding driver for your system, you must reboot your system otherwise this product will still not work!
- This product will not work with ChromeBook, ChormeOS, Linux, Roku or any other stream media player and any other system devices that's not Windows/MacOS! You need to confirm your device before ordering!
If the product just doesn't work, please check:
- did you connected the product directly to your laptop/computer instead of thr any hub/dock/dongle?
- did you installed the built-in driver and restarted the computer?
- did the resolution of your monitor 1080P or have set to 1080P before connected?
- did you check the display source of monitor and change it to the corresponding connected HDMI?
If the product just cannot work after eliminating all 4 questions above, please reach to Herfair for full re-fu-nd!
USB 3.0 A male to HDMI female adapter requires Driver & has nothing to do with USB C / VGA / Displayport / Light-ening / DVI interface/port/connector!
- This USB A to HDMI Adapter is not compatible with Rokus, Media Player, Sound Bar and any other devices that's operating system is not within above picture!
- Also it is NOT a plug and play product, it must install the built-in driver to work! If you mind, please look somewhere else!
Connected thru hub, dock, station, dongle will not work!
How to install the driver and using this USB 3.0 to HDMI Adapter:
Step 1:
Connected this usb a to hdmi into your laptop, and then wait for about 3 seconds for the AutoPlay popped out on your laptop screen.
Step 2:
Click Open folder to view files on the AutoPlay page, and then you will see 1 folder and 2 driver files.
MacBook user please install the file named 'UsbDisplay_macOS_V3.0.8.35_20240604_1857.dmg' which is on the left side.
Windows users please install the file named 'WinUSBDisplay_Windows_V4.1.8.15'. (Windows 11 supported)
Step 3:
After installed the corresponding driver, your system will ask you to restart the computer, please select Yes to reboot your system otherwise this hdmi usb adapter will not work.
Step 4:
After reboot your computer, you can now use a HDMI cable (not included) to hook up the adapter to your monitor. The screen shows up the content and start to enjoy!
Tips: if the monitor does not show anything, please check if the display source has been correctly selected or lower the resolution into 1080P first then reconnect.
USB to HDMI Adapter for TV Comes with Manual, You Can Also Check Below Description As Well:
Manual for Windows:
- Connected the product to the USB 3.0 port of your computer, then you will hear a notice sound and see a new driver in your computer.
- Double click to open the new driver which named 'USBDISPLAY', you will see one folder and two files.
- Double click the file named 'WinUSBDisplay' and follow the lead to install the driver for Windows system.
- After successfully installed the driver, it will ask you to reboot the computer immediately or reboot later, save all your opening files and reboot. MUST DONE, OTHERWISE NOT WORKING!
- After rebooted, connected your HDMI screen and start to enjoy. Normally it will auto detects the resolution of your monitor and display the best, but if your computer pops out the resolution notice, you need to manually adjust it to 1920*1080 for the best effect.
Manual for MacOS:
- Connected the product to the USB 3.0 port of your computer, then you will see a 'Allow Accessory Connection' dialog box poped out, please click 'Allow'.
- After Allowed, you will see a 'USBDISPLAY' disk driver on your desktop, double click to open it and you will see see one folder and two files.
- Double click the file named 'UsbDisplay_macOS' and follow the lead to install the driver for MacOS system.
- After successfully installed the driver, reboot your system and then a 'Record Screen' dialog box will poped out.
- Click 'Open System Settings' button to enter the 'Screen Recording and System Recording' dialog box, click to turn on 'MacUsbDisplay' and then click the 'Modify Settings' button to complete the driver installation.
- Adjust the resolution parameters, open the 'System Preferences' in the 'Display' option to select the 1920*1080 resolution, display normally and start to enjoy.
Important Note: package only contains 1x USB A to HDMI Adapter and 1x Manual, NOT included hdmi cable or anything else!
(the User Manual is written in both English and Chinese, one side for Windows system and the other side for MacOS system. Any problem please reach to Herfair for solution!)
30 days free re-tu-rn and 18 months wa-rr-an-ty!
- Herfair is committed to provided you with a simple and cost-effective way to connect between electronic devices, let you easy to use and manage your electronic peripherals.
- But if the product you received has any problem or it doesn't meet your expectation, please do not hesitate to reach out Herfair so that we can deal with it and give you a acceptable solution, thank you!
Video Games Cables & Adapters
USB Powering Cables
Small to Big Screen Adapters
USB Hubs
Firewire IEEE 1394 Cables
USB Adapters
How did we get our start?
Herfair started with a laptop in 2017, we have struggled from the initial ignorance to now, so far we have served more than one million customers and will continue to serve.
What problem are we solving?
We specialize in a wide range of accessories for electronics and aim to bring you the most useful products at the most reasonable cost so that your device could be used again.
What services or warranties do we have?
We provide a 180-day service for all our products, so if you have any issue or feel unsatisfied, you could just PM us for a satisfactory solution.