
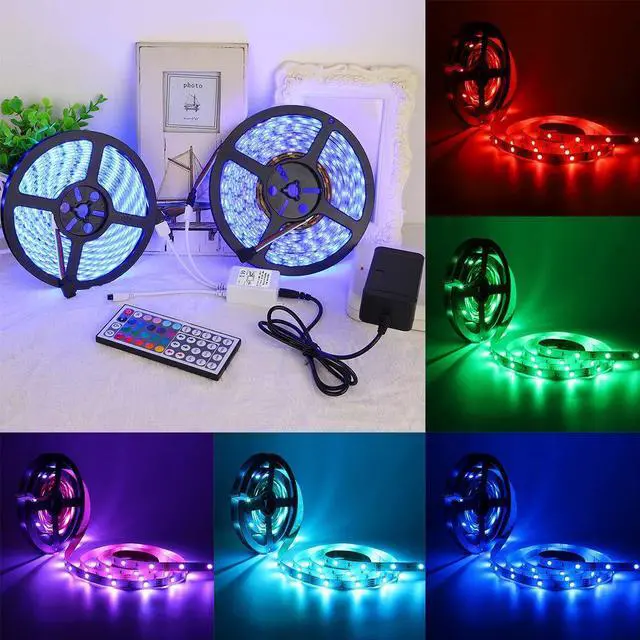


Multiple light colors
20 static light colors, adjustable light color depth and adjustable light brightness, multiple light dynamic change modes, DIY mode, very high playability.

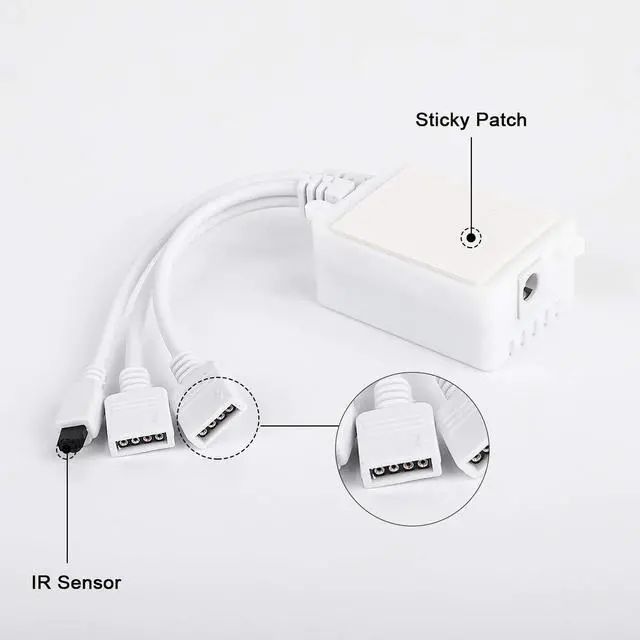
2 Connector
2 × 4Pin connection ports can connect two rolls of light belt at the same time to solve the requirement of decorative length.

Application
It can be used to connect SMD5050/3528 light strip, infrared remote control, enjoy the fun of wireless remote control of light strip.

Specification
- Voltage: DC12-24V
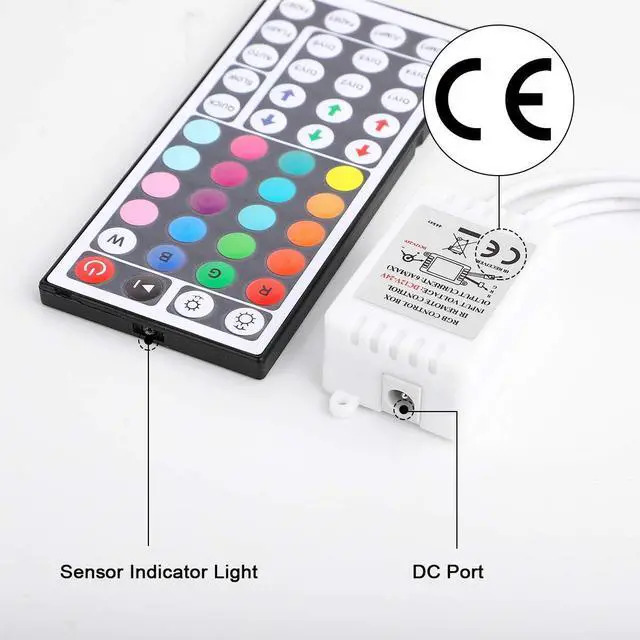
- Certification: CE
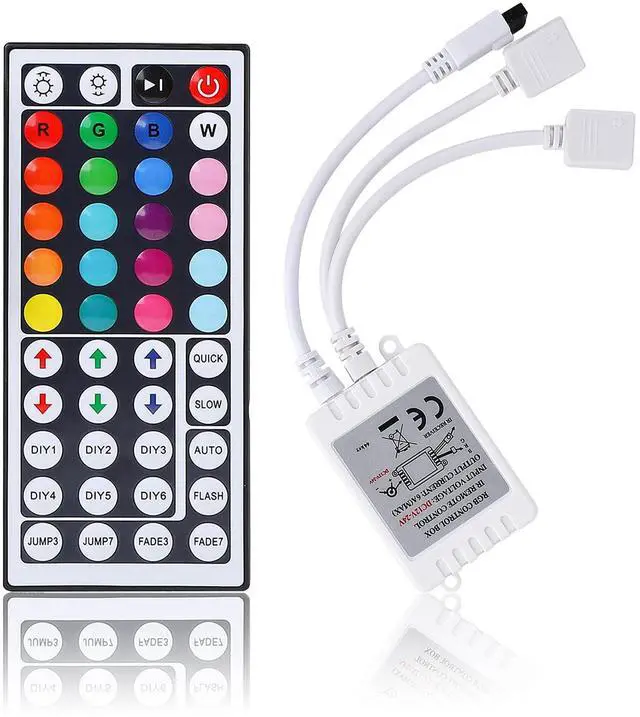
- Remote control: 44 keys
- Controller connector: 2
- Control method: wireless

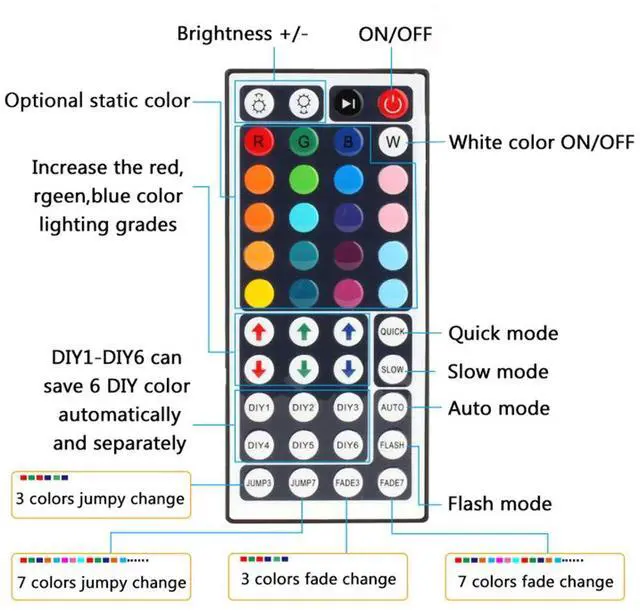
44-Key Controller DIY function setting steps
- Step 1: turn on the lights. Press one of the RGB buttons. For example, press red button if you want to DIY red color.
- Step 2: Press the DIY1 button (the lights will change to white color for the first time).
- Step 3: Press and hold (at least 5 seconds) green and blue down arrow buttons, the lights will start changing. If you need lighter red color, press and hold the red up button, the longer you hold, the lighter red color you have. You can also press green and blue down, the changing will be more clearly.
- Step 4: Keep the color you just set by pressing the DIY1 button again.
- Step 5: Repeat the steps above to set the rest of five DIYs.

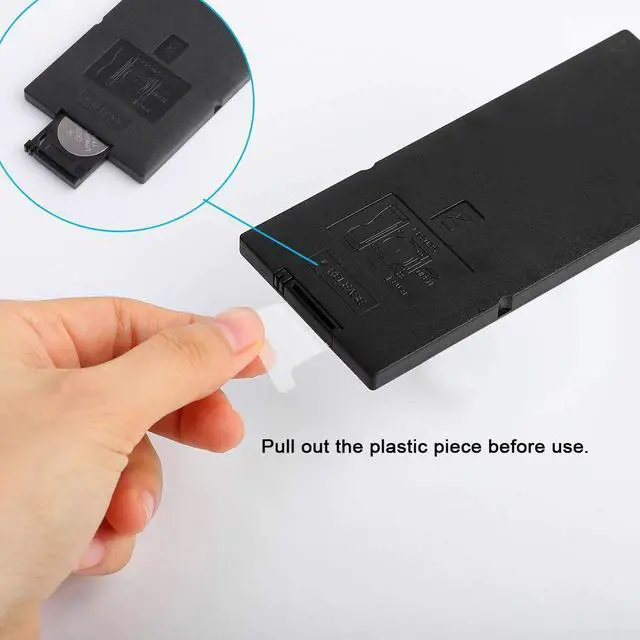
Tips
- If the buttons don't control the right colors, our controller can easily solve the problem.
- First, you can press the remote control switch button , turn off the light strip.
- Then press the "FADE7" button in the lower right corner, the light strip will flash. Then press the three keys R.G.B to adjust to the color you want and press the switch button to turn on the light strip, the buttons can control the correct color.
- If not, repeat the above steps until the button can control the correct color.
- There are 6 kinds of line sequence.

Package Including:
- 1 × 2*4Pin Connector LED Controller
- 1 × 44 Keys IR Remote Control
- 1 × Operation Instruction
 RGB LED Controller DC 12V 6A |  44 Key LED Controller |  2 pack led remote contril |  2-Port WiFi RGB LED Controller DC5-28V |  LED Strip Connector with 16.4FT Extension Cable | |
|---|---|---|---|---|---|
| Customer Reviews | — | — | — | — | — |
| Price | — no data | — no data | — | — no data | — no data |
Multiple light colors
20 static light colors, adjustable light color depth and adjustable light brightness, multiple light dynamic change modes, DIY mode, very high playability.
2 Connector
2 × 4Pin connection ports can connect two rolls of light belt at the same time to solve the requirement of decorative length.
Application
It can be used to connect SMD5050/3528 light strip, infrared remote control, enjoy the fun of wireless remote control of light strip.
Specification
- Voltage: DC12-24V
- Certification: CE
- Remote control: 44 keys
- Controller connector: 2
- Control method: wireless
44-Key Controller DIY function setting steps
- Step 1: turn on the lights. Press one of the RGB buttons. For example, press red button if you want to DIY red color.
- Step 2: Press the DIY1 button (the lights will change to white color for the first time).
- Step 3: Press and hold (at least 5 seconds) green and blue down arrow buttons, the lights will start changing. If you need lighter red color, press and hold the red up button, the longer you hold, the lighter red color you have. You can also press green and blue down, the changing will be more clearly.
- Step 4: Keep the color you just set by pressing the DIY1 button again.
- Step 5: Repeat the steps above to set the rest of five DIYs.
Tips
- If the buttons don't control the right colors, our controller can easily solve the problem.
- First, you can press the remote control switch button , turn off the light strip.
- Then press the "FADE7" button in the lower right corner, the light strip will flash. Then press the three keys R.G.B to adjust to the color you want and press the switch button to turn on the light strip, the buttons can control the correct color.
- If not, repeat the above steps until the button can control the correct color.
- There are 6 kinds of line sequence.
Package Including:
- 1 × 2*4Pin Connector LED Controller
- 1 × 44 Keys IR Remote Control
- 1 × Operation Instruction
RGB LED Controller DC 12V 6A | 44 Key LED Controller | 2 pack led remote contril | 2-Port WiFi RGB LED Controller DC5-28V | LED Strip Connector with 16.4FT Extension Cable | |
|---|---|---|---|---|---|
| Customer Reviews | — | — | — | — | — |
| Price | — no data | — no data | — | — no data | — no data |