


ZOZOMOTORS Heavy Duty Remote Battery Disconnect Switch ON/OFF

Specifications:
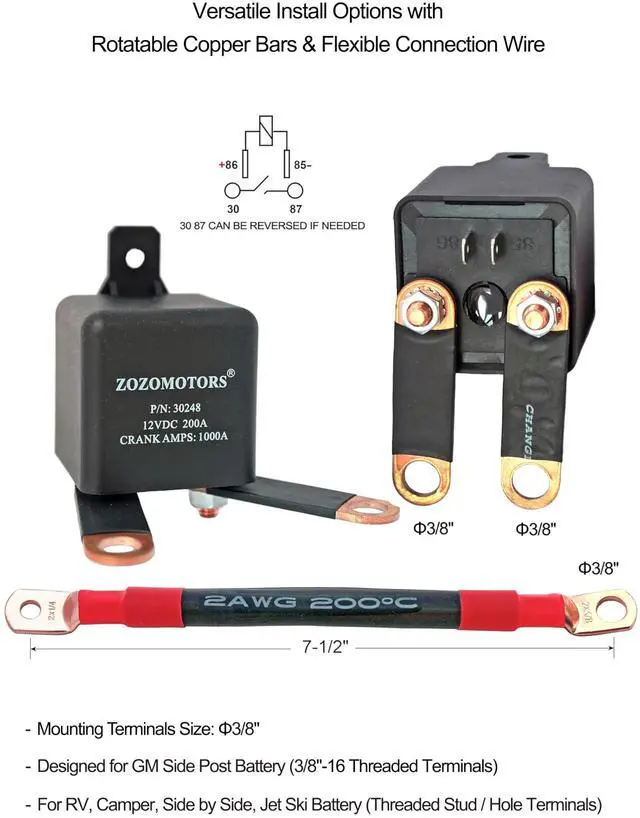
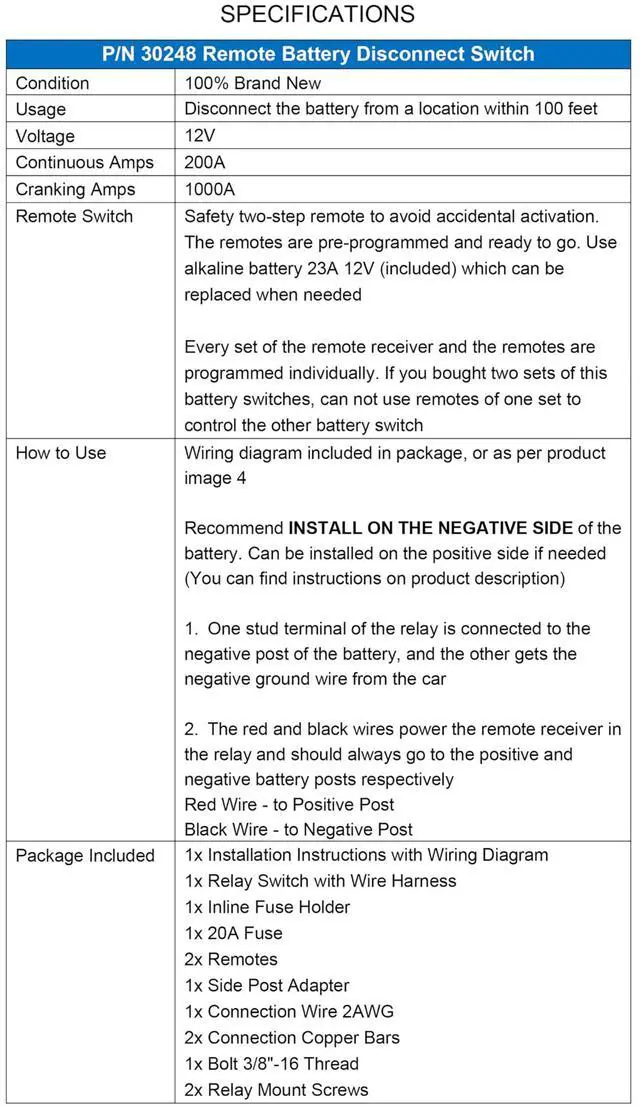
- Voltage: 12V
- Continuous Amps: 200A / Cranking Amps: 1000A (enough cranking amps to start your car in cold weather)
- Terminal Size: 3/8" Diameter Holes / Terminal Material: Copper
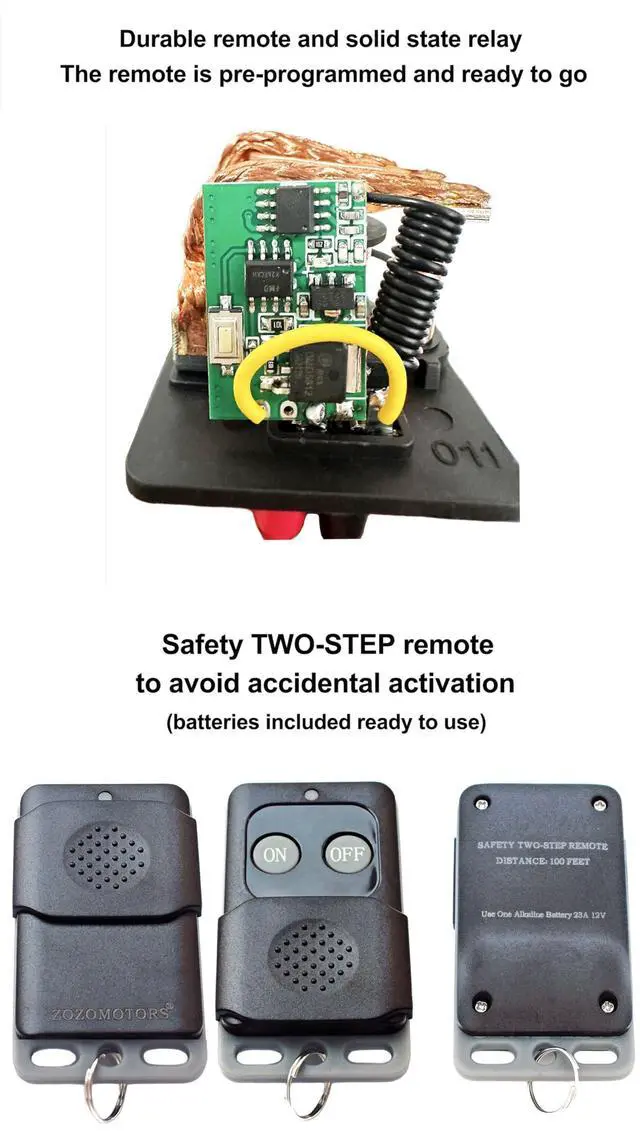
- Current draw of this switch (the remote receiver): 0.001 - 0.005A
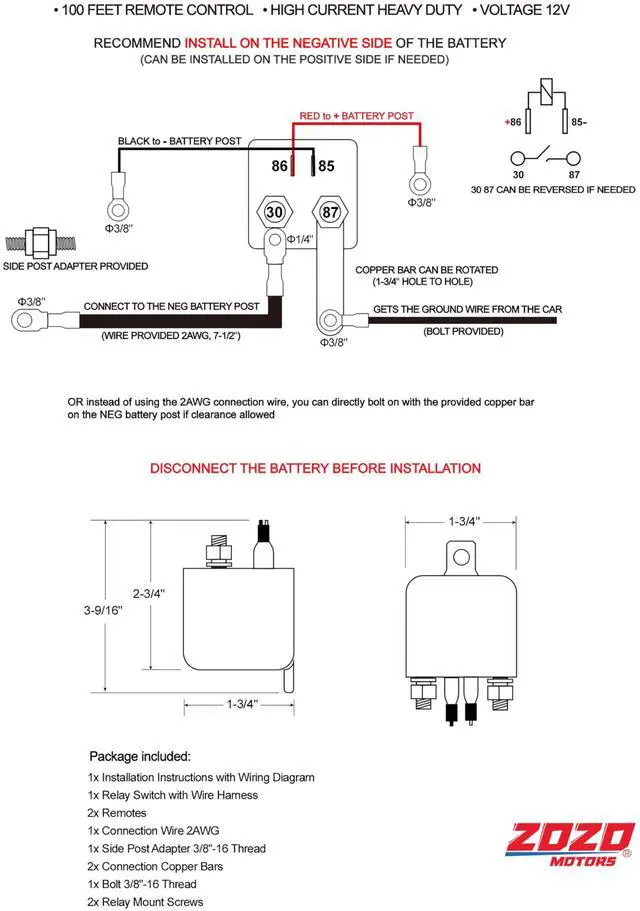
- How to use: Wiring diagram included in package, or as per product image 5
How many Amps do I need?
It’s critical to check a battery’s CCA (Cold Cranking Amps) rating. It measures a battery's ability to start an engine in cold climates
An engine will need about one amp per cubic inch of engine displacement. For most vehicles, this means between 250-600 cold-cranking amps, depending on the size of your engine. For most L4 V6 V8 engines, it needs about 600-770 cold-cranking amps. Larger or commercial vehicles may require more
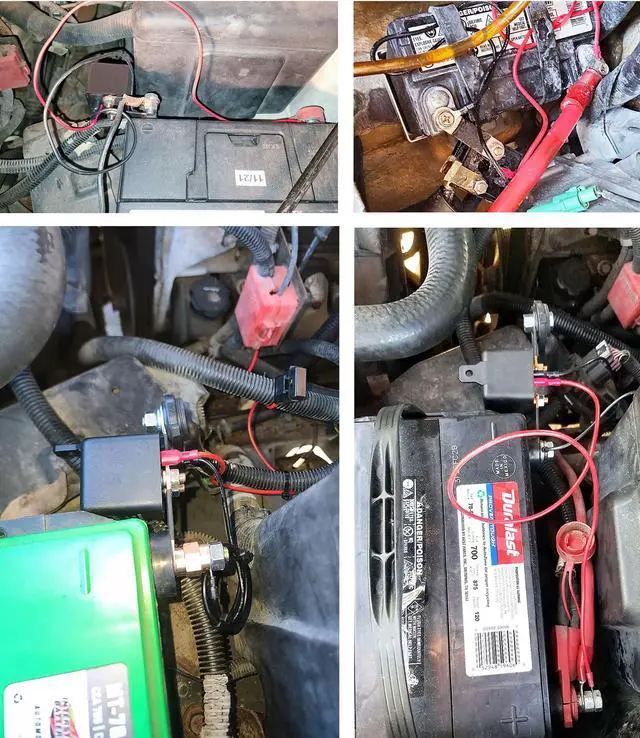
Recommend INSTALL ON THE NEGATIVE SIDE of the battery. Can be installed on the positive side if needed
1. One stud terminal of the relay is connected to the negative post of the battery, and the other gets the negative ground wire from the car
2. The red and black wires power the remote receiver in the relay and should always go to the positive and negative battery posts respectively
Red Wire - to Positive Post
Black Wire - to Negative Posts the negative wire from the car
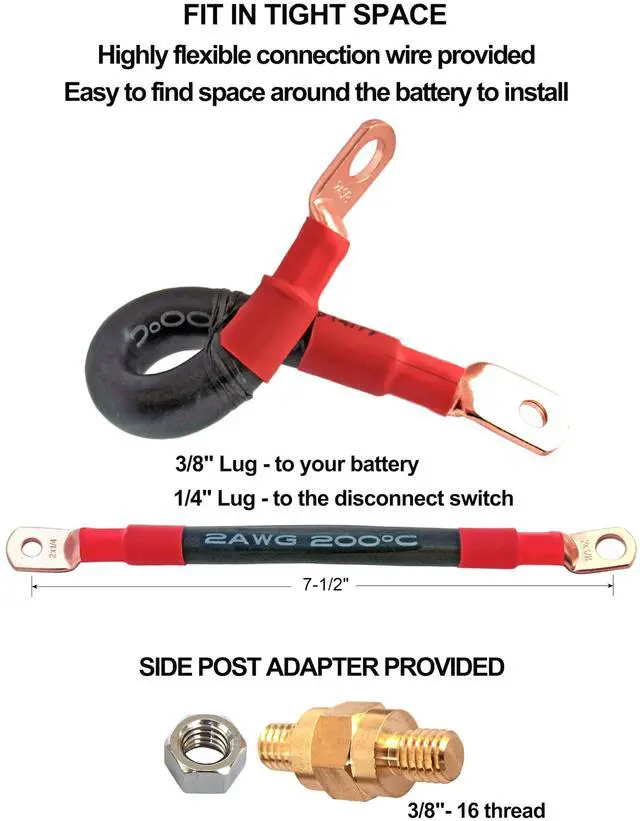
You can use the provided 2AWG connection wire or copper bars to easily connect the switch to your battery
IN CASE YOU NEED TO INSTALL ON THE POSITIVE SIDE:
1. One stud terminal of the relay goes to the positive post of the battery, and the other gets the positive wire from the car
2. You can reverse the black and red wires on pin 85- & 86+
So that the negative side 85- is connected to the red long wire that connects to the negative battery post. And the positive side 86+ becomes the black short wire that connects to the positive post of the battery. (NOTE: You can reverse the wires but you CAN NOT switch the polarity which is 85 pin connect to Negative post, 86 pin connect to Positive post)
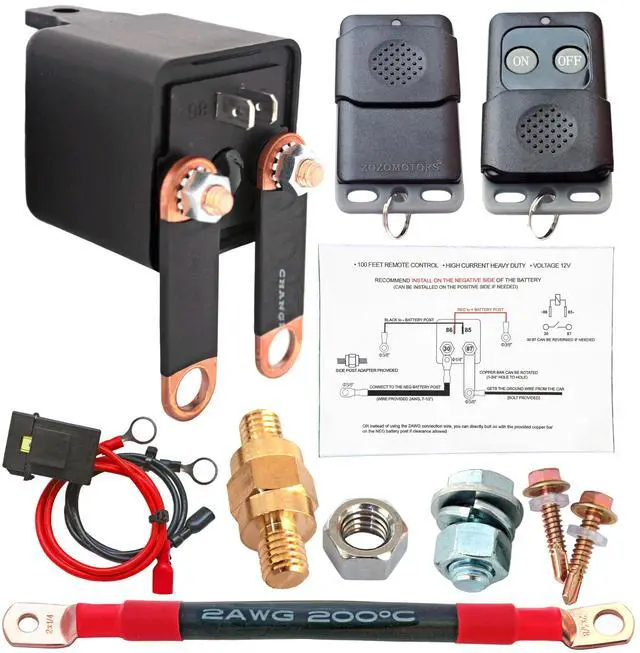
Package Included:
1x Installation Instructions with Wiring Diagram
1x Relay Switch with Wire Harness
1x Inline Fuse Holder
1x 20A Fuse
2x Remotes
1x Side Post Adapter
1x Connection Wire 2AWG
2x Connection Copper Bars
1x Bolt 3/8"-16 Thread
2x Relay Mount Screws
ZOZOMOTORS Heavy Duty Remote Battery Disconnect Switch ON/OFF
Specifications:
- Voltage: 12V
- Continuous Amps: 200A / Cranking Amps: 1000A (enough cranking amps to start your car in cold weather)
- Terminal Size: 3/8" Diameter Holes / Terminal Material: Copper
- Current draw of this switch (the remote receiver): 0.001 - 0.005A
- How to use: Wiring diagram included in package, or as per product image 5
How many Amps do I need?
It’s critical to check a battery’s CCA (Cold Cranking Amps) rating. It measures a battery's ability to start an engine in cold climates
An engine will need about one amp per cubic inch of engine displacement. For most vehicles, this means between 250-600 cold-cranking amps, depending on the size of your engine. For most L4 V6 V8 engines, it needs about 600-770 cold-cranking amps. Larger or commercial vehicles may require more
Recommend INSTALL ON THE NEGATIVE SIDE of the battery. Can be installed on the positive side if needed
1. One stud terminal of the relay is connected to the negative post of the battery, and the other gets the negative ground wire from the car
2. The red and black wires power the remote receiver in the relay and should always go to the positive and negative battery posts respectively
Red Wire - to Positive Post
Black Wire - to Negative Posts the negative wire from the car
You can use the provided 2AWG connection wire or copper bars to easily connect the switch to your battery
IN CASE YOU NEED TO INSTALL ON THE POSITIVE SIDE:
1. One stud terminal of the relay goes to the positive post of the battery, and the other gets the positive wire from the car
2. You can reverse the black and red wires on pin 85- & 86+
So that the negative side 85- is connected to the red long wire that connects to the negative battery post. And the positive side 86+ becomes the black short wire that connects to the positive post of the battery. (NOTE: You can reverse the wires but you CAN NOT switch the polarity which is 85 pin connect to Negative post, 86 pin connect to Positive post)
Package Included:
1x Installation Instructions with Wiring Diagram
1x Relay Switch with Wire Harness
1x Inline Fuse Holder
1x 20A Fuse
2x Remotes
1x Side Post Adapter
1x Connection Wire 2AWG
2x Connection Copper Bars
1x Bolt 3/8"-16 Thread
2x Relay Mount Screws