


Please Note:
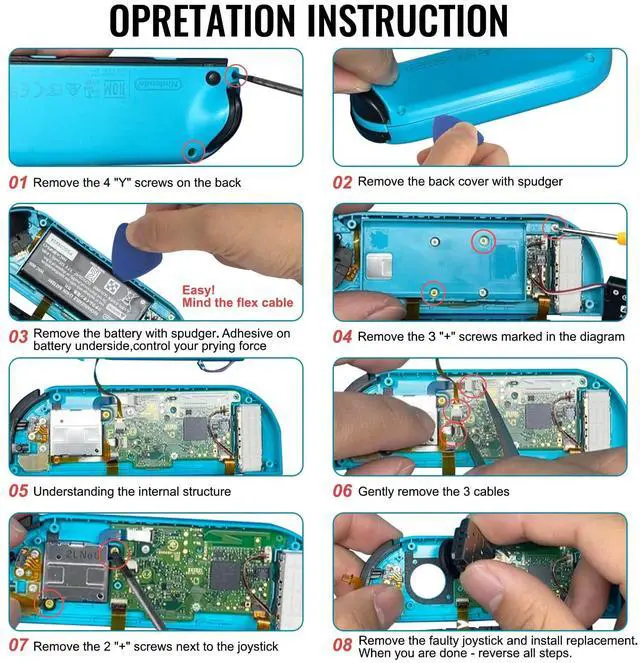
1.We recommend watching a full installation guide video before starting.
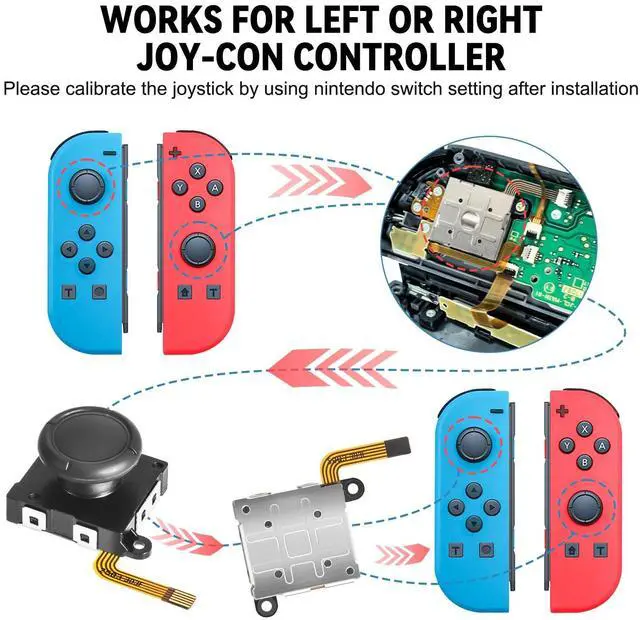
2.Handle ribbon cables gently and ensure they are securely reconnected.
3.Calibrate the new joystick after installation (System Settings > Controllers and Sensors > Calibrate Control Sticks). If drift occurs, recalibrate first. If the issue persists, restart the console (hold power button for 12 seconds).
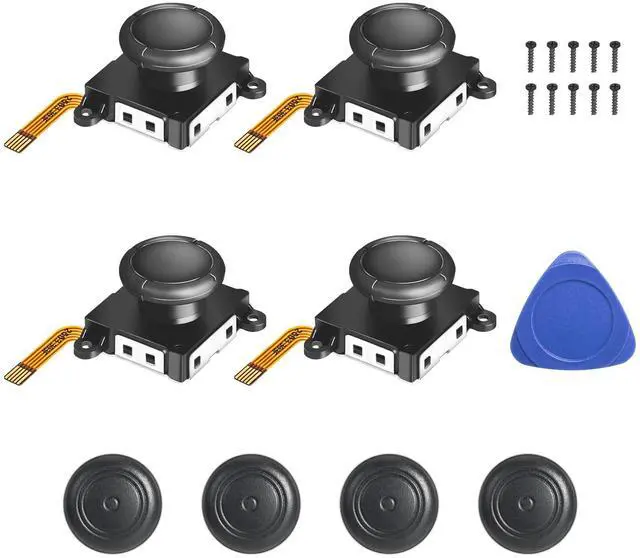
4. For missing or damaged parts, please ask us for a replacement.
Does it work with all Switch models?
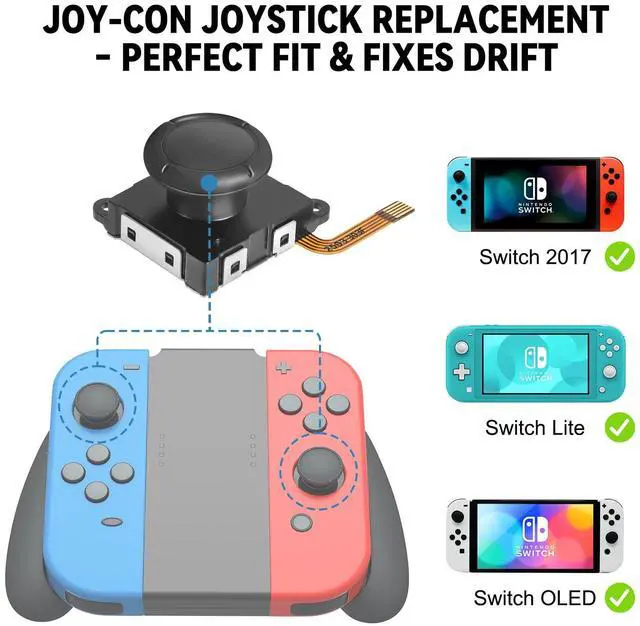
Yes, this repair kit is compatible with Nintendo Switch (2017), Switch OLED Model, and Switch Lite Joy-Con controllers.[ Not compatible with Nintendo Switch 2. ]
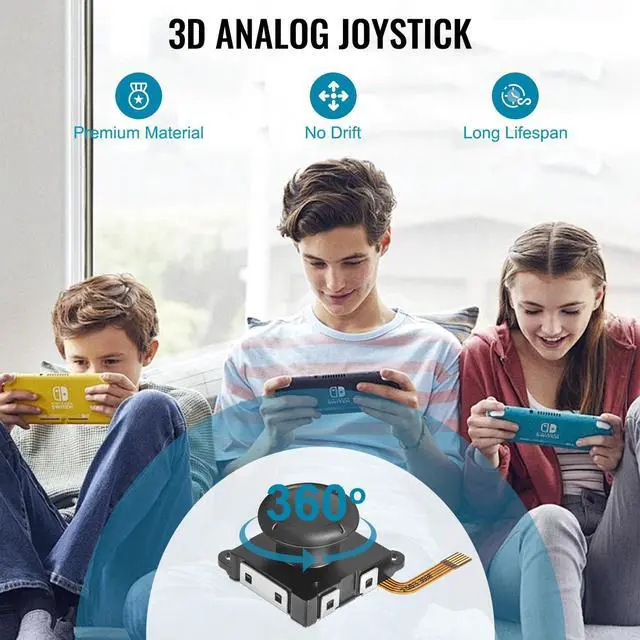
Are the thumb grips comfortable?
Designed with a non-slip thumb cap for improved comfort and control during play.
Is it difficult to replace a Joy-Con joystick yourself?
With patience and the right tools, most users find it manageable. Our detailed, step-by-step guide is designed to walk you through the entire process safely. Review the instructions first, and you'll likely find it's a very achievable DIY repair!
After replacement, how do l calibrate and test the joystick to ensure it works correctly?
After replacing your joystick, please calibrate it in Settings > System > Calibration of Control Sticks. Test it in a game to ensure precise, drift-free movement. If issues arise, first re-check all internal connections and repeat calibration.
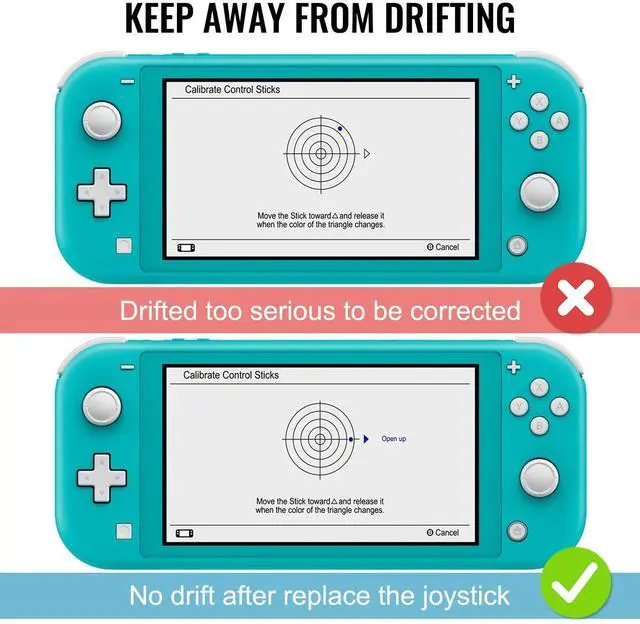
Will replacing the Joy-Con joystick fix drift ?
For drift caused by internal wear, a joystick replacement is a highly effective and practical solution.We advise trying system calibration first, but if the issue persists, this repair will typically resolve it.


Please Note:
1.We recommend watching a full installation guide video before starting.
2.Handle ribbon cables gently and ensure they are securely reconnected.
3.Calibrate the new joystick after installation (System Settings > Controllers and Sensors > Calibrate Control Sticks). If drift occurs, recalibrate first. If the issue persists, restart the console (hold power button for 12 seconds).
4. For missing or damaged parts, please ask us for a replacement.
Does it work with all Switch models?
Yes, this repair kit is compatible with Nintendo Switch (2017), Switch OLED Model, and Switch Lite Joy-Con controllers.[ Not compatible with Nintendo Switch 2. ]
Are the thumb grips comfortable?
Designed with a non-slip thumb cap for improved comfort and control during play.
Is it difficult to replace a Joy-Con joystick yourself?
With patience and the right tools, most users find it manageable. Our detailed, step-by-step guide is designed to walk you through the entire process safely. Review the instructions first, and you'll likely find it's a very achievable DIY repair!
After replacement, how do l calibrate and test the joystick to ensure it works correctly?
After replacing your joystick, please calibrate it in Settings > System > Calibration of Control Sticks. Test it in a game to ensure precise, drift-free movement. If issues arise, first re-check all internal connections and repeat calibration.
Will replacing the Joy-Con joystick fix drift ?
For drift caused by internal wear, a joystick replacement is a highly effective and practical solution.We advise trying system calibration first, but if the issue persists, this repair will typically resolve it.