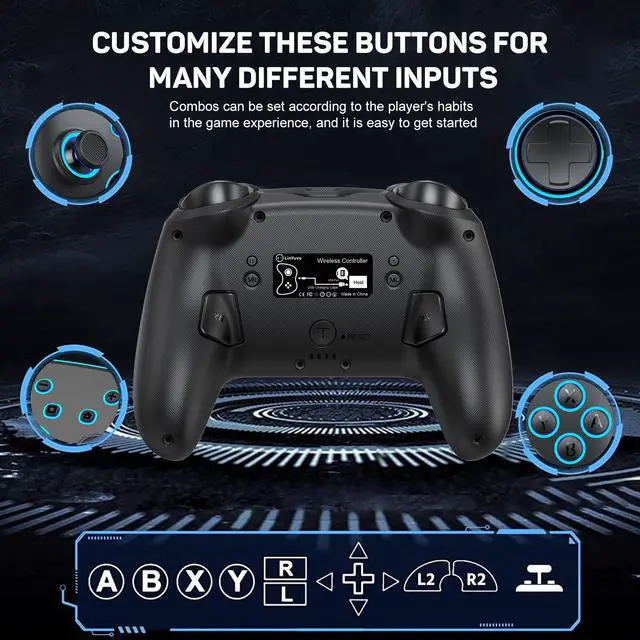
CUSTOMIZZE THESE BUTTONS FORMANY DIFFERENT INPUTS
Combos can be set according to the players habitsin the game experience, and it is easy to get started
ADJUSTABLE COLORFUL LIGHT
Colorful and cool breathing lighting effects bringplayers a more joyful game atmosphere
COMFORTABLE DESIGN &WAKE-UP FUNCTION
Just hold thehome button for 3 seconds to wake up the switch console
THREE-SPEED BURST SPEED ADJUSTMENT
Realize one-click combos in the game experience, improvethe mobility and flexibility of game effects
SUPPORT 6-AXIS GYROSCOPEMOTION SENSOR
Maintain stability and directional control to keep it balanced and free from jitt
ERGONOMIC DESIGN
Allowing players to experience a perfect fit in the palm of their hands
LONG BATTERY LIFE
Built-in high-performance batterry and intelligent power-asving design to improve batteryeffciency and provide longer playing timecity
HONEYCOMB MUSHROOMHEAD AND METAL ROCKER
Anti-skid, stable operation, enhanced expenence
Press the TURBO key + A/B/X/Y/L1/L2/R1/R2/cross keys to set the TURBO function (First time) Press TURBO key + A key to realize manual TURBO function (press and hold burst) (Second time) Press TURBO key + A key to realize automatic TURBO function (automatic burst) (Third time) Press TURBO key + A key to clear TURBO function (clear)
Note: Press and hold the TURBO button for 5 seconds (there will be a vibration prompt if the vibration is not 0%) to clear all TURBO functions.
2. TURBO speed adjustment (there are three speeds adjustable)
Adjustment method: Press TURBO key + "Left/right joystick up" to increase the speed by one level; Press TURBO key + "Left/right joystick down" to decrease the speed by one gear.
The speeds are: 5 consecutive shots per second (1 gear); Continuous bursts of 12 shots per second (2 levels); Continuously fire 20 times per second (3 levels).
3. Motor strength and vibration adjustment functionPress and hold the motor vibration button on the back to adjust the vibration intensity of the motor, and the vibration intensity can be cycled in sequence. There are five intensities in total, 100%, 75%, 50%, 25%, 0%
5.2. 4 Lighting control instructions1. Click the light button to change a color.
The order is: red, yellow, blue, green, purple, orange, pink. 2. Light key + 'plus sign', the
first time: breathing light mode; the second time: quick flash mode; the third time: vibration light mode; in these three modes, press the light key alone to adjust the light color. 3. Press and hold the light button for 3 seconds to turn off all lights.
5.2. 5 Back key macro and mapping function: 1. Macro functionDont release the MR button you are holding (the four LED indicators will light up to enter programming). Enter the buttons you want to edit (up to 24 steps). After releasing the MR button, the handle will vibrate, and then press the XR button to trigger the macro. button; Dont release the ML button you are holding (the four LED indicators will light up to enter programming). Enter the keys you want to edit (up to 24 steps). After releasing the ML button, the handle will vibrate. Press the XL button again to trigger the macro. button. The macro-editable keys are A, B,
2. Mapping functionPress and hold the MR button without releasing it (the four LED indicators light up to enter programming), enter the single button you want to map, the handle will vibrate after releasing the MR button, and press the XR button again to trigger the mapping button; Press and hold the ML button without releasing it (the four LED indicators light up to enter programming). Enter the single button you want to map. After releasing the ML button, the handle will vibrate. Press the XL button again to trigger the mapping button. The mapped editable keys are A, B, X, Y, L1, R1, L2, R2, L3, R3, +, -, and cross keys.
Note:
1. With memory function; 2. Press the setting programming key MR/ML, and there will be a vibration prompt to clear the macro and mapping functions of XR/XL