Your Browsing History
- Free 30-day Returns
$450.99

Meet Your Seller
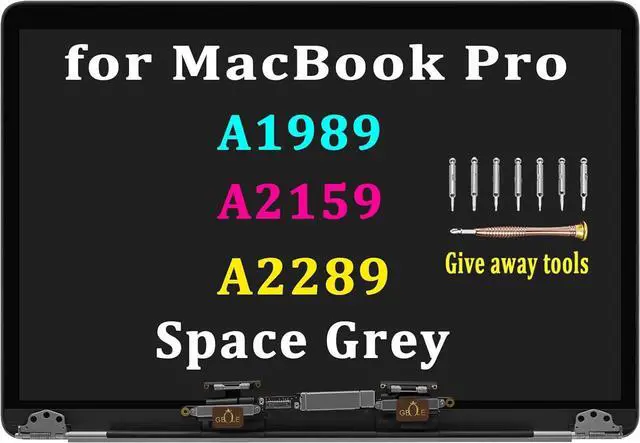


A1989 A2289 A2159 Screen Replacement for MacBook Pro A1989 A2159 A2289 Retina 13.3" LCD LED Display Digitizer Assembly Panel EMC 3214 3358 3301 3456 (Space Grey)
- Compatible Model: Replacement for MacBook Pro A1989 A2159 A2289 LCD Screen Display Assembly , Warranty: 3 months.
- After receiving the goods, the buyer needs to first read the instructions, strictly follow the instructions, and operate to avoid improper operation that may cause the machine to burn.
- Our products will undergo strict functional process testing before shipment to ensure that all functions of the product are normal and ensure stable and reliable product quality.
- If the buyer receives the package and encounters technical issues during installation or product quality issues after installation, please contact our customer service as soon as possible. We will provide you with assistance as soon as possible.
- please refer to the following instructions, compatible, if you have any questions about the installation, you can contact us at any time!
+
+
Overview
Specs
Reviews
Any questions? Our AI beta will help you find out quickly.
Try me now
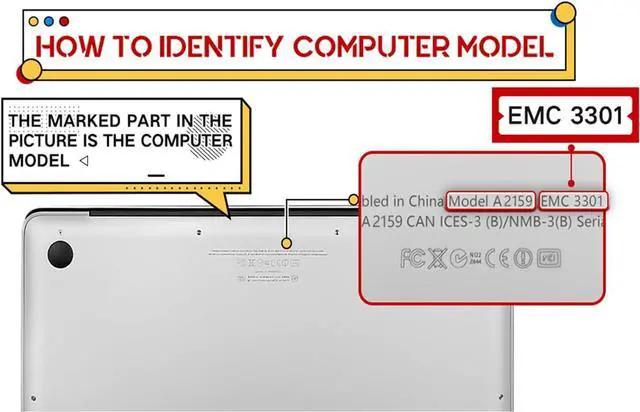
When purchasing, please confirm the model and the installation instructions below
Please check the specific model at the bottom of the notebook to avoid using the wrong model
Compatible Models:for for MacBook Pro A1989 , A2159 , A2289 , one of these three models.
Locate the battery connector: After opening the back cover, find the battery connector.
Disconnect the battery: Gently pry open the battery connector using a plastic spudger to ensure the device is completely powered off.
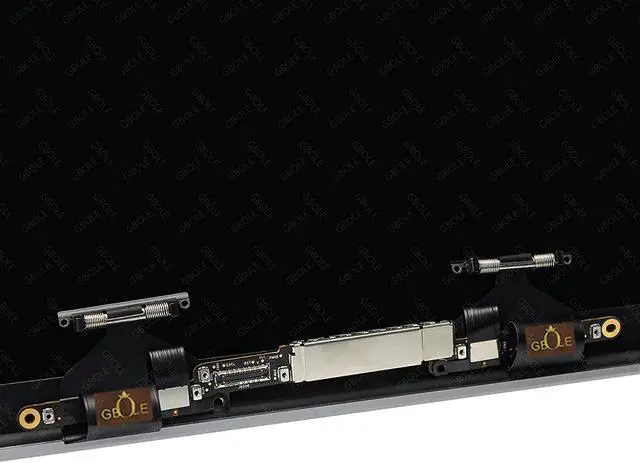
Disconnect the screen cable: Gently unplug the screen cable, being careful not to use excessive force.
After replacing the new screen, connect and plug in all the existing connecting cables one by one,
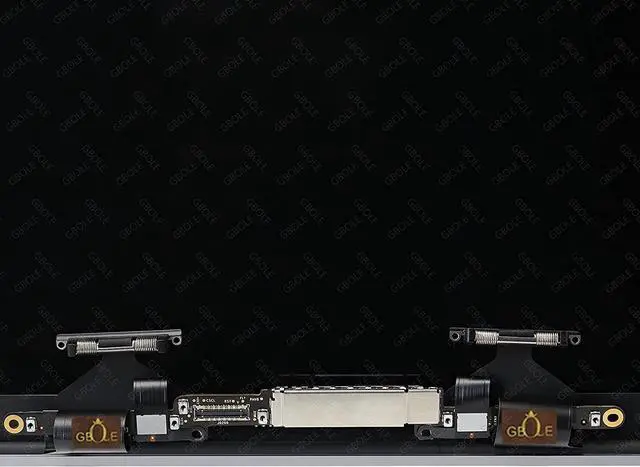
Key reminder: The cable connecting the motherboard to the screen needs to be properly docked and plugged in.
Finally tighten the screw
If the connector plug is not installed properly, there may be issues such as the screen not displaying. Please be sure to pay attention.
Finally, connect the battery cables on the motherboard correctly and perfectly.
Installation picture instructions for specific details
To the final step, it is necessary to patiently check all connection conditions to ensure that they are all connected correctly,
To avoid situations where some interfaces are not properly connected due to carelessness and cannot be displayed.
Finally, cover the lid and tighten the screws.
for MacBook Pro A1989 A2289 A2159 Screen Replacement Open the bottom of the notebook and remove the back cover Step 1: Check if the laptop model Cut off all power sources to avoid damaging the motherboard Step 4: Disconnect the Battery Remove the old screen Step 7: Removing the Screen Connection Cable Installing a new screen and connecting the LCD cable requires careful and patient attention to detail. Key steps for screen connection Finally, connect the power supply, tighten the screws, and cover the bottom cover. Battery connection steps
Please check the specific model at the bottom of the notebook to avoid using the wrong model
Compatible Models:for for MacBook Pro A1989 , A2159 , A2289 , one of these three models.
Locate the battery connector: After opening the back cover, find the battery connector.
Disconnect the battery: Gently pry open the battery connector using a plastic spudger to ensure the device is completely powered off.
Disconnect the screen cable: Gently unplug the screen cable, being careful not to use excessive force.
After replacing the new screen, connect and plug in all the existing connecting cables one by one,
Key reminder: The cable connecting the motherboard to the screen needs to be properly docked and plugged in.
Finally tighten the screw
If the connector plug is not installed properly, there may be issues such as the screen not displaying. Please be sure to pay attention.
Finally, connect the battery cables on the motherboard correctly and perfectly.
Installation picture instructions for specific details
To the final step, it is necessary to patiently check all connection conditions to ensure that they are all connected correctly,
To avoid situations where some interfaces are not properly connected due to carelessness and cannot be displayed.
Finally, cover the lid and tighten the screws.
for MacBook Pro A1989 A2289 A2159 Screen Replacement Open the bottom of the notebook and remove the back cover Step 1: Check if the laptop model Cut off all power sources to avoid damaging the motherboard Step 4: Disconnect the Battery Remove the old screen Step 7: Removing the Screen Connection Cable Installing a new screen and connecting the LCD cable requires careful and patient attention to detail. Key steps for screen connection Finally, connect the power supply, tighten the screws, and cover the bottom cover. Battery connection steps
Warranty & Returns
Warranty, Returns, And Additional Information
Warranty
- Please contact the Seller directly for warranty information. Warranty information may also be found on the Manufacturer's website.
- CONTACT
Return Policies
- Return for refund within: 30 days
- Return for replacement within: 30 days
- This item is covered by E-Transit Limited Return Policy
Manufacturer Contact Info
- For a directory of all our manufacturers, please click below.
- Manufacturers Directory
LOADING...