Your Browsing History
- Free 30-day Returns
$51.94

Meet Your Seller
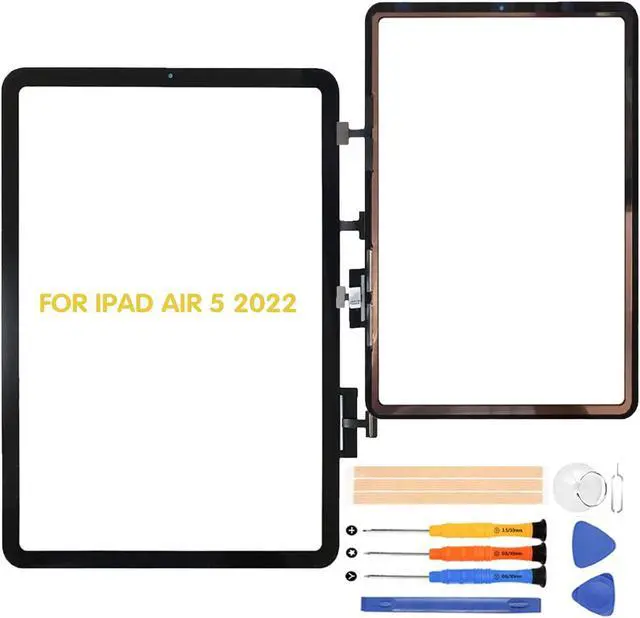


A-MIND for iPad Air 5 2022 Touch Screen Replacement Touch Digitizer for iPad Air 2022 A2589 A2591 Touch Panel Glass Repair Tool Kits(Not Include LCD)
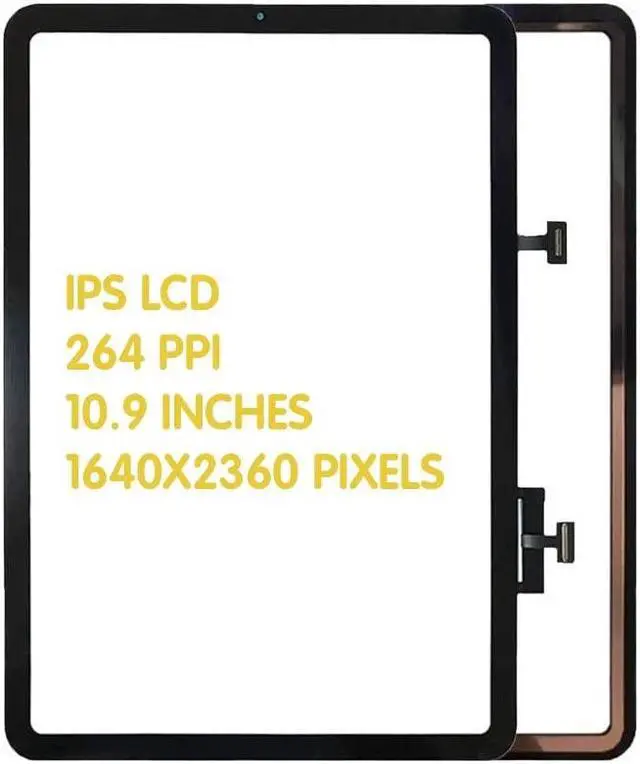
- Compatible Models ------ (Black)For iPad Air 5 2022 A2589 A2591 10.9 inch touch screen, Please make sure you know the correct model number before purchasing. Wrong model may damage your pad.
- Strict quality control ------ Before shipping, all products undergo rigorous quality inspections to ensure their excellent condition. We guarantee the absence of screen scratches, blind spots, and cracks. We reject any products with scratches and only offer A+ quality items. Our aim is to provide top-quality products, ensuring customer satisfaction.
- Applications ------ repair faulty screen and heal ruptured lcd, dead point pixels, touch non-action, touch response problem, display problem, false color problem, non-functional screen, etc. Note: If your iPad becomes unusable for any reason other than assembly, please check the cause of the problem before purchasing, as replacing the lcd will not fix the problem.
- Installation ------ Excluding installation tutorial. Please view vi
+
+
Overview
Specs
Reviews
Any questions? Our AI beta will help you find out quickly.
Try me now
Package Contents
1* For iPad Air 5 2022 A2589 A2591 touch screen
1* Repair Tool
Installation Precautions
Installing this product requires a certain level of repair skill. If you are unsure, we recommend having the screen replaced by a professional repair service.
Before full installation, please perform a trial connection test. Connect the screen panels flex cable to the motherboard without securing the screen to the device. Power on the unit to ensure the screen functions correctly.
Simulation Test Guidelines:
1 Do not remove protective films or labels during the initial test phase.
2 Handle with anti-static protection: Use an anti-static (ESD) wrist strap to prevent damage to internal components.
3 Power disconnection: Before removing the old screen, always disconnect the flex cable between the battery and the motherboard.
4 Function check: After connecting the new screen, plug in the charging cable and power on the device to check for normal operation.
5 Report issues promptly: If any abnormalities occur, contact our support team immediately with clear photos or a short video.
Customer Support:
Support Coverage: Our team is ready to assist with installation or product quality concerns.
Warranty Policy: We offer a free replacement for any initial defects reported within 30 days of delivery.
How to Reach Us: Please send photos and details to our support team via Amazon messages.
If you have any questions, feel free to contact us anytime through the Amazon message center.
Note:
This product does not come with a manual, so please see the replacement procedure on Youtube etc. before replacing.
Attaching requires some knowledge and technique, so if you are an amateur, it is better to ask a professional business.
If the tablet cannot be used for a reason other than a broken LCD panel, then replacing the LCD panel will not work. please confirm.
Since this product is an imported product, it may have slight stains. Please note.
The lcd is covered with a film to prevent the screen from being scratched in transit.
Tips:
Screen replacement parts are very fragile products that must be carefully and gently opened and installed.
Don't strongly pressed on the edges or four corners of the screen. It is easily broken.
Don't bend the LCD cable too much. Above 90 degrees the display will be black.
Turn off the tablet and disconnect the battery cable before installation.
Clean the LCD connector with cleaning paper (included in the package).
Pay attention to the position of the screws, place them in the correct position, as they are of different dimensions and lengths.
Carefully connect the touchline and the battery flexible cable.
Connect the battery, reboot the IPad, and check it.
If the line is displayed on the screen or the touch does not respond even after installation, remove the LCD display, clean the connector, and then reinstall it.
Warranty & Returns
Warranty, Returns, And Additional Information
Warranty
- Please contact the Seller directly for warranty information. Warranty information may also be found on the Manufacturer's website.
- CONTACT
Return Policies
- Return for refund within: 30 days
- Return for replacement within: 30 days
- This item is covered by TA Factory Return Policy
Manufacturer Contact Info
- For a directory of all our manufacturers, please click below.
- Manufacturers Directory
LOADING...