• $60.99
  • Free 30-day Returns
  • Price alert
    Shop it at NeweggBusiness.

    Meet Your Seller

    Top Upper LCD Screen Display Replacement for Nintendo DS Lite With Speakers by YTXXDEUS

    • FITMENT: This is a replacement screen for Nintendo DS Lite that has the speakers already soldered. Each screen is tested immediately before shipping
    • How to Install: You'll need to transfer the colored bezel over from your old screen. Do this by pinching the adhesive on the bottom right corner of the screen and carefully pulling up; the bezel should come up with the adhesive in a single piece. Use the top shell piece as a guide for reassembly
    • Please be aware: the speaker wire connections are fragile, and if not handled gently, the speakers can rip off. !!!Defective returns are ONLY considered for screens that have not been installed. Please test the screen before installing. Non-working screens returned after install will not receive a refund due to the risk of damage while installing
    • To test the screen before Installing: plugin the top screen, bottom screen, and wifi card. Then, hold the battery to the terminals with the logo facing outward. The console will be able
    +
    +
    Overview
    Specs
    Reviews
    avatar

    Any questions? Our AI beta will help you find out quickly.

    Common Screen Issues:

    Touchscreen registers touch erratically (or not at all), and/or
    has dead zones:
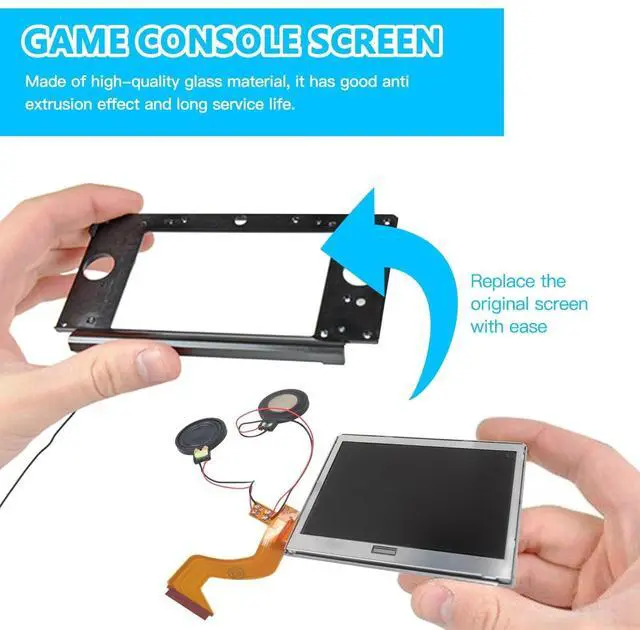
    You'll need to align the digitizer with you bottom screen. Carefully drop the digitizer (sticky side up) into the housing. then your bottom screen on top.

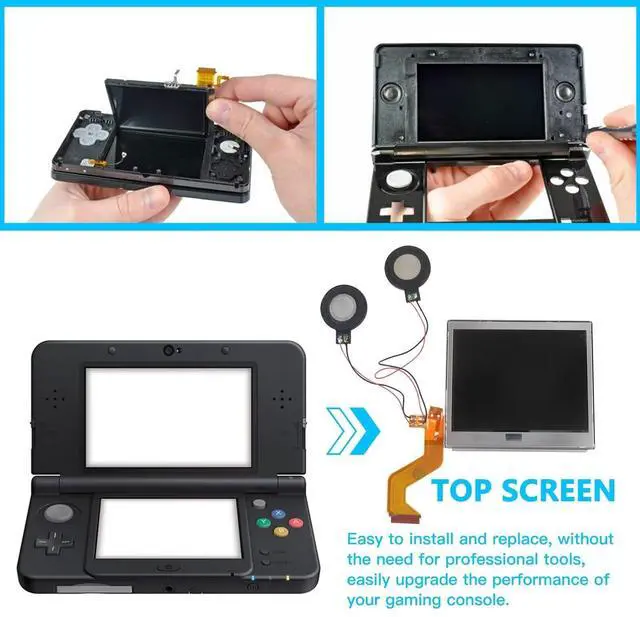
    Console powers on, top screen flashes, then
    shuts off:
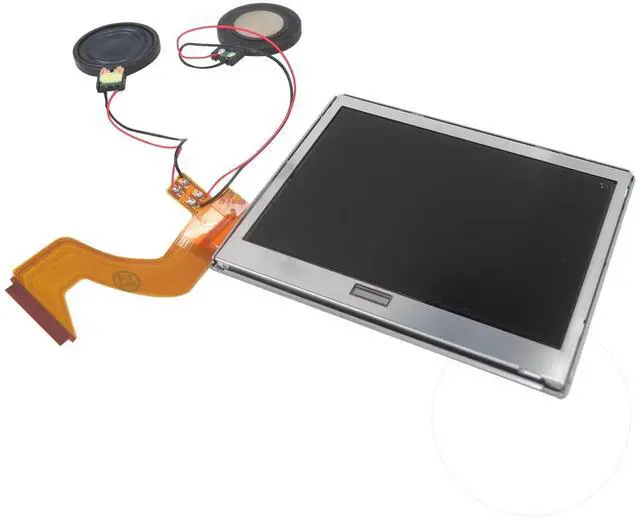
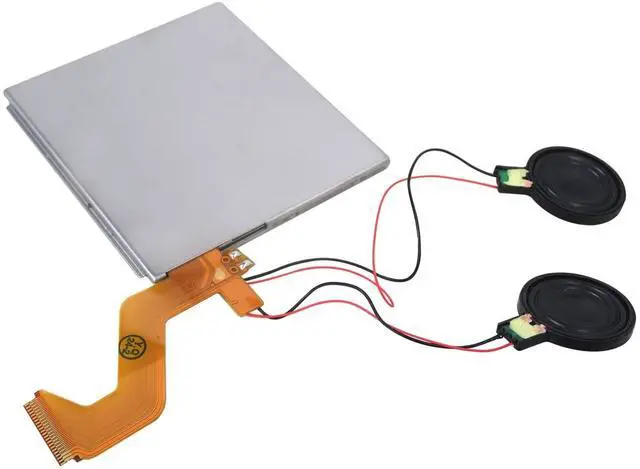
    I've applied the touch digitizer to the LCD and put some tape on the bottom of the screen to insulate it from your console's motherboard. This is an easy drop-in repair!

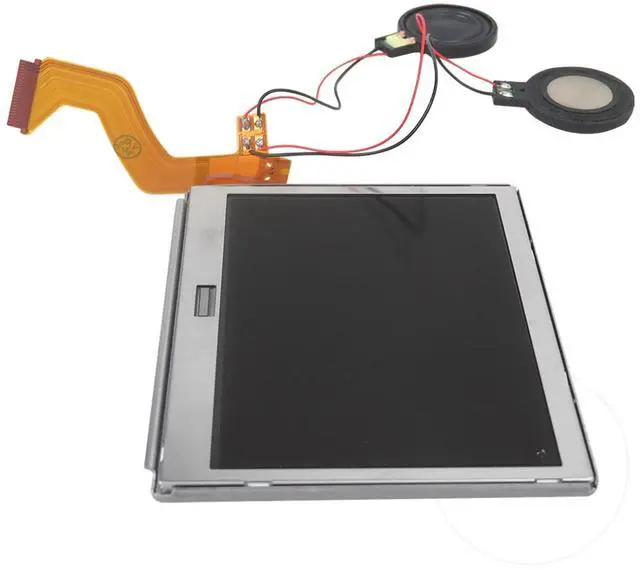
    bottom screen flashes, Speakers are blown or produce distorted audio:
    If there's no audio at all, you may have a bigger issue, but usually this is caused by debris being stuck in the head phone jack, or the ribbon cable to the top screen being ripped, which is easily fixed by replacing the screen.

    How to Install
    You'll need to transfer the colored bezel over from your old screen.
    Do this by pinching the adhesive on the bottom right corner of the screen and carefully pulling up;
    the bezel should come up with the adhesive in a single piece.
    Use the top shell piece as a guide for reassembly.

    NOTE!!!
    All screens are tested to be functional before shipping. Defective returns are only considered for screens that have not been installed.
    Please test the screen before installing. Non-working screens returned after install will not receive a refund due to the risk of damage while installing.

    To test the screen before installing, plugin the top screen, bottom screen, and wifi card.
    Then, hold the battery to the terminals with the logo facing outward.
    The console will be able to power on.
    Be mindful to have the battery oriented correctly or it will destroy the fuse on the motherboard.

    __________________________________________Shopping at the "name" - YTXXDEUS, be sure of the qua-lity and service.

    Warranty & Returns

    Warranty, Returns, And Additional Information

    Warranty

    • Please contact the Seller directly for warranty information. Warranty information may also be found on the Manufacturer's website.
    • CONTACT

    Return Policies

    • Return for refund within: 30 days
    • Return for replacement within: non-replaceable
    • This item is covered by SIMPLIZED Return Policy

    Manufacturer Contact Info

    LOADING...