

Your Browsing History
- Free 30-day Returns
$67.99

Meet Your Seller

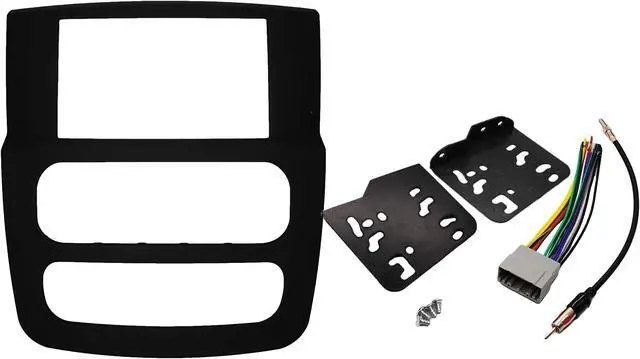
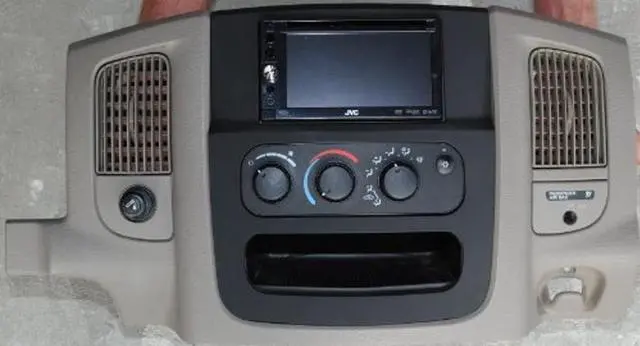


Radio Stereo Double Din Navigation Black Bezel Installation Kit Compatible with Dodge Ram (1500, 2500, 3500) (2002 2003 2004 2005)
- n
+
+
Overview
Specs
Reviews

Any questions? Our AI beta will help you find out quickly.
Try me now
The 2002-2005 Factory Bezel is designed to house Single Din Radios only. Therefore modifications are necessary to install larger Double Din Radios. Modifying is completed by hand and often includes cutting the Factory Bezel, filling it with bondo or fiberglass, then sanding and painting or using vinyl to cover. This process is time consuming and costly, until now. This is the only one piece Double Din Dash Kit available for purchase on the market. This Dash Kit eliminates the need of shipping off your Factory Bezel for a weeks worth of modifications that can cost $200-$250.
Unlike the modified Bezels this Dash Kit is made up of only one material that will not break or crack when subjected to continuous heat and comes complete with installation brackets, factory systems wire harness for those wishing to retain the factory amp and sound quality without having to bypass the amp and antenna adapter.
Basic Installation Directions: Separate the Single Din face plate from the main Dash Bezel then use a soldering iron to melt down the posts to the main Dash Bezel.
Detailed Installation Directions: (1) Disconnect the negative battery terminal (2) Unclip the top edge of the trim panel below the steering column (3) Remove the one Philips head screw from below the right A/C vent (4) Unclip and remove the dash trim panel (5) Remove the 4 Philips screws that secure the radio, disconnect and remove the radio (6) Remove the 4 Philips screws that secure the A/C controller (7) Remove the 4 Philips screws that secure the factory pocket (8) Locate the 11-PVC welds and with a ¼ drill bit drill each PVC weld out, you can drill right through the old face plate (9) Slide a flat head screw driver between the old face plate and the main Dash Bezel to separate. (10) Melt the posts of the main bezel down to seal the new frame to it, using the soldering iron. Soldering irons and about $5 at your local hardware store.
Unlike the modified Bezels this Dash Kit is made up of only one material that will not break or crack when subjected to continuous heat and comes complete with installation brackets, factory systems wire harness for those wishing to retain the factory amp and sound quality without having to bypass the amp and antenna adapter.
Basic Installation Directions: Separate the Single Din face plate from the main Dash Bezel then use a soldering iron to melt down the posts to the main Dash Bezel.
Detailed Installation Directions: (1) Disconnect the negative battery terminal (2) Unclip the top edge of the trim panel below the steering column (3) Remove the one Philips head screw from below the right A/C vent (4) Unclip and remove the dash trim panel (5) Remove the 4 Philips screws that secure the radio, disconnect and remove the radio (6) Remove the 4 Philips screws that secure the A/C controller (7) Remove the 4 Philips screws that secure the factory pocket (8) Locate the 11-PVC welds and with a ¼ drill bit drill each PVC weld out, you can drill right through the old face plate (9) Slide a flat head screw driver between the old face plate and the main Dash Bezel to separate. (10) Melt the posts of the main bezel down to seal the new frame to it, using the soldering iron. Soldering irons and about $5 at your local hardware store.
Warranty & Returns
Warranty, Returns, And Additional Information
Warranty
- Please contact the Seller directly for warranty information. Warranty information may also be found on the Manufacturer's website.
- CONTACT
Return Policies
- Return for refund within: 30 days
- Return for replacement within: 30 days
- This item is covered by Detail Driven Return Policy
Manufacturer Contact Info
- For a directory of all our manufacturers, please click below.
- Manufacturers Directory
LOADING...