

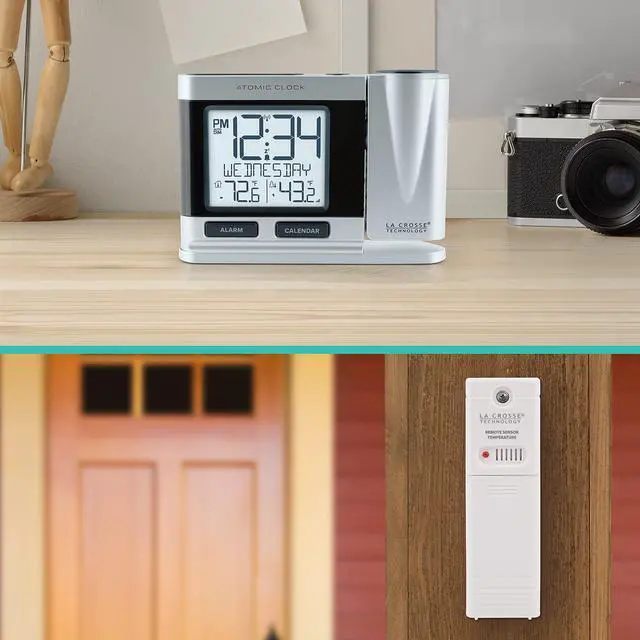


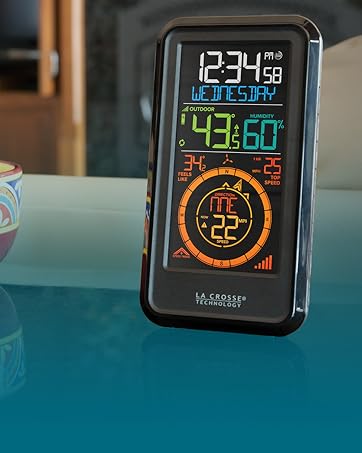
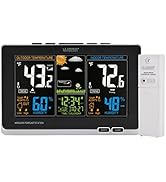
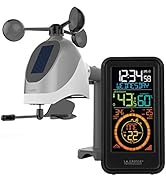
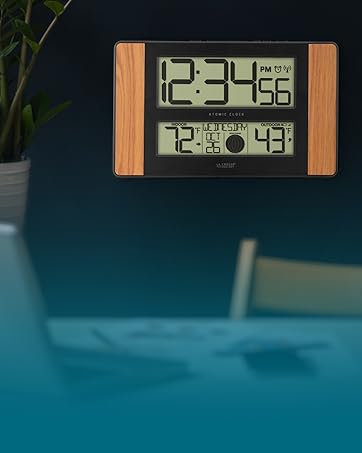
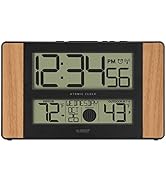
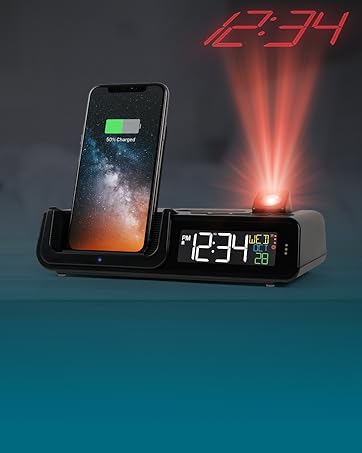
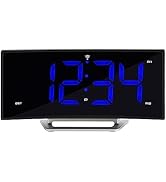
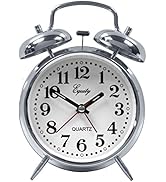
La Crosse Technology 616-12667-INT Silver Atomic Projection Alarm Clock with Temperature

Features Include:
- Customizable display (Date or Weekday view or Alarm time)
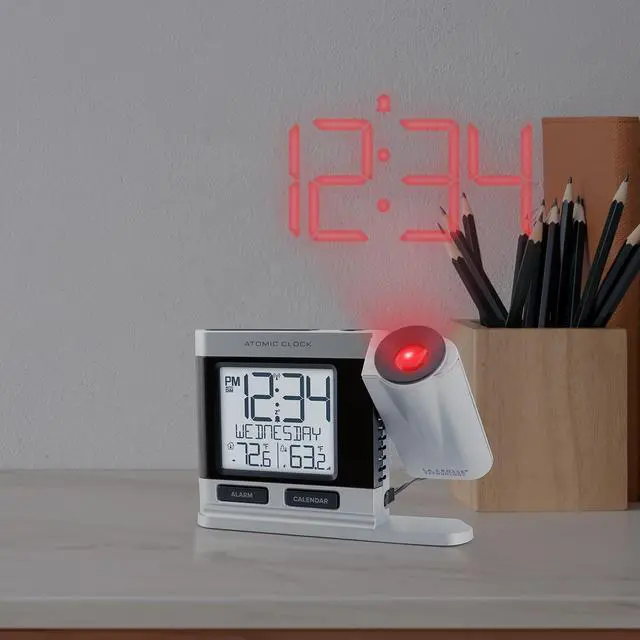
- Projection
- Image options (Time only ~ Indoor temp ~ Outdoor temp ~ Or, alternate between Time + Indoor Temp + Outdoor Temp)
- Brightness level control
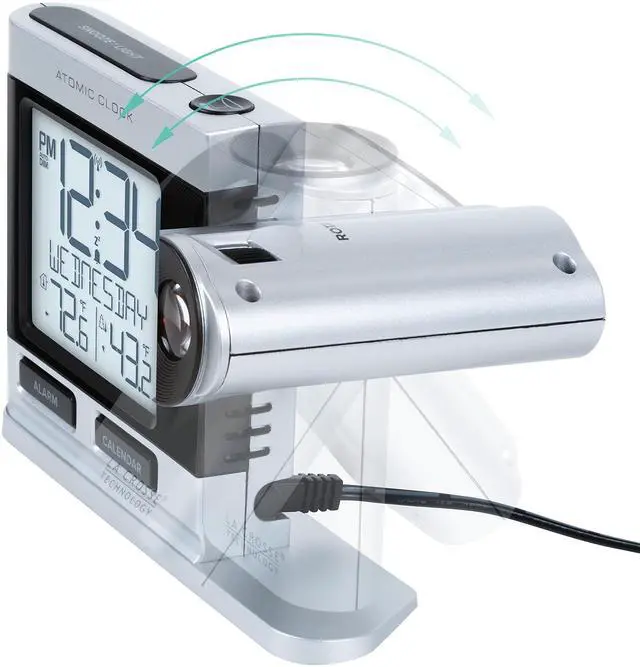
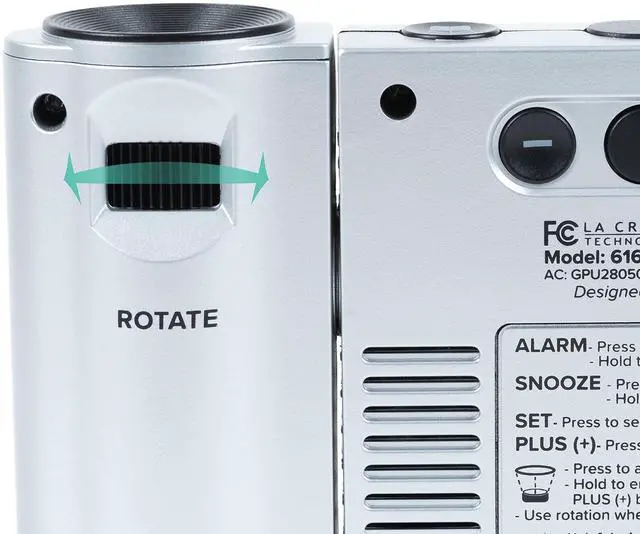
- Correctional Orientation (rotates 270 degrees)
- Adjustable Tilt
- Backlight with Auto-Dim
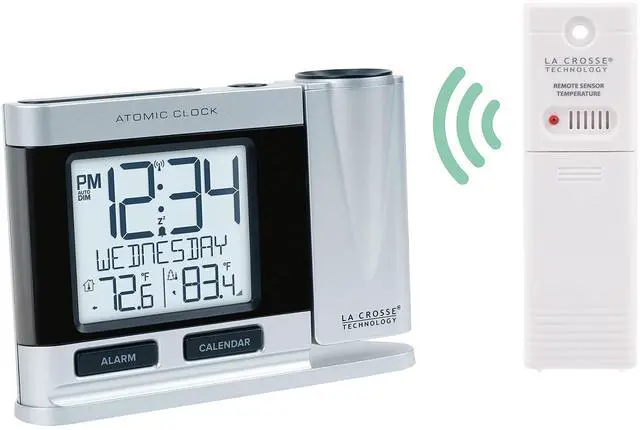
- Wireless weather-resistant outdoor temperature sensor with long 330 ft range
- Self set Atomic time and date
- Automatic DST reset

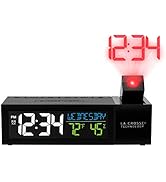
Projection, Atomic Time, and Temperatures
- 12/24 hour viewable (1" digits)
- 7 Time Zone selections
- ATL, ET, CT, MT, PT, ALA, HAW
- DST (auto ON; always OFF; always ON)
- Language selection (ENG, SPA, FRE, GER)
- Alarm with 10 minute snooze
- Indicates Active Alarm, PM, Auto-Dim, Temperature trends, and Low battery
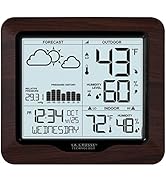
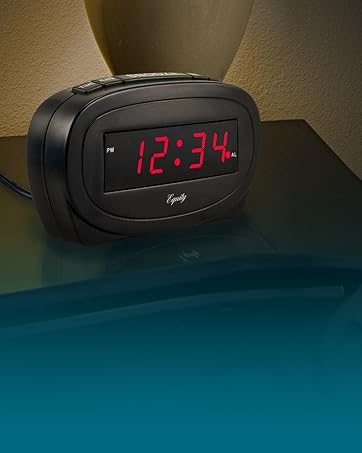
Temperature
- Monitor room temperature (F/C)
- Requires (included) 5.0V adapter power cord; Optional backup: 3 AAA alkaline batteries (not included)

Accurate and Precise
Wireless outdoor temperature sensor
- Long range: over 330 ft (100m)
- Temperature range: -40°F to 140°F
- Weather resistant case (avoid heavy precipitation; out of direct sunlight)
- Trend arrows indicate temp changes over last hour
- TX141-Bv3 Sensor requires 2 AA batteries (not included)
(*if NO or dashes for outdoor readings, HOLD + button for sensor search. Reception icon will flash to search. See manual for further instructions)

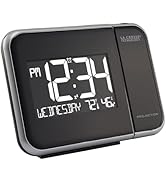
Better Viewing with Adjustable settings
- Projection arm tilt, plus rotation
- Projection brightness (HI/LO/OFF)
- Adjustable view: only Time; only Indoor Temp; only Outdoor Temp, or alternate between All
- Calendar display or Alarm Time
- Auto-Dim backlight preselected times
- Backlight intensity control
La Crosse Technology 616-12667-INT Silver Atomic Projection Alarm Clock with Temperature

Backlight Intensity control with 4 level adjustment, plus OFF ~ AUTO-DIM setting during pre-selected times (icon displays when active)
*NOTE: 5V power adapter supplied with clock is required for Constant Projection & Backlight use
Power-saving feature when operating only with batteries (3 AAA alkaline batteries - not included) as Backlight will only illuminate for several seconds, as well as projected time/temp. Adjustable features, such as auto-dim, intensity control, and projection brightness settings MUST use included power adapter.
FAQ and Tips!
CONSTANT backlight & projection MUST OPERATE with included 5V power adapter cord. You may test this by removing back-up batteries inside clock. If LCD turns off, plug is not connected properly. Check back line-in port in the back of clock and in wall outlet. When LCD turns on, you may install batteries back into clock.
Alarms
- TO SET: Hold the ALARM button to enter into settings mode.
- Press the PLUS/MINUS (+/-) buttons to adjust flashing values. Holding either button will adjust values quickly.
- Press ALARM button to confirm HOUR settings and move to MINUTES. Pressing the Snooze button will exit settings mode.
- Alarm is 2 minute crescendo sound (increased beep sound) and will shut off completely when duration expires.
- Activated Alarm: the Alarm Time & Bell icon will display on LCD, when active. (You may view Calendar instead, by pressing Calendar button)
- When alarm sounds, press SNOOZE/LIGHT button to silence alarm for 10 minutes. LCD will show Zzz and be flashing. Pressing any other button than the Snooze/Light button will silence alarm for 24 hours.
Projection settings
- Projection options are TIME only; INDOOR TEMP only; OUTDOOR TEMP only; ALTERNATING Time + Indoor Temp + Outdoor Temp
Loss of Outdoor temperature ('HI' or 'LO' view) ('NO' view)
- If LCD displays 'HI' or 'LO' for outdoor temperature, check that batteries have not weakened or leaked. (*We recommend batteries have expiration date 6 years in advance of current year, or 1.48 volts on voltmeter) Overpowered or underpowered batteries can cause this reading.
- Check batteries inside outdoor sensor. NOTE: if outdoor humidity reads 'HI' or 'LO' your sensor may be detecting readings below 10% humidity.
- 'NO' reading (30 minutes) will indicate loss of connection to outdoor sensor. Your clock will search every 3 minutes for reconnection.
- If outdoor temperature readings do not appear begin a manual search from your clock. HOLD the PLUS (+) button to search for outdoor sensor.
- Signal icon will flash, and dashes will appear in outdoor temp area on LCD. Icon will stop flashing and remain constant once sensor has been located. If no sensor is located, 'NO' will again appear. You will want to attempt a Factory Reset if no connection can be made.
- Distance, Interference, Resistance - We recommend mounting wireless outdoor sensor protected from direct sunlight (accuracy) and from constant precipitation (performance), well ventilated. On a North-facing structure and sheltered (do not use plastic bag, as sensor must be ventilated for humidity and moisture build-up) Keep away from electronical interference, as sensor uses frequency to transmit to clock. Range is within 300ft (100m) from clock without any obstructions, so keep that wall materials (brick, concrete, metal, etc), glass, foliage, etc will reduce range.
Factory Reset
- Test (new) batteries (6 year expiration date, in advance of current year and/or 1.48 volts on voltmeter) (should be well-known brand name, standard alkaline batteries, avoid rechargeable, heavy-duty, ultra, super, or plus type batteries. You can even receive weak/dead batteries in new package.
- Bring sensor within 5 to 10ft away from clock. Remove all cords and batteries from clock and sensor.
- While no power, remove residual electricity from clock by pressing any button 20 times. LCD should be blank and all memory cleared.
- Install fresh, new batteries into sensor first. Plug power adapter into wall outlet, then into back of clock (make sure plugged in tightly, should hear soft click when made connection into plug port.) Install fresh, new back-up batteries into clock. LEAVE UNITS alone for 15 minutes before setting any time/date or other settings.
- AFTER 15 MINUTES, check that temperatures are displaying on clock. You may remount sensor and adjust settings on clock.

Who are we?
Since 1983, we’ve been a family-owned company that started by delivering grandfather clocks across the United States—but we’ve become so much more...
What do we do?
We create everything from decorative clocks to professional weather stations. Striving to combine elegance and technology, we design things we want to use and love sharing that expertise with you.
Why choose us?
We’re a world leader in atomic time and weather instruments. Designed in La Crosse, WI, our products have unmatched support, resources, and video tutorials backed by a USA-based support team—welcome to the family.
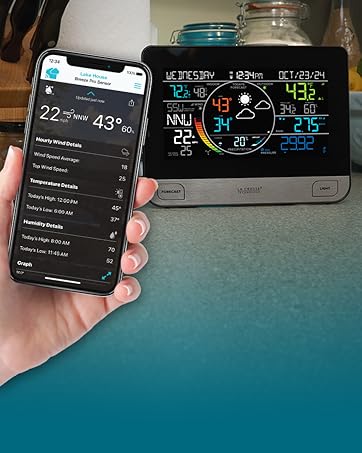
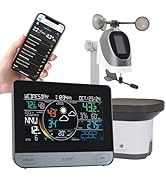
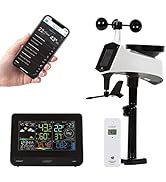
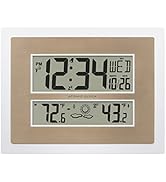
Wi-Fi Weather Stations
Connect to the Internet to receive AccuWeather forecasts and send data for remote monitoring in the La Crosse View mobile app.
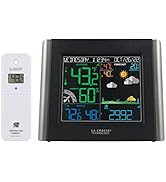
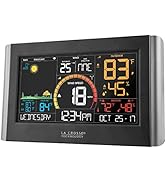
Wi-Fi Weather Stations
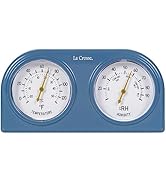
Weather Stations
Simple, easy-to-use solutions for monitoring home conditions inside and out.
Weather Stations
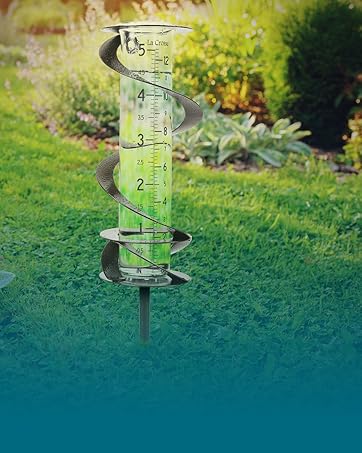
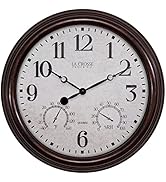
Traditional Instruments
Elegant and easy-to-use thermometers and rain gauges offer unique accents to your lawn or garden.

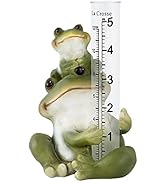
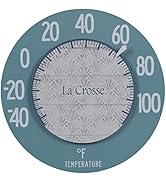
Traditional Instruments
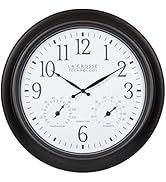
Digital Clocks
Digital wall clocks blend accuracy, convenience, and style and are an essential addition to any modern home or office.

Digital Clocks
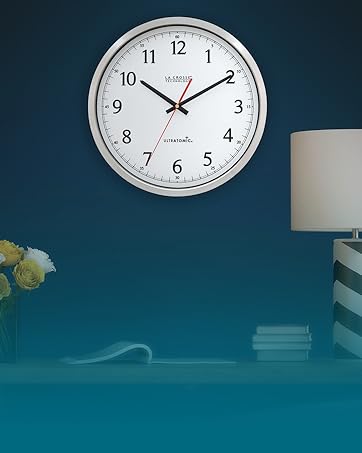
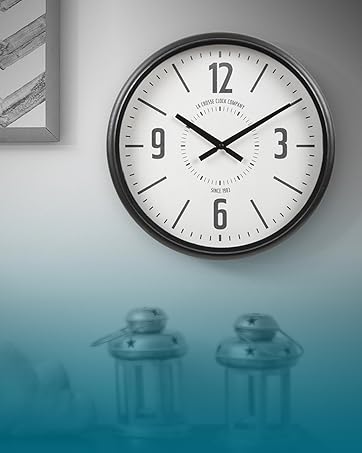
Analog Atomic Wall Clocks
Atomic clocks combine form and function by syncing with the WWVB radio signal for precise time and Daylight Saving Time changes.
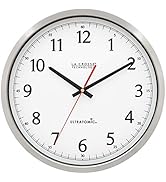
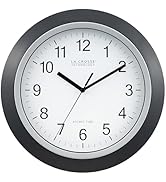
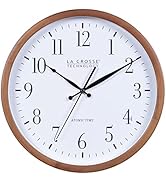
Analog Atomic Wall Clocks
Decorative Clocks
Decorative clocks blend artistry and function, transforming a simple time-telling device into a focal point of any room's decor.

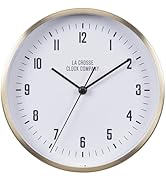
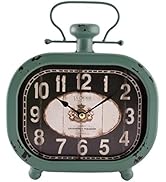
Decorative Clocks
Advanced Alarm Clocks
Wake up in style with a modern alarm clock packed with features like time projection, wireless charging, LED lights, and more!
Advanced Alarm Clocks
Basic Alarm Clocks
Our basic alarm clock collection emphasizes function and ease of use by providing large digits, loud sound alarms, and simple controls.
Basic Alarm Clocks


Who are we?
Since 1983, we’ve been a family-owned company that started by delivering grandfather clocks across the United States—but we’ve become so much more...
What do we do?
We create everything from decorative clocks to professional weather stations. Striving to combine elegance and technology, we design things we want to use and love sharing that expertise with you.
Why choose us?
We’re a world leader in atomic time and weather instruments. Designed in La Crosse, WI, our products have unmatched support, resources, and video tutorials backed by a USA-based support team—welcome to the family.
Wi-Fi Weather Stations
Connect to the Internet to receive AccuWeather forecasts and send data for remote monitoring in the La Crosse View mobile app.
Wi-Fi Weather Stations
Weather Stations
Simple, easy-to-use solutions for monitoring home conditions inside and out.
Weather Stations
Traditional Instruments
Elegant and easy-to-use thermometers and rain gauges offer unique accents to your lawn or garden.
Traditional Instruments
Digital Clocks
Digital wall clocks blend accuracy, convenience, and style and are an essential addition to any modern home or office.
Digital Clocks
Analog Atomic Wall Clocks
Atomic clocks combine form and function by syncing with the WWVB radio signal for precise time and Daylight Saving Time changes.
Analog Atomic Wall Clocks
Decorative Clocks
Decorative clocks blend artistry and function, transforming a simple time-telling device into a focal point of any room's decor.
Decorative Clocks
Advanced Alarm Clocks
Wake up in style with a modern alarm clock packed with features like time projection, wireless charging, LED lights, and more!
Advanced Alarm Clocks
Basic Alarm Clocks
Our basic alarm clock collection emphasizes function and ease of use by providing large digits, loud sound alarms, and simple controls.
Basic Alarm Clocks
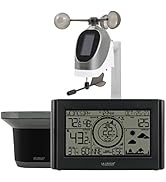
La Crosse Technology 616-12667-INT Silver Atomic Projection Alarm Clock with Temperature
Features Include:
- Customizable display (Date or Weekday view or Alarm time)
- Projection
- Image options (Time only ~ Indoor temp ~ Outdoor temp ~ Or, alternate between Time + Indoor Temp + Outdoor Temp)
- Brightness level control
- Correctional Orientation (rotates 270 degrees)
- Adjustable Tilt
- Backlight with Auto-Dim
- Wireless weather-resistant outdoor temperature sensor with long 330 ft range
- Self set Atomic time and date
- Automatic DST reset
Projection, Atomic Time, and Temperatures
- 12/24 hour viewable (1" digits)
- 7 Time Zone selections
- ATL, ET, CT, MT, PT, ALA, HAW
- DST (auto ON; always OFF; always ON)
- Language selection (ENG, SPA, FRE, GER)
- Alarm with 10 minute snooze
- Indicates Active Alarm, PM, Auto-Dim, Temperature trends, and Low battery
Temperature
- Monitor room temperature (F/C)
- Requires (included) 5.0V adapter power cord; Optional backup: 3 AAA alkaline batteries (not included)

Accurate and Precise
Wireless outdoor temperature sensor
- Long range: over 330 ft (100m)
- Temperature range: -40°F to 140°F
- Weather resistant case (avoid heavy precipitation; out of direct sunlight)
- Trend arrows indicate temp changes over last hour
- TX141-Bv3 Sensor requires 2 AA batteries (not included)
(*if NO or dashes for outdoor readings, HOLD + button for sensor search. Reception icon will flash to search. See manual for further instructions)
Better Viewing with Adjustable settings
- Projection arm tilt, plus rotation
- Projection brightness (HI/LO/OFF)
- Adjustable view: only Time; only Indoor Temp; only Outdoor Temp, or alternate between All
- Calendar display or Alarm Time
- Auto-Dim backlight preselected times
- Backlight intensity control
La Crosse Technology 616-12667-INT Silver Atomic Projection Alarm Clock with Temperature
Backlight Intensity control with 4 level adjustment, plus OFF ~ AUTO-DIM setting during pre-selected times (icon displays when active)
*NOTE: 5V power adapter supplied with clock is required for Constant Projection & Backlight use
Power-saving feature when operating only with batteries (3 AAA alkaline batteries - not included) as Backlight will only illuminate for several seconds, as well as projected time/temp. Adjustable features, such as auto-dim, intensity control, and projection brightness settings MUST use included power adapter.
FAQ and Tips!
CONSTANT backlight & projection MUST OPERATE with included 5V power adapter cord. You may test this by removing back-up batteries inside clock. If LCD turns off, plug is not connected properly. Check back line-in port in the back of clock and in wall outlet. When LCD turns on, you may install batteries back into clock.
Alarms
- TO SET: Hold the ALARM button to enter into settings mode.
- Press the PLUS/MINUS (+/-) buttons to adjust flashing values. Holding either button will adjust values quickly.
- Press ALARM button to confirm HOUR settings and move to MINUTES. Pressing the Snooze button will exit settings mode.
- Alarm is 2 minute crescendo sound (increased beep sound) and will shut off completely when duration expires.
- Activated Alarm: the Alarm Time & Bell icon will display on LCD, when active. (You may view Calendar instead, by pressing Calendar button)
- When alarm sounds, press SNOOZE/LIGHT button to silence alarm for 10 minutes. LCD will show Zzz and be flashing. Pressing any other button than the Snooze/Light button will silence alarm for 24 hours.
Projection settings
- Projection options are TIME only; INDOOR TEMP only; OUTDOOR TEMP only; ALTERNATING Time + Indoor Temp + Outdoor Temp
Loss of Outdoor temperature ('HI' or 'LO' view) ('NO' view)
- If LCD displays 'HI' or 'LO' for outdoor temperature, check that batteries have not weakened or leaked. (*We recommend batteries have expiration date 6 years in advance of current year, or 1.48 volts on voltmeter) Overpowered or underpowered batteries can cause this reading.
- Check batteries inside outdoor sensor. NOTE: if outdoor humidity reads 'HI' or 'LO' your sensor may be detecting readings below 10% humidity.
- 'NO' reading (30 minutes) will indicate loss of connection to outdoor sensor. Your clock will search every 3 minutes for reconnection.
- If outdoor temperature readings do not appear begin a manual search from your clock. HOLD the PLUS (+) button to search for outdoor sensor.
- Signal icon will flash, and dashes will appear in outdoor temp area on LCD. Icon will stop flashing and remain constant once sensor has been located. If no sensor is located, 'NO' will again appear. You will want to attempt a Factory Reset if no connection can be made.
- Distance, Interference, Resistance - We recommend mounting wireless outdoor sensor protected from direct sunlight (accuracy) and from constant precipitation (performance), well ventilated. On a North-facing structure and sheltered (do not use plastic bag, as sensor must be ventilated for humidity and moisture build-up) Keep away from electronical interference, as sensor uses frequency to transmit to clock. Range is within 300ft (100m) from clock without any obstructions, so keep that wall materials (brick, concrete, metal, etc), glass, foliage, etc will reduce range.
Factory Reset
- Test (new) batteries (6 year expiration date, in advance of current year and/or 1.48 volts on voltmeter) (should be well-known brand name, standard alkaline batteries, avoid rechargeable, heavy-duty, ultra, super, or plus type batteries. You can even receive weak/dead batteries in new package.
- Bring sensor within 5 to 10ft away from clock. Remove all cords and batteries from clock and sensor.
- While no power, remove residual electricity from clock by pressing any button 20 times. LCD should be blank and all memory cleared.
- Install fresh, new batteries into sensor first. Plug power adapter into wall outlet, then into back of clock (make sure plugged in tightly, should hear soft click when made connection into plug port.) Install fresh, new back-up batteries into clock. LEAVE UNITS alone for 15 minutes before setting any time/date or other settings.
- AFTER 15 MINUTES, check that temperatures are displaying on clock. You may remount sensor and adjust settings on clock.