


External DVD/CD Rewriterble

Product Features
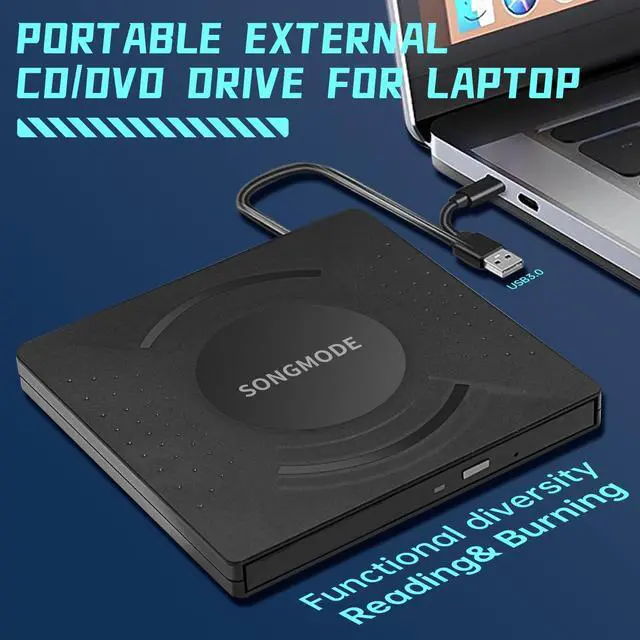
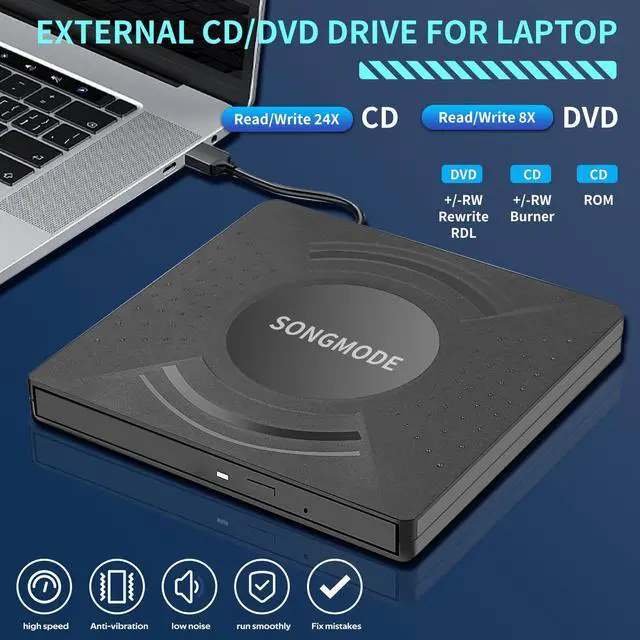
• High - speed data transfer: Equipped with USB 3.0 technology, it offers a high - speed data transfer rate, which is much faster than USB 2.0.
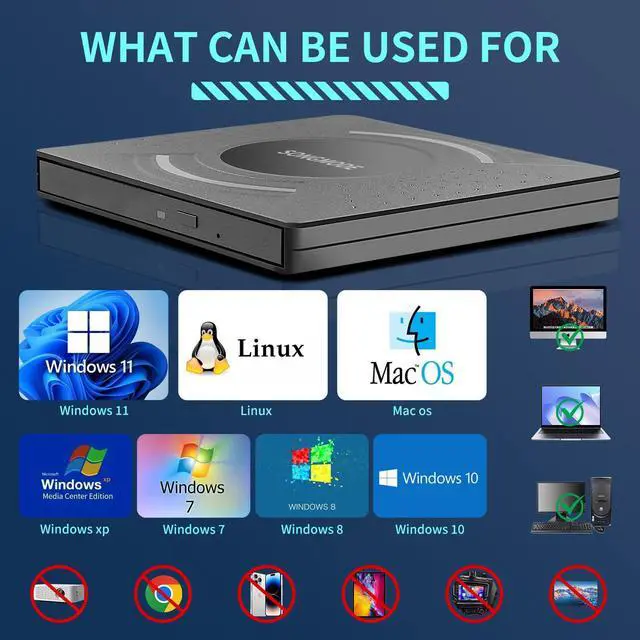
• Plug and play: No need to install additional drivers for most operating systems, including Windows 11/10/8/7, Linux, and Mac OS 10.6 or above.
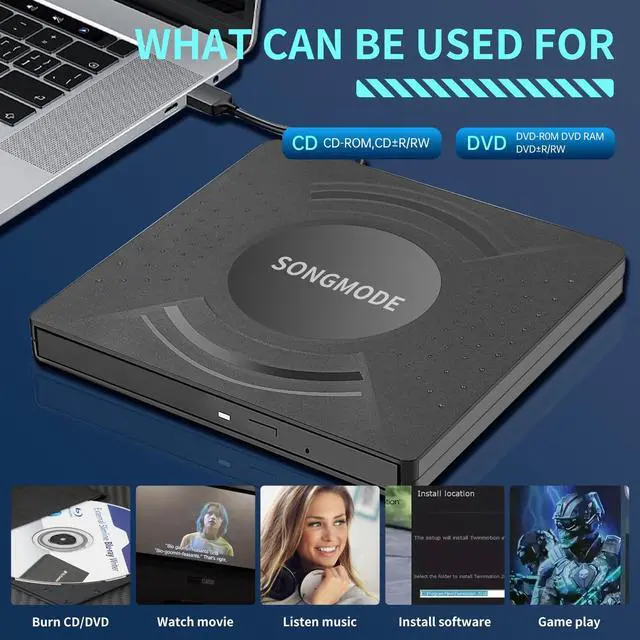
• Multiple functions: Supports reading and burning CDs and DVDs. You can play music CDs, watch DVD movies, install software from discs, and backup data.
• Wide compatibility: Compatible with laptops, desktops, and other devices with USB interfaces.
Connection Steps
1. Identify the ports: Locate the USB port on your computer. If your computer has both USB - A and USB - C ports, you can choose the appropriate end of the USB cable according to your computer's port type.
2. Connect the drive: Insert one end of the USB cable into the USB port on the external CD/DVD drive, and the other end into the USB port on your computer.
3. Power on: Once connected, the drive will be powered on automatically through the USB connection.
Precautions
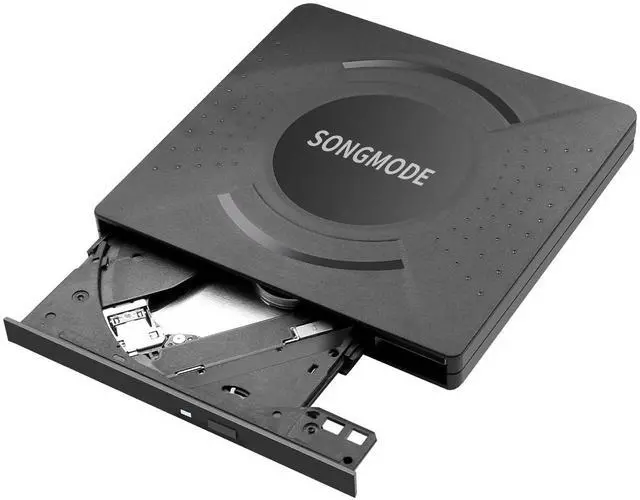
1. Do not insert the disc forcefully. Make sure the disc is properly aligned before closing the tray.
2. Avoid using the drive in a dusty or humid environment, which may affect its performance and lifespan.
3. When not in use, unplug the external CD/DVD drive from the computer to save power and prevent accidental damage.
4. If the drive is not recognized by the computer, try reconnecting the USB cable or using a different USB port. If the problem persists, check if there are any driver updates available on the manufacturer's website.
Ultra Slim DVD Burner

Ejecting a Disc
1. Press the eject button on the external CD/DVD drive.
2. If the eject button doesn't work, you can right - click on the drive icon in "This PC" (Windows) or "Finder" (Mac) and select "Eject".
3. For Mac users, you can also use the shortcut "Command + E" to eject the disc.

For desktop
Plug & Play. Easy to use,powered by USB port. No external driver and Power needed. Just plug it into your USB port and the DVD driver will be detected. For the desktops, Please connect the device to the back USB port of the motherboard for normal use

Fashionable design
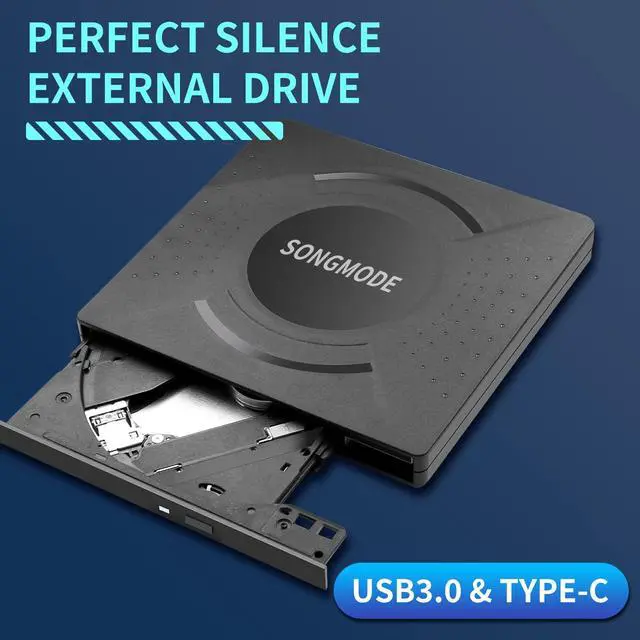
ultra-thin shell, compact and exquisite, convenient to carry. Weighing approximately 200g. Comes with USB-A+USB-C cable.

USB 3.0/Type-C
M-DISC Support, Plug & Play for PC/Mac/Laptop

High speed
Burning a Disc (if supported)
1. Open the burning software on your computer. Popular burning software includes Nero (Windows) and Toast (Mac).
2. Select the option to burn files or create a disc image.
3. Add the files you want to burn to the burning list.
4. Insert a blank CD or DVD into the external CD/DVD drive.
5. Click the "Burn" button in the burning software and wait for the burning process to complete.
Ejecting a Disc
1. Press the eject button on the external CD/DVD drive.
2. If the eject button doesn't work, you can right - click on the drive icon in "This PC" (Windows) or "Finder" (Mac) and select "Eject".
3. For Mac users, you can also use the shortcut "Command + E" to eject the disc.
Precautions
1. Do not insert the disc forcefully. Make sure the disc is properly aligned before closing the tray.
2. Avoid using the drive in a dusty or humid environment, which may affect its performance and lifespan.
3. When not in use, unplug the external CD/DVD drive from the computer to save power and prevent accidental damage.

External DVD For Mac
1. Connect the Drive
Plug the drive's USB cable (USB-A or USB-C) into an available port on your Mac.
Power: If the drive has a separate power adapter (common for Blu-ray drives or high-speed burners), plug it in and connect it to power.
2. Insert a Disc
Press the drive's eject button to open the tray (if it has one).
Place the disc label-side up in the tray and gently push it closed, or press the eject button again. For slot-loading drives, gently insert the disc until the drive pulls it in.
3. Access the Disc (Automatic Mounting)
macOS will typically recognize the drive and disc within seconds.
A disc icon will appear **on your Desktop
The disc will also appear in the **sidebar of any Finder window** under "Locations"
Troubleshooting
1. Drive/Disc Not Recognized
Check Connections:** Ensure cables are secure. Try a different USB port. Test the adapter with another device.
Restart Your Mac:** Solves many temporary glitches.
*Check System Information:** Go to ` > About This Mac > System Report > Hardware` section (USB or Thunderbolt depending on connection). See if the drive is listed. If visible, the issue is likely the disc or software.
Disc Issues:** Disc may be dirty (clean gently), scratched, formatted unsupported (Mac reads ISO 9660, UDF, HFS+; reads NTFS but *cannot write* NTFS natively), encrypted (commercial movies), or damaged. Try a known-good disc.
**Power Issues:** Ensure the drive has adequate power (use the adapter if supplied).
**Driver Issues:** Rare, but check the manufacturer's website for macOS drivers.
**Region Code (DVD/Blu-ray):** Players/drives have region locks. The first time you play a disc from a new region, you may be prompted to set the drive's region (limited changes allowed). Discs from different regions won't play.
2. **Can't Burn a Disc:**
* Verify the drive *supports burning* (look for RW or R labels).
* Ensure you're using a *blank recordable* disc (CD-R, DVD-R, BD-R, etc.), not a pre-recorded one.
* Ensure the disc is blank or properly erased (for RW discs).
* The disc might be full. Try burning fewer files or lowering the burn speed (option in burn dialog/software).
3. **DVD/Blu-ray Won't Play:**
* **DVD:** Use the "DVD Player" app. If prompted, install any necessary "Additional Software".
* **Blu-ray:** **macOS cannot play commercial Blu-rays natively.** You *must* install **third-party Blu-ray player software** (Macgo or a properly configured VLC).
External CD/DVD Drive User Manual
Thank you for choosing SONGMODE external CD/DVD drive. This user manual will guide you through the setup and operation of the device. Please read it carefully before use.
Package Contents
• External CD/DVD drive
• USB cable (usually with USB-A and USB-C connectors)
• Quick start guide (this manual)
Connection Steps
1. Identify the ports: Locate the USB port on your computer. If your computer has both USB - A and USB - C ports, you can choose the appropriate end of the USB cable according to your computer's port type.
2. Connect the drive: Insert one end of the USB cable into the USB port on the external CD/DVD drive, and the other end into the USB port on your computer.
3. Power on: Once connected, the drive will be powered on automatically through the USB connection.
External DVD/CD Rewriterble
Product Features
• High - speed data transfer: Equipped with USB 3.0 technology, it offers a high - speed data transfer rate, which is much faster than USB 2.0.
• Plug and play: No need to install additional drivers for most operating systems, including Windows 11/10/8/7, Linux, and Mac OS 10.6 or above.
• Multiple functions: Supports reading and burning CDs and DVDs. You can play music CDs, watch DVD movies, install software from discs, and backup data.
• Wide compatibility: Compatible with laptops, desktops, and other devices with USB interfaces.
Connection Steps
1. Identify the ports: Locate the USB port on your computer. If your computer has both USB - A and USB - C ports, you can choose the appropriate end of the USB cable according to your computer's port type.
2. Connect the drive: Insert one end of the USB cable into the USB port on the external CD/DVD drive, and the other end into the USB port on your computer.
3. Power on: Once connected, the drive will be powered on automatically through the USB connection.
Precautions
1. Do not insert the disc forcefully. Make sure the disc is properly aligned before closing the tray.
2. Avoid using the drive in a dusty or humid environment, which may affect its performance and lifespan.
3. When not in use, unplug the external CD/DVD drive from the computer to save power and prevent accidental damage.
4. If the drive is not recognized by the computer, try reconnecting the USB cable or using a different USB port. If the problem persists, check if there are any driver updates available on the manufacturer's website.
Ultra Slim DVD Burner
Ejecting a Disc
1. Press the eject button on the external CD/DVD drive.
2. If the eject button doesn't work, you can right - click on the drive icon in "This PC" (Windows) or "Finder" (Mac) and select "Eject".
3. For Mac users, you can also use the shortcut "Command + E" to eject the disc.
For desktop
Plug & Play. Easy to use,powered by USB port. No external driver and Power needed. Just plug it into your USB port and the DVD driver will be detected. For the desktops, Please connect the device to the back USB port of the motherboard for normal use
Fashionable design
ultra-thin shell, compact and exquisite, convenient to carry. Weighing approximately 200g. Comes with USB-A+USB-C cable.
USB 3.0/Type-C
M-DISC Support, Plug & Play for PC/Mac/Laptop
High speed
Burning a Disc (if supported)
1. Open the burning software on your computer. Popular burning software includes Nero (Windows) and Toast (Mac).
2. Select the option to burn files or create a disc image.
3. Add the files you want to burn to the burning list.
4. Insert a blank CD or DVD into the external CD/DVD drive.
5. Click the "Burn" button in the burning software and wait for the burning process to complete.
Ejecting a Disc
1. Press the eject button on the external CD/DVD drive.
2. If the eject button doesn't work, you can right - click on the drive icon in "This PC" (Windows) or "Finder" (Mac) and select "Eject".
3. For Mac users, you can also use the shortcut "Command + E" to eject the disc.
Precautions
1. Do not insert the disc forcefully. Make sure the disc is properly aligned before closing the tray.
2. Avoid using the drive in a dusty or humid environment, which may affect its performance and lifespan.
3. When not in use, unplug the external CD/DVD drive from the computer to save power and prevent accidental damage.
External DVD For Mac
1. Connect the Drive
Plug the drive's USB cable (USB-A or USB-C) into an available port on your Mac.
Power: If the drive has a separate power adapter (common for Blu-ray drives or high-speed burners), plug it in and connect it to power.
2. Insert a Disc
Press the drive's eject button to open the tray (if it has one).
Place the disc label-side up in the tray and gently push it closed, or press the eject button again. For slot-loading drives, gently insert the disc until the drive pulls it in.
3. Access the Disc (Automatic Mounting)
macOS will typically recognize the drive and disc within seconds.
A disc icon will appear **on your Desktop
The disc will also appear in the **sidebar of any Finder window** under "Locations"
Troubleshooting
1. Drive/Disc Not Recognized
Check Connections:** Ensure cables are secure. Try a different USB port. Test the adapter with another device.
Restart Your Mac:** Solves many temporary glitches.
*Check System Information:** Go to ` > About This Mac > System Report > Hardware` section (USB or Thunderbolt depending on connection). See if the drive is listed. If visible, the issue is likely the disc or software.
Disc Issues:** Disc may be dirty (clean gently), scratched, formatted unsupported (Mac reads ISO 9660, UDF, HFS+; reads NTFS but *cannot write* NTFS natively), encrypted (commercial movies), or damaged. Try a known-good disc.
**Power Issues:** Ensure the drive has adequate power (use the adapter if supplied).
**Driver Issues:** Rare, but check the manufacturer's website for macOS drivers.
**Region Code (DVD/Blu-ray):** Players/drives have region locks. The first time you play a disc from a new region, you may be prompted to set the drive's region (limited changes allowed). Discs from different regions won't play.
2. **Can't Burn a Disc:**
* Verify the drive *supports burning* (look for RW or R labels).
* Ensure you're using a *blank recordable* disc (CD-R, DVD-R, BD-R, etc.), not a pre-recorded one.
* Ensure the disc is blank or properly erased (for RW discs).
* The disc might be full. Try burning fewer files or lowering the burn speed (option in burn dialog/software).
3. **DVD/Blu-ray Won't Play:**
* **DVD:** Use the "DVD Player" app. If prompted, install any necessary "Additional Software".
* **Blu-ray:** **macOS cannot play commercial Blu-rays natively.** You *must* install **third-party Blu-ray player software** (Macgo or a properly configured VLC).
External CD/DVD Drive User Manual
Thank you for choosing SONGMODE external CD/DVD drive. This user manual will guide you through the setup and operation of the device. Please read it carefully before use.
Package Contents
• External CD/DVD drive
• USB cable (usually with USB-A and USB-C connectors)
• Quick start guide (this manual)
Connection Steps
1. Identify the ports: Locate the USB port on your computer. If your computer has both USB - A and USB - C ports, you can choose the appropriate end of the USB cable according to your computer's port type.
2. Connect the drive: Insert one end of the USB cable into the USB port on the external CD/DVD drive, and the other end into the USB port on your computer.
3. Power on: Once connected, the drive will be powered on automatically through the USB connection.