Your Browsing History
 Holiday Shipping Details & Extended Holiday Returns Holiday Shipping Details & Extended Holiday Returns
Joined on 02/24/07
Performance just as advertised

Pros: The Intel 670p (512GB) is an extremely fast M.2 SSD using 3rd GEN PCIe interface. I bench marked this against a Seagate ZP1000GM30011 (1TB) and a Crucial CT1000P5SSD8 (1TB). For the testing I used CrystalDiskMark on a Windows 10 x64 system and ran the test with 4 passes (1GB) at 3 separate times and took the average of the results. Seagate ZP1000GM30011 (1TB) -------------------------------------------------------------- Sequential Read (Q= 32,T= 1) : 3468.881 MB/s Sequential Write (Q= 32,T= 1) : 3125.871 MB/s Random Read 4KiB (Q= 32,T= 1) : 586.406 MB/s [143165.5 IOPS] Random Write 4KiB (Q= 32,T= 1) : 524.853 MB/s [128137.9 IOPS] Sequential Read (T= 1) : 2222.290 MB/s Sequential Write (T= 1) : 3152.058 MB/s Random Read 4KiB (Q= 1,T= 1) : 51.666 MB/s [ 12613.8 IOPS] Random Write 4KiB (Q= 1,T= 1) : 175.905 MB/s [ 42945.6 IOPS] Crucial CT1000P5SSD8 (1TB) -------------------------------------------------------------- Sequential Read (Q= 32,T= 1) : 3503.111 MB/s Sequential Write (Q= 32,T= 1) : 2910.393 MB/s Random Read 4KiB (Q= 32,T= 1) : 379.186 MB/s [ 92574.7 IOPS] Random Write 4KiB (Q= 32,T= 1) : 342.572 MB/s [ 83635.7 IOPS] Sequential Read (T= 1) : 2449.914 MB/s Sequential Write (T= 1) : 2795.464 MB/s Random Read 4KiB (Q= 1,T= 1) : 56.786 MB/s [ 13863.8 IOPS] Random Write 4KiB (Q= 1,T= 1) : 127.672 MB/s [ 31169.9 IOPS] Intel 670p (512GB) -------------------------------------------------------------- Sequential Read (Q= 32,T= 1) : 3045.141 MB/s Sequential Write (Q= 32,T= 1): 1639.727 MB/s Random Read 4KiB (Q= 32,T= 1) : 420.843 MB/s Random Write 4KiB (Q= 32,T= 1) : 304.840 MB/s Sequential Read (T= 1) : 2511.140 MB/s Sequential Write (T= 1) : 1619.614 MB/s Random Read 4KiB (Q= 1,T= 1) : 65.020 MB/s Random Write 4KiB (Q= 1,T= 1): 129.652 MB/s The results show us a few things. First, the Intel 670p does come in at the advertised spec speeds which is 3000 Read and 1600 Write (sequential for both), Second, when performing random reads and random writes (which is more in line with real life usage) it performs on par with the Seagate and Crucial units. Finally, unit is a nice slim design and temps were within acceptable ranges (with no heat sink or spreader needed).
Cons: Price point is a bit high. There are units that are below the asking price that outperform it. The sequential write is a big problem, with that almost a 1000Mb difference from other units at or below the price point of the 670p.
Overall Review: My concern is long term performance. The Intel 6xx series has had its up and downs. They were the first to introduce QLC and the earlier models were plagued with performance dipping real fast. I believe with the 660 and 670 series they have resolved that problem to an acceptable measure, but it is always something to keep in the back of your mind.
Solid DDR5 Kit Needs Manual Tuning for Ryzen Stability
Pros: Tested on a Ryzen 9 7950X3D paired with an ASUS ROG Strix X670E-F motherboard (latest BIOS). I was able to get this Crucial DDR5 kit running reliably at 6200 MHz in synchronous mode by manually configuring the timings and voltage (1.35V) to match the EXPO profile. Once manually set, the system passed all stress tests and rebooted consistently without issue. I used Intel Burn Test to stress 40 GB of the 64 GB installed, and it passed without errors. Please refer to my screenshots for full BIOS settings and stability confirmation.
Cons: While the memory will boot at its rated 6400 MHz using EXPO I or II and pass stress testing, it fails to reboot properly without a full shutdown. This instability makes EXPO impractical for Ryzen users. Manual tuning down to 6200 MHz is necessary for consistent performance and restart stability.
Overall Review: Rating: 3 out of 5 stars Solid performance after manual tuning, but EXPO instability on Ryzen holds it back from being a true plug-and-play option. Running DDR5 at 6400 MHz or higher in synchronous mode on Ryzen platforms is notoriously difficult, so these results aren't surprising. While Ive previously reached speeds up to 7800 MHz, those configurations were asynchronous, which I dont recommend due to added latency and potential instability. This kit has strong potential, but it requires manual tweaking to get there on Ryzen.
Got this working at 7800Mhz on a Ryzen 7950x3d
Pros: Although this memory module is on the QVL list for Asus (which manufactures the motherboard I purchased), I was unable to run it at a stable 8000MHz. I encountered errors in all the standard testing programs, such as MemtestPro, Prime95, and IntelBurnTest. However, when I kept the same settings and lowered the frequency to 7800MHz, then adjusted the BIOS to enable Power Down and remember the previous memory settings (so that it doesnt recheck them on each boot), it worked flawlessly. I can officially report that 7800MHz is fully stable. It passes all tests on an ASUS x670e-F motherboard with a Ryzen 7950x3d processor.
Cons: I did not get 8000Mhz even though its on the ASUS QVL list
Overall Review: They work as advertised.
Great for people who do graphics casually!

Pros: Photoshop Elements 2024 tries to bring back the familiarity of main Photoshop product to individuals that need to do passive image editing with a familiar interface. Users that never upgraded to the Cloud version of Photoshop and have been stuck using Photoshop CS6 would find this version of Photoshop appealing as it presents a familiar interface with much of the functionality that you are accustom to. When using it I found it had all the features such as adding texting with all the basics (bolding, underlining etc) and FX manipulation with Outer Shadow (People have found a way to do Inner Shadow as well), Glow (both Inner and Outer) and Leveling (both Up and Down). Layers are present with all the usual features such as Opacity controlling, locking them, making them invisible or visible etc. Image resizing is also present so you can make images larger and then do manipulation to try and smooth it out to be less boxy (assuming its an old image you are working with).
Cons: Price, this is where the cost is being justified by the name rather than the product. There are options out their such as Affinity Photo that provide more features and functionality for half the price and do not require a Cloud Service Fee for it.
Overall Review: Overall I do like the familiarity of the interface and how Adobe is trying to bring an option back to a market they lost when they went to a full cloud model. I am hopping they will take a book from Microsoft and reintroduce a non-cloud version that has all the tools of photoshop but without the cloud feature. Microsoft did this by reintroduce both Microsoft Office Cloud and a regular Microsoft Office non-cloud version (that is a one-time fixed price fee). For your average consumer this is a strong option to look at for photo/image manipulation at a fixed price cost.
One of the most well designed cases I have ever seen
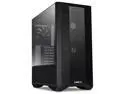
Pros: This has to be one of the most well designed cases I have ever seen in my 30+ years (since the 286 CPU days). First note, I replaced all the fans with Noctua fans With that said, the airflow is fantastic, and my temps went down by almost 10 degrees Celsius on a Ryzen 5900x using an ASUS ROG Strix x570 motherboard. The back of the case has plenty of areas for SSD(s) but I think most people getting this type of equipment are not using those anymore. The cable management system is awesome. The pre-built fan control that is built into the top panel and the fan connectors are in the back side is a very nice addition. I do recommend people use this to put one common group of fans together that are of the same make, model and doing the same job. Then connect the main connector to one of the connectors on your board so the BIOS can control them based on the CPU temperature. If you do this then just leave the front panel on AUTO all of the time. It supports up to a 3x120mm radiator. I do recommend that no matter what radiator type you choose to put 3 120mm fans at the front of the case. DO NOT FORGET to move the panel forward for those fans as it increases the amount of space you have inside the case and you lose nothing for that extra space. Instead of bringing your video cards power supplies through the standard cable management setup I recommend you take advantage of the slot openings the case has just above the power supply and pass them through their. You will get better airflow in the case from it. Love this case A++
Cons: - The top side Panels are made of glass, although gorgeous I am scared, they will break one day by accident. - The cable management pathway mount next to the motherboard needs to be flipped right away no matter what size motherboard you use. If you have an RTX 3080 or better it will not fit unless you do this.
Overall Review: Some comments for a future case as I know they read these - Wish they would create a slimmed down version of this design. Most people do not use SSD(s) anymore (NVME with 1 HD for storage) and there is no need for so many slots. Remove all SSD locations but keep the 3 Drive Bay at the bottom and provide an adapter to put an old SATA SSD in there. This change will allow you to slim the case down a bit and still keep the same airflow and it will also get you more in line with 90% of the common persons gaming machines out there. - Increase the distance at the top between the back panel and where the 140mm fans get moun6ed by 1/4 inch. Using motherboards like the ASUS x570 Strix the 140mm fans are pushing up against the control panel. If you increase it by about 1/2 inch then you can move the 140mm fans centered and then slim the case down even more. - Providing an area for the fans to be mounted just above the power supply can be removed. Suggest take the one that is centered and instead create an opening at the top of it so the PCIe power cables can come through to bring power to the graphics card. Majority of people have 1 to 3 cards in their system (1 video, 1 sound (some not all) and 1 WiFi (unless built into the board). Putting this hole allows the cables to be out of the way and not prevent air flow from moving in the case. - Latch on both side(s) bottom area near the power supply is awesome HOWEVER if you mount the case under a rising desk then you will NOT be able to use this case as the legs can not be removed and are part of the bottom latch. Make the latch independent and allow the legs to be removed.
In-expensive and worked perfectly!
Pros: Used this in my NAS drive and it worked perfectly!
Overall Review: For the price, you simply can not go wrong.
Sent me used item then replacement was wrong one
The first Ring Pro they sent me was clearly used and the 30 day free trial of the Ring Pro service had already expired (when you buy a new one they give you a free 30 days). The replacement they sent me was different and did not include the angel brackets. In fact if you look at the picture on NewEgg several of the items are missing in the box (but the box was new). I am guess there are different box types for the Ring Pro so the new one they sent me did not include any of the angle brackets nor the small frame (which is visible in the picture of the item). I contacted customer support and they sent me an email telling me I am wrong and tried to convince me that the first Ring they sent me was a different model when I still have that registered on my phone and it clearly says RING PRO!
