


Network Configure Steps ( 2 Connection Methods )
Connection Method 1--- AP Mode
1. Turn on the device and use reset pin to long press reset button until the indicator flashes slowly. Notice: please confirm the indicator light is flashing slowly when you are connecting it; For a fast connection, please make sure the device and the router are within 5 meters of
each other when you're connecting it.
2. Please switch on the Bluetooth Function of your smartphone;
3. After Bluetooth is switched on from the phone >> Open “Tuya” APP >> Add Device (Devices to be added) >> Tape “Add” >> Enter Wi-Fi Information (choice of your home WiFi name and password, supports 2.4 and 5Ghz WiFi) >> Click "Next" >> HD mini camera being adding
(indicator light will be fast flash, you also will be hearing "Di" tips sound), the device will be added within 1 minute >> Click "Done"(Added successfully) >> You can watch live video by smartphone.
Connection Method 2 --- QR
1. Turn on the device and there will a prompt sound remind you to configure with WiFi.
2. Open APP >> Add Device >> click “Camera & Lock” >> choose “Smart Camera(2.4GHz&5GHz)” >> tick off “Make sure the indicator is flashing quickly or a prompt tone is heard” then click “Next”.
3. Select your WiFi network (2.4GHz or 5GHz) >> Input password >> Next.
4. Hold the camera’s lens face to the QR for scan, hold them together, and keep15-20 cm away, until you hear a “Beep” sound, which means the scan code is succeeded, the indicator quickly flashes and then keeps a long on, (clock camera is the LED time display change from 00:00 to time number), which means WiFi connection succeeded.
5. Click “I Hear a Prompt”, wait for a moment the device will be added successfully >> click Done. (if the connection is failed, please reset the camera try the same operation again)


Installation Steps
Rotate the WiFi hidden camera counterclockwise, take out the chassis, then fix the chassis to the ceiling or wall with a spiral knife, and then turn clockwise to install the product back.
Easy To Install
This product has nails for installation, which is very easy to install.
Warm Tips:
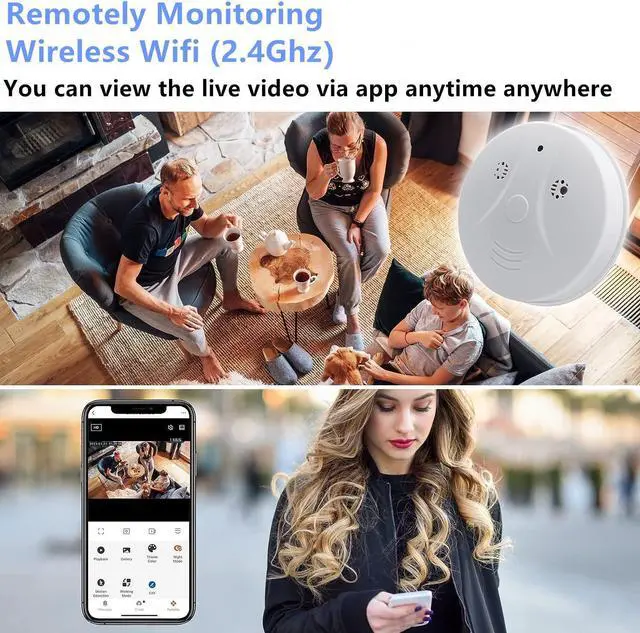
- 1. The smoke detector camera need to connect to a router 2.4Ghz / 5GHz WIFI.
- 2. Pls format the SD before first use.
- 3. Pls charge the mini camera wireless for 4 hours before using to get enough power.
- 4. We suggest that charging while recording, so that it will not go offline due to lack of power.
Technical Specification
Network Configure Steps ( 2 Connection Methods )
Connection Method 1--- AP Mode
1. Turn on the device and use reset pin to long press reset button until the indicator flashes slowly. Notice: please confirm the indicator light is flashing slowly when you are connecting it; For a fast connection, please make sure the device and the router are within 5 meters of
each other when you're connecting it.
2. Please switch on the Bluetooth Function of your smartphone;
3. After Bluetooth is switched on from the phone >> Open “Tuya” APP >> Add Device (Devices to be added) >> Tape “Add” >> Enter Wi-Fi Information (choice of your home WiFi name and password, supports 2.4 and 5Ghz WiFi) >> Click "Next" >> HD mini camera being adding
(indicator light will be fast flash, you also will be hearing "Di" tips sound), the device will be added within 1 minute >> Click "Done"(Added successfully) >> You can watch live video by smartphone.
Connection Method 2 --- QR
1. Turn on the device and there will a prompt sound remind you to configure with WiFi.
2. Open APP >> Add Device >> click “Camera & Lock” >> choose “Smart Camera(2.4GHz&5GHz)” >> tick off “Make sure the indicator is flashing quickly or a prompt tone is heard” then click “Next”.
3. Select your WiFi network (2.4GHz or 5GHz) >> Input password >> Next.
4. Hold the camera’s lens face to the QR for scan, hold them together, and keep15-20 cm away, until you hear a “Beep” sound, which means the scan code is succeeded, the indicator quickly flashes and then keeps a long on, (clock camera is the LED time display change from 00:00 to time number), which means WiFi connection succeeded.
5. Click “I Hear a Prompt”, wait for a moment the device will be added successfully >> click Done. (if the connection is failed, please reset the camera try the same operation again)
Installation Steps
Rotate the WiFi hidden camera counterclockwise, take out the chassis, then fix the chassis to the ceiling or wall with a spiral knife, and then turn clockwise to install the product back.
Easy To Install
This product has nails for installation, which is very easy to install.
Warm Tips:
- 1. The smoke detector camera need to connect to a router 2.4Ghz / 5GHz WIFI.
- 2. Pls format the SD before first use.
- 3. Pls charge the mini camera wireless for 4 hours before using to get enough power.
- 4. We suggest that charging while recording, so that it will not go offline due to lack of power.
Technical Specification
| Video Resolution | 1080P |
| Charging Time | 4 hours |
| Using Time | 3 hours |
| Working Network | 2.4Ghz / 5GHz |
| Application Name | Tuya Smart |
| Motion Detection Distance | 5 Meters |
| Wide Angle Lens | 150° Degrees |
| Feature | APP Remote Connection, Motion Detection, Night Vision, etc |
| Power Supply Cable | DC Power or Rechargeable Battery |
| Material | Plastic |
| Product Size | 2.1 × 2.1 × 2.1 inches |