Your Browsing History

Jeffry B.
Joined on 05/23/05
0
0

product reviews
- 4
Great card at a great price! Benefits from undervolting!

MSI Ventus GeForce RTX 3080 12GB GDDR6X PCI Express 4.0 Graphics Card RTX 3080 VENTUS 3X PLUS 12G OC LHR
Pros: *Competitive price versus other 3080s (this is generically true, not trying to get into price specifics as per the Newegg review guidelines) *Good Ampere chip that can run at high clocks with lower voltage (this is crucial to its best performance, read on) *Effective cooling solution that keeps the card at safe operating temperatures even at full 350W power *Performance capabilities well in line with other 3080 models *12GB of VRAM likely to be "enough" for more time versus 8/10GB
Cons: *Lack of RGB lighting makes it an outlier these days *350W hard power limit means that it can't draw more power to achieve even higher performance unlike other AIB 3080 designs *Fan design not as advanced as slightly more expensive MSI models
Overall Review: This card has been a stellar pickup for me. Its stock performance at default settings was a bit lower than the average for 3080 12GB cards, though still a lot higher than even a good 3070 Ti card. The reason for its performance not being as high as some others is because, like its predecessor the 10GB Ventus model from MSI, it features a rather low power limit compared to its direct competition. The 10GB had just 320W to work with, while this card has 350W, and that is a hardware-enforced limit so it isn't something you can just drag a slider to overcome. So, being that its performance by default is power-limited, how can you get better than stock performance without the usual route of running more power through it and overclocking? The answer lies in undervolting! A process that is safe and effective, placing no additional load on the GPU and in fact making it run cooler, with less power usage at a given clock speed. Not every card will have the same undervolting performance, but the process of finding your card's efficiency point couldn't be easier. You can see my attached screenshot for my voltage curve and resulting 3DMark scores for my MSI Ventus 3080 12GB 3X Plus OC, about 5% more than I got with it stock with better thermals and power. Its stock boost behavior tended to stay in the mid-1800s or low 1900s while drawing a full 350W at 1.1V for its highest clocks. Undervolted, its clock is stable at or around 1995MHz at .9V, which has proven stable for my chip in all testing and all gaming applications including raytracing-enabled and advanced DX12 games. This stability lets it achieve greater performance while drawing typically lower wattage and also therefor lower temperatures. The lower temperatures are also related to its boost stability, as nVidia's boosting algorithm takes temperature into account. The only downside to undervolting is that it takes a moment of your time and some stability testing, that's it. Unlike overvolting which places additional strain on components, this actually lets them do their job under even safer conditions than stock! Before you start, run a benchmark at its stock settings so you can get an idea of how high it wants to boost. You will not be able to exceed its stock boost behavior, which might use a voltage as high as 1.1V, with your undervolt, and in fact will probably need to use a lower clock than that, so keep that in mind. My card would boost to 2040Mhz at stock, but only for a split second as it would quickly become power limited and downclock further. But, that gave me a good idea of what a realistic goal should be as I undervolted: definitely not quite that high. Once you've got an idea of what it does stock, get started: 1. Install MSI's excellent "Afterburner" software, and set a clock offset of -260 right off the bat in the "Core Clock MHz" box on that software, and click the checkmark "Apply" button, to the right of the floppy disk-looking "Save Settings" button. That will set the voltage to a very reasonable curve right away, close to the stock boost frequency from nVidia's design. 2. hit "Ctrl+F" to open up the Voltage Curve editor. You want to find the vertical line corresponding to .9V, and (using either your mouse, or your arrow keys) move the frequency point at that .9V line up to a reasonable setting. Because my card did 2040Mhz at 1.1V, I first tried moving this to 1935MHz, which it easily achieved in testing. Set your card's frequency at .9V to something reasonable based on your own card's stock clock, and hit the "Apply" checkmark. That will automatically change the rest of the curve so that it now uses that voltage and under for its clock rates, and never exceeds .9V. 3. If stability testing does not result in benchmarks failing to run or crashing, congratulations, you've got a working undervolt! Test in some demanding games, titles that use DX12 and Raytracing, and if you get stable performance without issues or crashing, you've just saved power and gained performance. 4. Now, you can start to tune the performance level up. Boosting works in 15MHz increments, so move it up 15MHz at a time, repeat testing, and find what level of performance you can get at .9V - well below stock voltage, and thus at a lower power usage overall with better temperatures. I found my chip remains perfectly stable and has performance improvements up to 1995MHz at .9V, which was good for a substantial performance gain over the stock settings as it will dial into that clock speed and stay there for the duration of gaming, instead of throttling! Other voltages may work, but with only 350W, "less" can be "more" for performance. Remember to use the floppy disk-looking "Save" feature to save your resulting profile to one of the numbers on the right of MSI Afterburner to easily apply it again later, or even at startup. I hope this review has been helpful to others who bought this excellent value card. I wish you all success and happiness getting the most from it!
5/17/2022See more detail
The perfect fan for 120mm mounts?
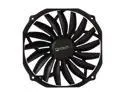
Prolimatech PRO-USV14 140mm Ultra Sleek Vortex Fan
Pros: I'll keep it short and sweet. This is an absolutely amazing fan that performs exactly as advertised - and it advertises some hard to believe specs. You'll believe it when you install the fan! It mounts to any specs-compliant 120mm slot, and pushes as much air as many 200mm fans while remaining inaudibly quiet. I seriously don't know how they did this. I will be using this in every 120mm mounting application for future builds, period. Love it. Being so thin, it's very easy to mount to whatever, and in my case it reduced some turbulence I had with an inferior 120mm fan that shall remain unnamed and a high-end air cooler with a triple fan setup. The third fan was too close to the 120mm fan and the 120mm fan couldn't keep up with all three of the cooler's fans running. This 15mm thick fan most certainly CAN. No turbulence, amazing airflow, no noise, mounts bi-directionally for whatever you need, and dual ball-bearing tech for a very long useful life. I can't find a single thing wrong with it. Genuinely cannot.
Cons: Some might find it a con that a 140mm fan does not have 140mm mounting options, but I have to file that under failure to read the product specifications: user error. It's a 140mm-to-fit-120mm, nothing else. And in that role it is absurdly good.
Overall Review: What more is there to say? This is my new favorite fan to put where a 120mm fan would be called for, bar-none. Top of the heap, excellent quality, superb in every way.
6/26/2013See more detail
Use a zip-tie to mount in reverse. Good fan!
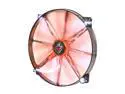
XIGMATEK FCB (Fluid Circulative Bearing) Cooling System XLF XLF-F2003 200mm LED Orange Case Fan PSU Molex Adapter/extender included
Pros: The pros are advertised. In the real world, you get very quiet fans with an excellent combination of airflow and the ability to keep said airflow in a column. I have three of these in a Corsair 650D and they are amazingly better than whatever awful OEM is supplying those stock fans. It's hard to find really nice 20mm fans, and 25mm fans are a very tight fit for the front intake and top exhaust on the 650D, so these were among the few options I had. I picked them because of specs you can read in their marketing. I'm keeping them because they live up to those specs. Temperatures are down and the bearing technology they use will last for a very long time. Solid stuff. I do have them set up somewhat unconventionally along with a Prelimatech PRO-USV14 rear exhaust replacing the 120mm rear exhaust fan from the factory. Only one fan, the side fan, is intake. The rest, including the front, are exhaust. There's ample spacing around the fan to allow for air to intake as needed to prevent thrashing or turbulence, and this setup, while requiring a little more attention to dust than a positive airflow setup, keeps my components much, much cooler than my previous setup. I don't know if others would find this a pro or a con, but I quite like that the LEDs are not blindingly bright. They're understated. Which is fantastic, I don't want them to be bright. You can see some white dots and a flash of orange (the color I chose) and that's it, there's nothing obnoxious going on.
Cons: As mentioned, they only mount one way, and by default it's exhaust. But solving that is as easy as just getting some small zip-ties and turning them around. Tighten the zip-ties up well and ta-da, intake fans with all the nice qualities mentioned above.
Overall Review: I wasn't around for any rebate issues so I have no beef with the company. I just know that I feel that I got my money's worth with these high quality fans. They are inaudible, push air well, and are just bright enough to make my son think they're neat without being so bright that I think they're obnoxious. Provided the long-life bearing holds up its end of the bargain, these are great 200mm thin fans.
6/26/2013See more detail
Contender for the throne
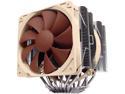
Noctua NH-D14, Premium CPU Cooler with Dual NF-P14 PWM and NF-P12 PWM Fans (Brown)
Pros: Features they don't brag about but they could: *Nickel-plated copper for corrosion resistance *An incredibly well-machined contact block - no, it is not mirror shiny, but that's not the point; get out your most sensitive gear and it becomes clear through testing that this is a really remarkably uniform surface. I don't know how many people are still into lapping for better performance, but it is literally 100% unnecessary here. *Ideal heat pipe dimensions and construction, fully soldered connections with obvious quality control as a top priority - expect the best. *Consistent best-performer. Three worthy contenders: Archon, Silver Arrow, NH-D14. *The fans alone would be half the product's cost if bought separately, yet they're basically tossed in at "cost" to sweeten the deal. Noctua's fans are amazingly reliable. *Noctua support really friendly to deal with, and they ship fast, too. I got the third fan kit (and bought another 120mm Noctua fan for it), was really easy
Cons: The only real criticism you can make is just that it's big, but that's not a legitimate criticism because any heat sink with thermal performance characteristics like this is going to be big. It uses a dual radiator tower design, compared to (e.g.) the great bang for the buck Hyper 212+ single tower design; and, when fitted with the full 3 fan possible complement, it weighs around 3 pounds. Its mounting hardware and modern motherboards are made to take this level of pressure, it's nothing to worry about except when you're moving or whatever. Might be worth dismounting it and taking it separately, just so you don't jar all that weight in transport. It is also quite massive. Pay attention to the RAM compatibility list. Anything with a tall heat sink is a no-go with this cooler. It can be difficult to route wiring and plug in the 8-pin top ATA spec power connector post-installation. My advice: mount the retention system first outside the case, route cables, then mount the NH-D14 itself.
Overall Review: Everything about this cooler is thoughtful and effective, demonstrating the price:performance:radiator dimensions:noise level advantage that modern heat pipe coolers enjoy. To get performance better than this, preconfigured liquid loops have to push way, way more air over their radiator space (less efficient, though their brute force performance can keep temps lower under extreme conditions). But it is absolutely remarkable that this is one of a very limited class of heat pipe coolers that can make liquid cooling look mediocre. I've got mine cooling a 2600K at 4.7GHz and temperatures are completely within the comfort zone despite aggressive voltage and hot Hyperthreading. Even a year and a half in, this remains one of the most thoughtfully designed and carefully implemented heat sinks on the market. One more thing? Even at top performance, the Noctua fans keep it totally quiet. I never hear this thing even when they ramp up. Love it. I'll definitely be paying attention to Noctua.
11/15/2011See more detail