
If your laptop has started to feel sluggish—programs take forever to load, your browser struggles with many tabs, or you’re constantly seeing “disk full” warnings—you’re not alone. As noted in Newegg Insider’s laptop guide, “With hundreds of laptop models … knowing where to start can be tricky.”
The good news: you don’t necessarily need a brand-new machine. Upgrading your RAM and storage can breathe new life into your system—often at a fraction of the cost. With a little preparation and patience, you can transform your laptop’s responsiveness.
This guide walks you through everything—from checking compatibility to installation to follow-up checks—so you know what you’re doing and why it matters.
Why Upgrading Still Matters in 2025
Modern laptops are fast out of the box, but “fast enough” shifts over time. Operating systems, browser engines, creative and gaming software all demand more memory and faster storage access.
As Newegg Insider’s Upgrading Laptops 2025 article points out, upgrading isn’t just about chasing bigger numbers—it’s about improving your everyday experience:
“Enhanced Performance … Better Graphics … Increased Storage … Improved Portability … Longer Battery Life.”
What each upgrade does
-
RAM (Random Access Memory): your laptop’s short-term workspace. More RAM = smoother multitasking and less lag.
-
SSD (Solid State Drive): your speed engine. A good SSD cuts boot times and file-load delays dramatically.
If your system still runs on 8 GB RAM and a SATA HDD, upgrading both will make it feel like an entirely new machine—especially considering the entry, mainstream, and premium upgrade tiers in Newegg’s Laptop / Notebook store.
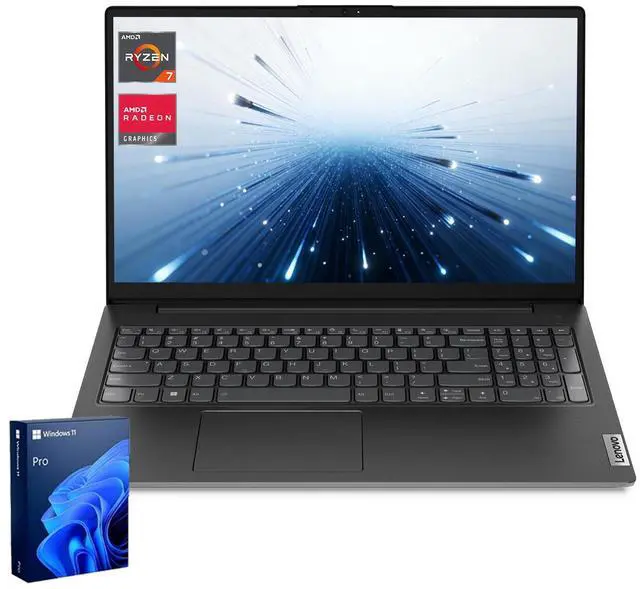
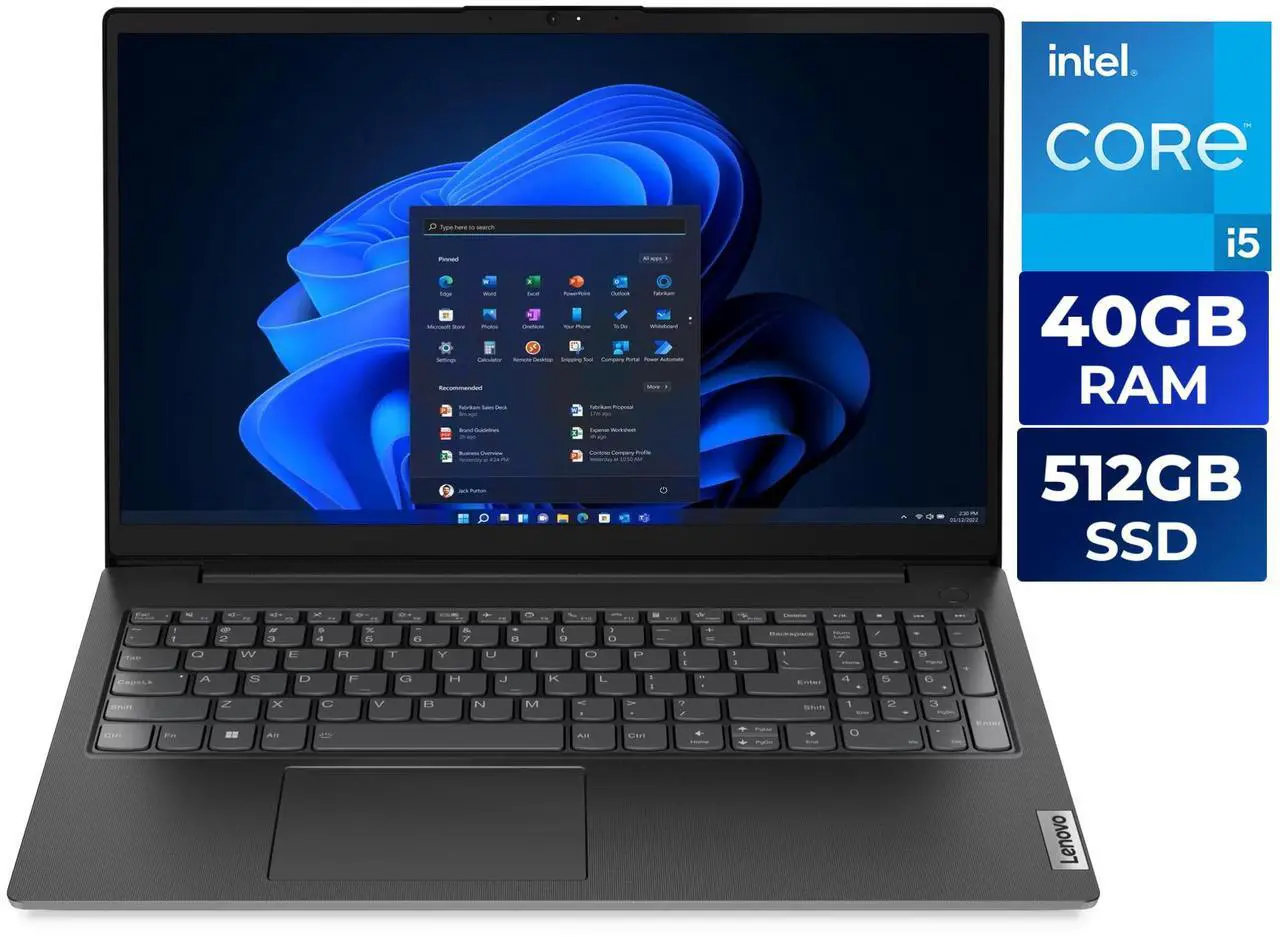
But if you already picked up something like this Lenovo beast — Lenovo 15.6″ Laptop (Core i5-13420H, 40 GB RAM, 512 GB NVMe SSD) — congratulations, you basically pre-upgraded your life.
With 40 GB of RAM, your browser tabs can hold an entire library, and that 512 GB SSD already gives you lightning-fast boots and instant launches. So you can skip the screwdriver this time—sit back, enjoy the speed, and maybe lend your toolkit to a friend still stuck on 8 GB and spinning platter drives.
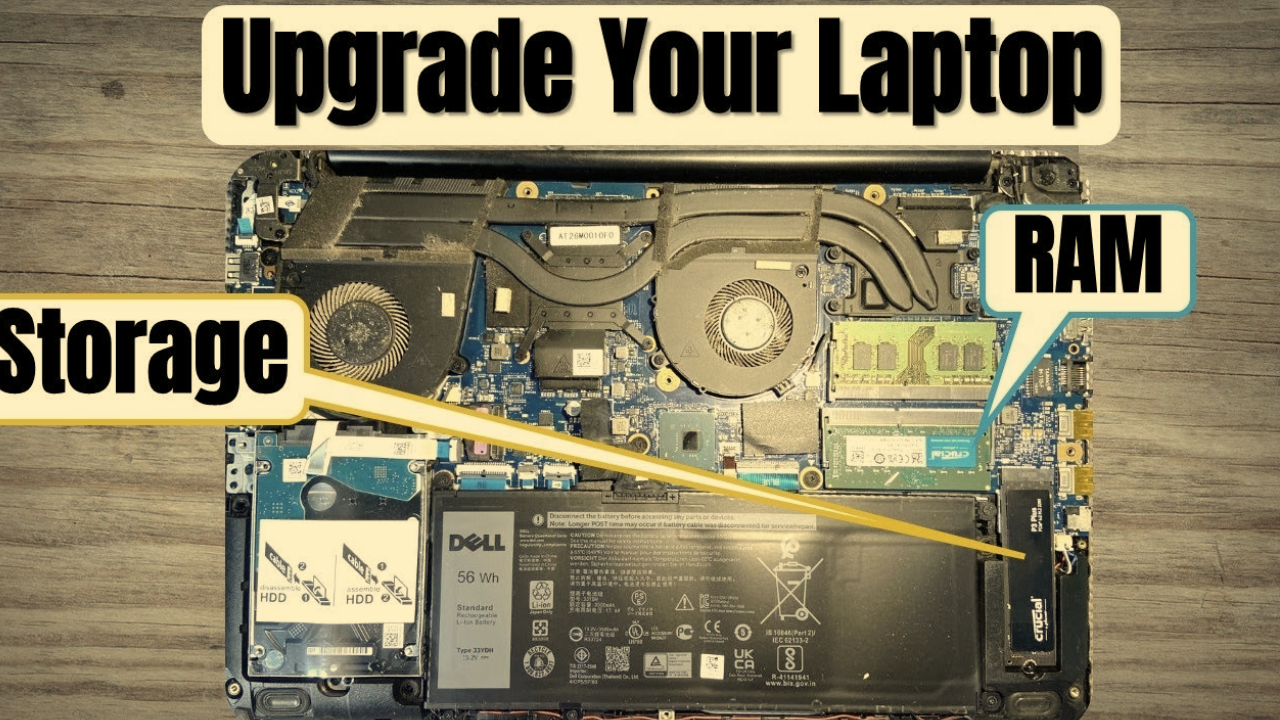
Step 1: Check What’s Inside Before You Buy
Every laptop is different, so before buying parts, confirm what your system supports.
Confirm your current specs
- Windows:
Ctrl + Shift + Esc → Task Manager → Performance - macOS:
Apple Menu → About This Mac → System Report - Use tools like CPU-Z or Crucial System Scanner for exact info.
As Newegg suggests, “8GB is the minimum for smooth operation; 16GB or more is recommended for heavy multitasking.”
Check maximum supported RAM and slots
- Visit your manufacturer’s support site or use a compatibility scanner.
- Note: RAM type (DDR4 vs DDR5), max capacity (e.g., 64 GB), and slot count.
From Newegg’s Upgrading Laptops 2025:“Upgrading your laptop … is about enhancing your overall computing experience.”
Identify storage interface
- Does your system have a 2.5″ SATA bay, an M.2 NVMe slot, or both?
- As the “Choose the Best Laptop” guide notes:
“Storage: SSD for faster performance. 256 GB is a good start; 512 GB or more is ideal.”
Pro Tip
Take a photo of your laptop’s internals before removing anything. It makes reassembly much easier.
Step 2: Gather Tools and Prep Your Workspace
Preparation is everything. A smooth upgrade starts with the right setup — and the right tools.
You’ll need:
-
Precision screwdriver set (Phillips #0 or #00) — your best friend for opening laptop chassis.
If you don’t already have one, check out Newegg’s collection of Hand Screwdrivers & Nutdrivers — from compact magnetic kits to professional torque-handled sets. You’ll thank yourself later when you’re not chasing tiny screws across the table. -
Plastic pry tool or guitar pick – to safely lift panels without scratching the casing.
-
Anti-static wrist strap – or simply touch an unpainted metal surface to discharge static electricity before touching components.
-
Small container or magnetic tray – for screws and clips (trust us, one runaway screw can derail your whole afternoon).
-
Your new RAM and/or SSD – unboxed and ready to install.
Optional but helpful:
-
USB drive (16 GB or larger) – for reinstalling or repairing Windows if you’re starting fresh.
-
USB-to-SATA or USB-to-NVMe adapter – handy for cloning your existing drive to the new SSD before swapping.
Tip: Work on a hard, non-carpeted surface. Avoid soft areas like beds or rugs — they’re static-electricity traps waiting to zap your brand-new memory stick.

Step 3: Upgrade the RAM
Usually the simplest and safest upgrade—still, handle with care.
- Power down and unplug.
If the battery is removable, take it out; if not, hold the power button 5 seconds to discharge. - Unscrew the back panel carefully; keep screws organized.
- Locate the RAM slots—thin slots with metal clips.
- Remove old modules by pushing clips outward; the stick will pop up.
- Install new RAM:
- Align the notch correctly.
- Insert at a 30° angle and press down until clips click.
- For dual-channel setups, use matching modules (same brand/speed/size).
- Reassemble and boot.
- Verify under Task Manager → Performance → Memory.
Pro Tip: If RAM is recognized but performance still lags, update BIOS or enable XMP/DOCP.
Looking for the right memory?
Check out Newegg’s full range of Laptop Memory Upgrades.
You’ll find everything from budget-friendly DDR4 sticks to high-speed DDR5 kits ideal for heavy multitasking, gaming, and creative workloads.