
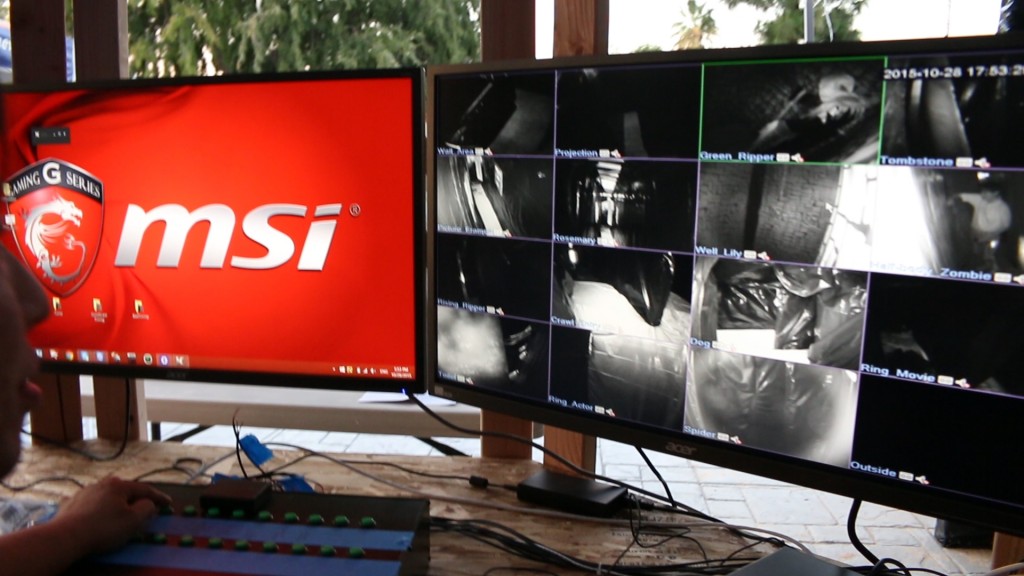
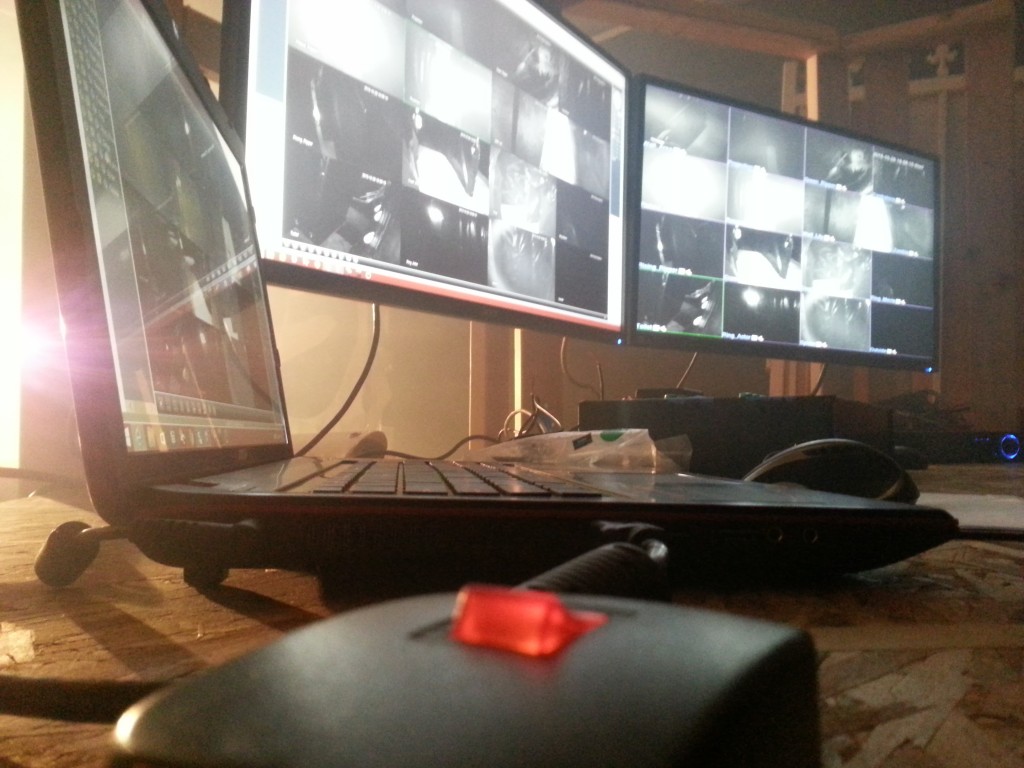
Command Center
What made this project unique was our command center, where the operator can control everything from the lighting to the sounds, props, fog machines and cameras. From the beginning this was the most involved part of the project. With the MSI Apache gaming laptop we are able to record the video feed directly to the hard drive and play background audio tracks on a loop. Our Annke 16 channel surveillance system needed to have wires pulled throughout the entire maze and the cameras had to be calibrated. One of the problems we didn’t expect was the IR capability picking up the slightest reflection from the black plastic sheeting on the walls, thus washing out the picture on-screen. This was solved by simply taping off the majority of the LEDs, which lowered the intensity of the glare in the low-light areas.
We are able to focus on key areas by using multiple monitors and setting cameras to have an overview of the entire maze at all times. Viewing is important because operators have up to three sets of attendees navigating the maze at one time. Part of the beauty of this setup is the ability to see where everyone is to time the scares at just the right moment. Having the space to display all the feeds is critical.
Control Box
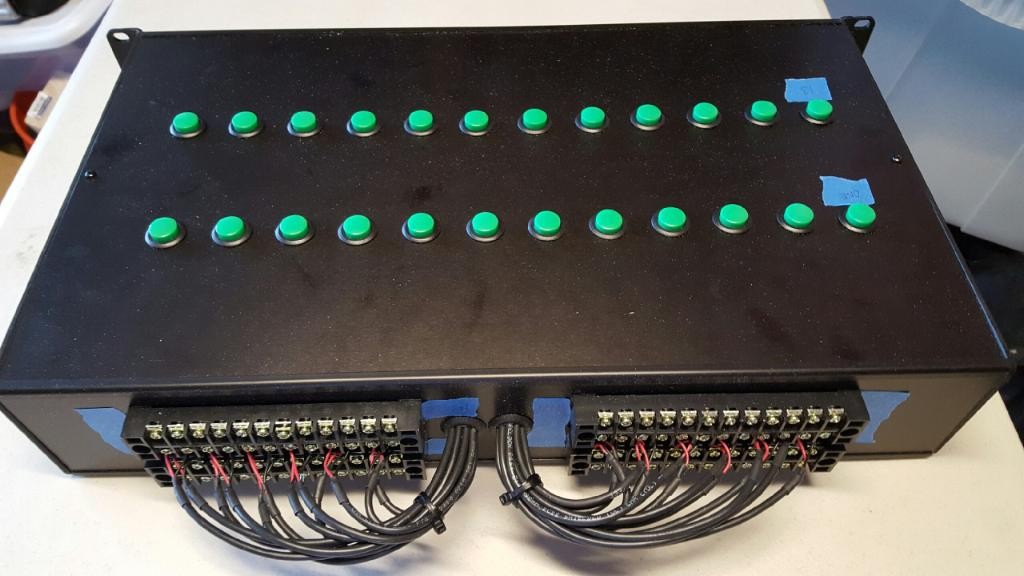
A very important piece to getting all the tech aligned is the control box, which will be used to activate all the props, audio and video. Constructing the unit was fairly simple. We started with a metal box with holes drilled out for the buttons. You can use any type of button or switch. On our setup we have the simple push-button style. After all the buttons are installed, they are linked up with a contact for the wires, which was then is connected to the props throughout the house with 14ga. wire.
One of the issues which unexpectedly popped up was a time delay between when the button was pushed and the prop/action was triggered. This was due to the distance between the two, so we added a battery pack to give the charge a little boost.
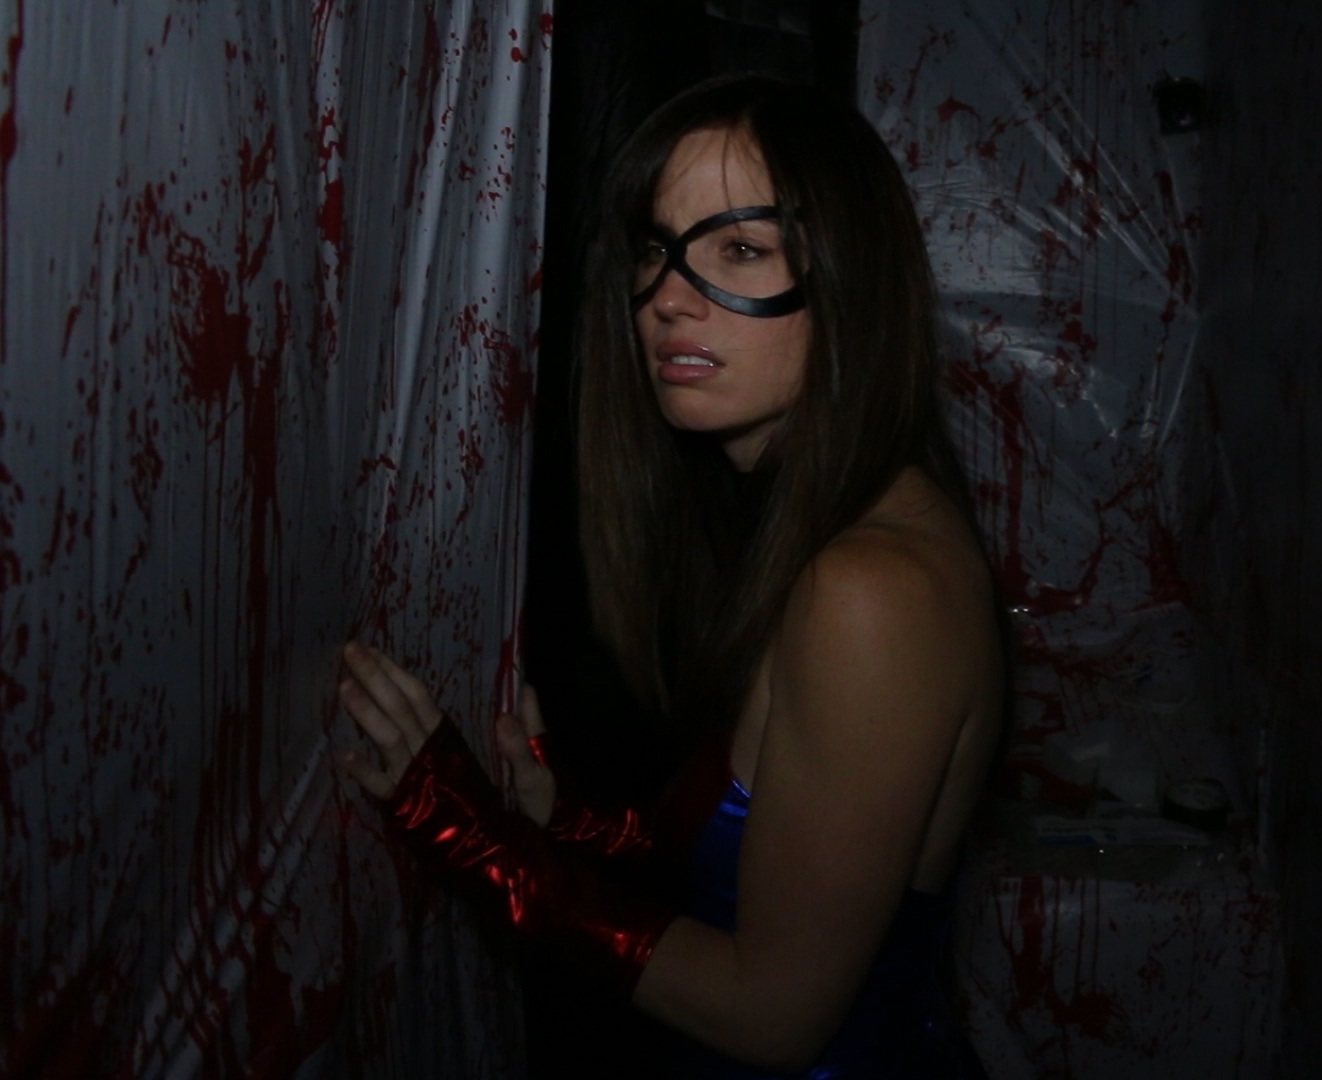
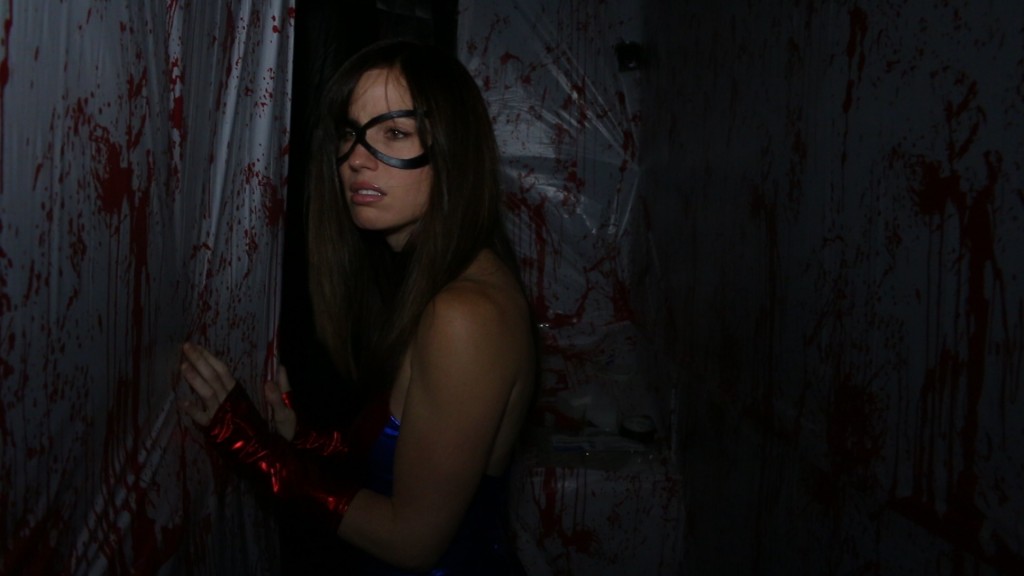
Haunted Portraits

A really cool way to make a haunted house more techie and unique is to add moving pictures. We added an LG 23” monitor into the walls of the walkway we built and covered the screen with some plexiglass. By adding some inexpensive moulding over top of the plexiglass we created the illusion of a moving image inside a picture frame. There are several video files available online of loops of still images springing to life, so you can choose from several. Ours was hooked up to the control box with the audio output going to the Corsair speakers positioned to surround the visitor. With eyes on the location, the operator can trigger both the action and sound with the push of one button, ensuring a properly timed scare.
The Event Details
18628 Bellorita Ave, Rowland Heights CA 91748
Friday 10/30 7pm-12am
Saturday 10/31 7pm-12am
Sunday 11/1 7pm-9pm
If you are near the area, come out to take a walk through the haunted maze and check out the command center. The event is free and fun for families.
Looking Back
All in all, this project was a great way for Newegg to get involved with the local community and help out a family passionate about technology and DIY projects. We had a lot of fun and learned some great things about using tech in a completely different way. We look forward to future DIY projects, and hope it gave you some ideas as well.
Did you enjoy reading about this? What DIY projects have you done around the house? Planning on building anything new?