
One of the most productivity-enhancing upgrades you can make to your laptop is adding one or more additional monitors. The ability to spread your work over multiple displays gives you more screen space to work with and an easy way to segregate your various tasks. Windows 11 makes it easy to work with multiple monitors in a number of useful ways, and this guide will provide an overview of how multiple monitors can make you more productive.
Adding additional monitors to your laptop
The first question that needs answering is: how many and what types of external monitors will your laptop support? The first step is to contact your laptop manufacturer and determine how many external displays your laptop’s graphics processing unit (GPU) will support.
There are so many different laptop configurations that it would be impossible for us to cover all of them here, and so we’ll provide some general advice on how to connect external displays.
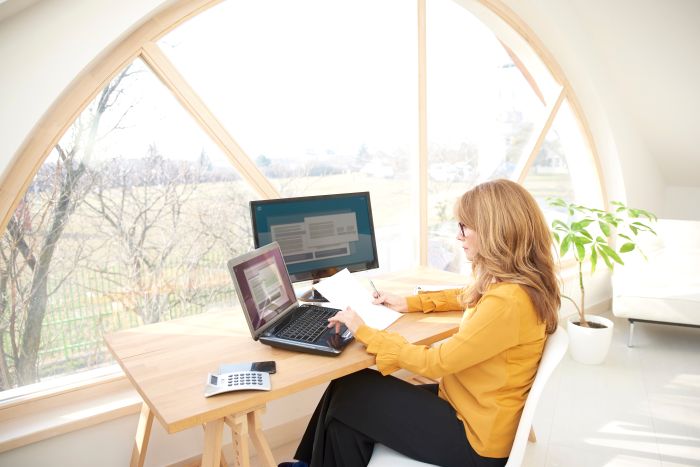
Desktop real estate is at a premium
If your laptop is older and only has USB-A 2.0 or USB-A 3.0 ports, with no USB-C or Thunderbolt ports, then your external display choices will be more limited.
You may or may not be able to connect via USB-A – again, contact your laptop manufacturer – but if you can then you can use a USB-A adapter depending on your display’s connection. For example, if your display uses HDMI, then a USB-A to HDMI adapter would be your choice. Other options include USB-A to DisplayPort and USB-A to DVI.
If these adapters will work with your laptop, then you would simply connect them and install the required drivers. Note that depending on the laptop and adapter, you may be limited to connecting to a Full HD (1,920 x 1080) display.
Some laptops have HDMI ports built-in, which would let you connect directly to a display. These are plug-and-play solutions and will typically support up to 4K (3,840 x 2,150) displays.
More recent laptops have USB-C and Thunderbolt 4 adapters. You can get a variety of USB-C adapters just as you can with USB-A, only they’re going to provide higher resolutions and faster refresh rates (up to 60Hz). Example adapters include USB-C to HDMI, USB-C to DisplayPort, and USB-C to DVI. You can also connect to a variety of USB-C docks that can provide additional display support with a variety of resolutions.
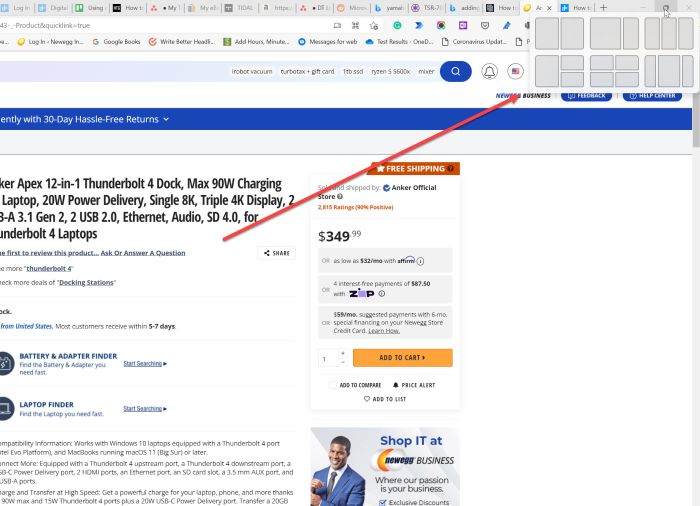
The most powerful connection is Thunderbolt 4. You can connect to a single display via the same adapters that you would use for USB-C, or you can get a Thunderbolt 4 dock. In the latter case, depending on the dock you may be able to connect up to three external 4K displays or a single 8K display. These are expensive options, but they provide the most flexibility.
More PC, less money. Helix. It’s in our DNA.
Configuring multiple displays in Windows 11
Once you have your displays connected and working, then you’ll want to configure them the way that best suits your working habits and configuration. This includes setting up the proper resolution and arranging your displays in your laptop’s configuration to match their physical arrangement.
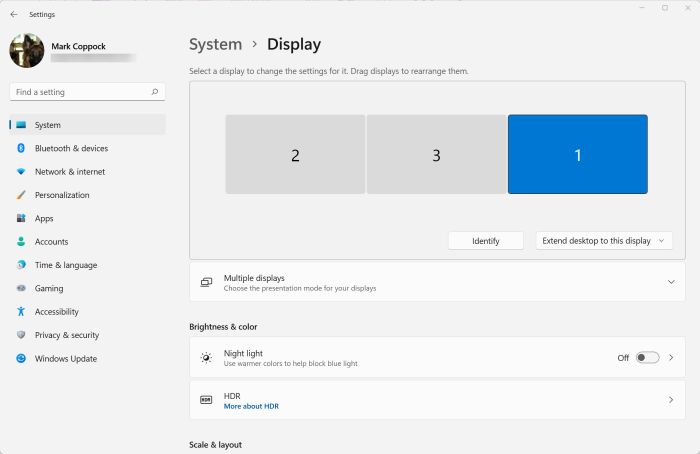
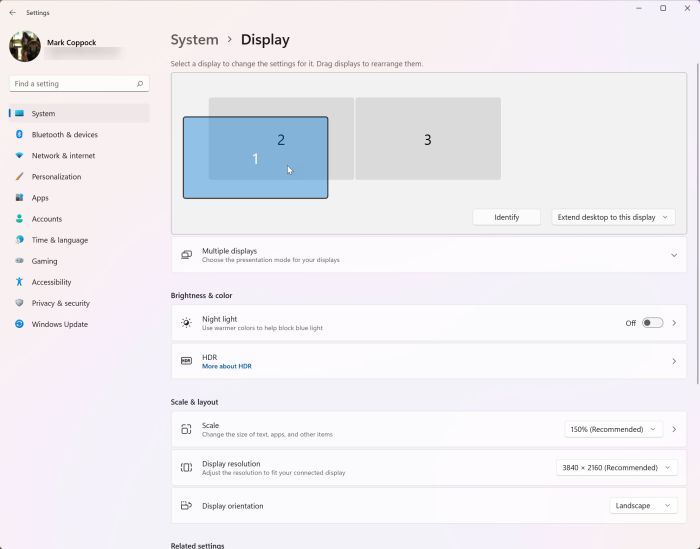
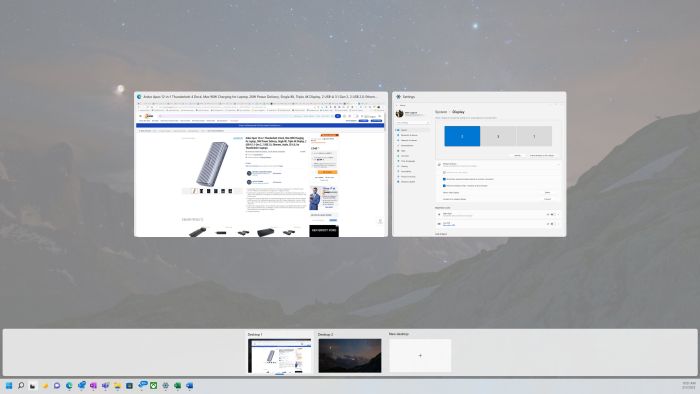
To do so, you need to open Settings, then choose System and Display. All of your displays should be represented, but they may not be in the right order.
It’s a triple threat
Each of your displays will have a number.
In the example, there are three displays.
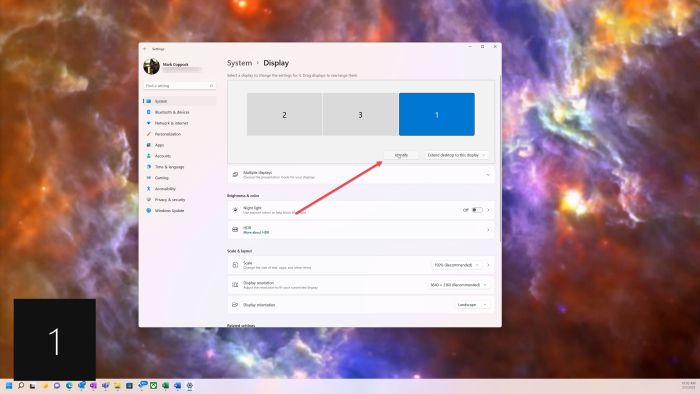
To determine with display icon corresponds with which physical display, you can click the Identify button and the number of each display will show up on the appropriate screen.
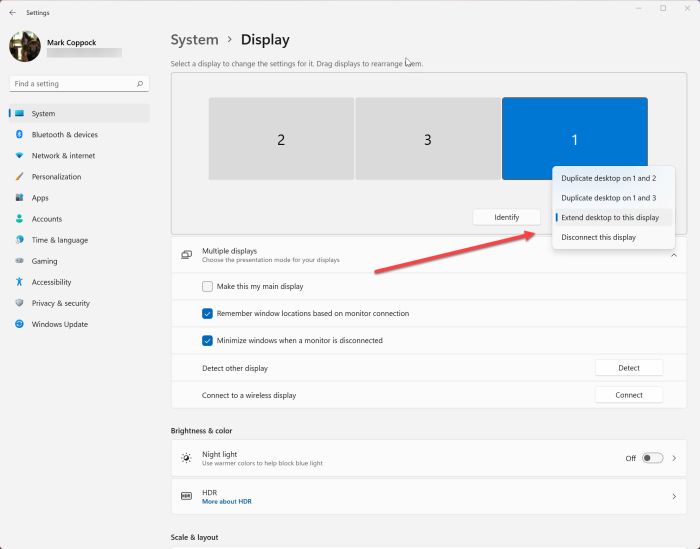
When you first set up your displays, Windows 11 might default to duplicating two displays rather than extending them to separate screens.
You can easily tell Windows 11 to extend them by selecting from the drop-down menu next to the Identify button.
If you want to duplicate displays instead, then you can make that choice as well.
Identify your opportunities to extend your view
Bring order to chaos
If your displays aren’t in the right order, then you can simply drag and drop the appropriate icons into the proper position.
For example, if your laptop is on the left and you have two external displays to the right, then you would drag each icon as needed.
That way, your mouse will move fluidly from left to right through each display.
Click the Apply button when you’ve finished.
We have tons of Laptops to choose from
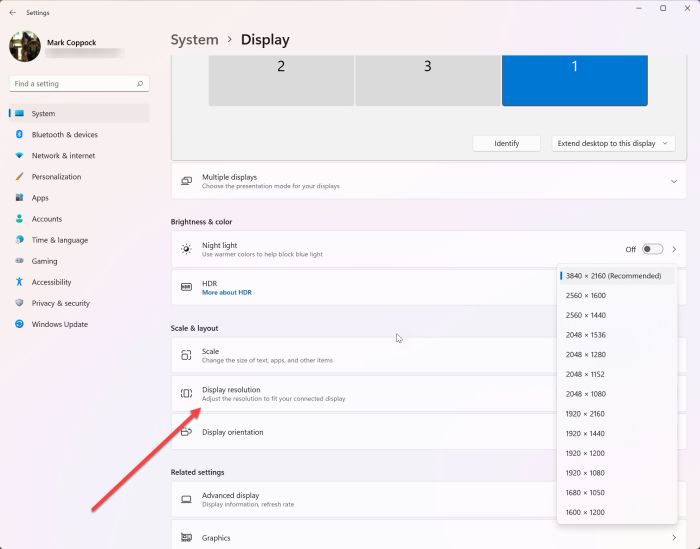
Next, you’ll want to make sure each display is set at the right resolution.
To do so, simply select the display’s icon and go to the Display Resolution section.
There, select the right display from the drop-down menu.
Manator Monagment
One should always seek resolution
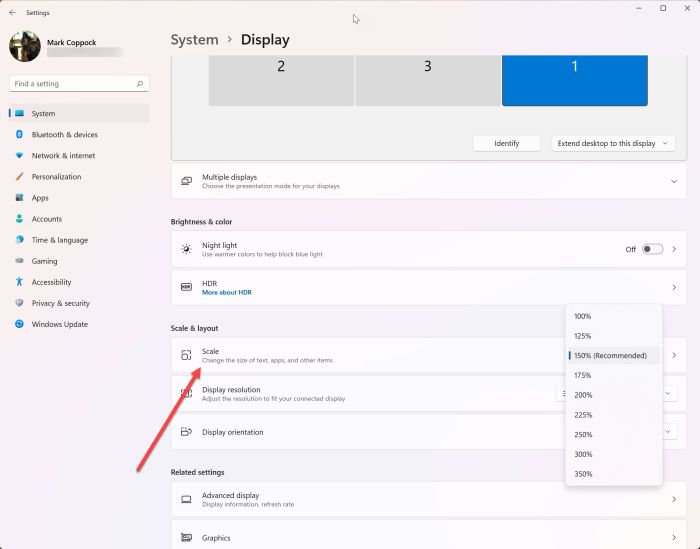
You can also adjust the display’s scale, which will make items appear larger or smaller on the screen.
Choose the percentage that works best.
There’s a “Recommended” setting that Windows 11 will determine for you, and that typically works well.
But if you like your on-screen items such as text and icons to be larger or smaller, just choose a lower or higher scale.
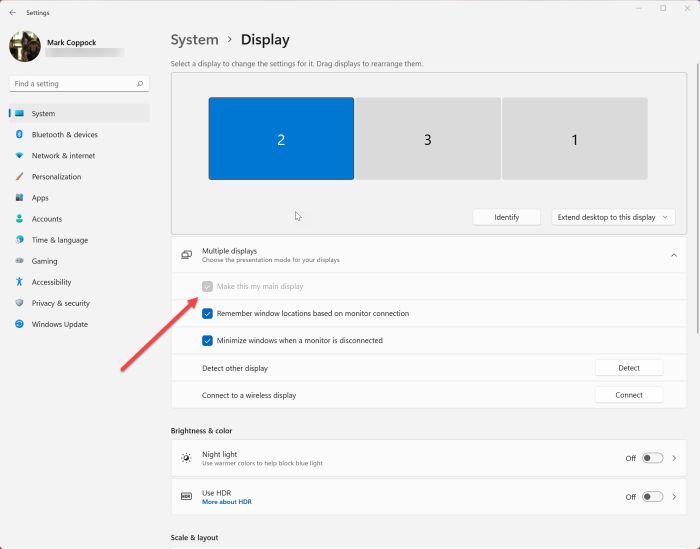
Finally, you’ll want to choose which display is your main display.
This is where the Windows 11 system tray will appear on the bottom right, where you can change various settings.
To make that change, select Multiple displays and then, with the appropriate display icon selected, click on the Make this my main display option.
Tip the scale
Your main displayns mainly on the planes
You can also make other changes in this section, such as whether Windows 11 should remember window locations based on the display connection and whether windows should be minimized when a display is disconnected.
You can also Detect new displays if they’re not showing up and connect to a wireless display.
There are more setting in the Display section, but these are the ones that are pertinent to configuring multiple displays. Now, let’s move on to how you can use multiple displays effectively.
Check out all our Monitors on display.
Utilizing multiple displays
There are a variety of ways that multiple monitors can make your work easier and more productive. For example, you can easily drag windows from one display to another. Let’s say you’re writing an article and you have a browser full of research tabs. You can drag the browser to another window and segregate it form your Word document, making it easier to access the research while writing.
You can also use all the same Windows 11 Snap Assist features on multiple monitors. If you hold your mouse over a window’s maximize/minimize button, for example, you’re given the option to select from several split window arrangements.
Select which one you want and then which windows you wan to populate and your display will be arranged accordingly. You can do this for each display that’s connected to your laptop, making for a powerful means to manage your many windows and utilize them most effectively.
You can also use the Desktops feature, which lets you create spaces for maintaining different sets of windows.
Again, this works just like with a single display, only you can now include your multiple displays in a desktop.
That makes it a much more powerful tool.
It’s a snap
Desktop display delineation
Within the Desktops configuration screen, you can simply drag windows to a new desktop to reconfigure your environment.
Then, selecting a Desktop will present you with just the information you need for a given task.
Multiple displays are powerful tools
Clearly, adding additional displays to a laptop makes it a much more powerful tool. You can extend your work area and organize your information in ways that are impossible with a single display. Hopefully this guide has been helpful in getting your multi-monitor setup configured and working best for you.
Newegg. Tech your world.
Related Posts
- Monitor Response Time Explained: The Science Behind Smooth Gaming in 2026
- Do Gaming Monitors Have Motion Blur or Ghosting Issues? What Buyers Need to Know
- Curved vs. Flat Gaming Monitors: Which Shape Is Right for You in 2026?
- 10 Best Laptops for Windows 11
- Windows 11 Requirements: A Guide for Custom PCs