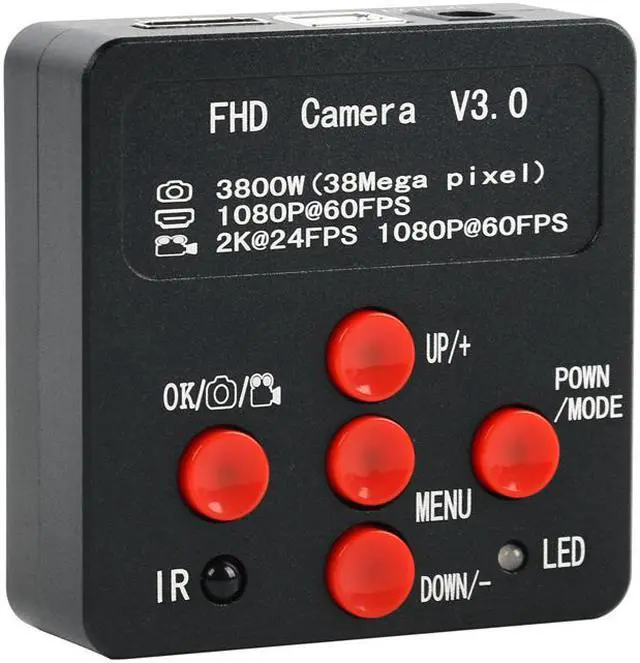
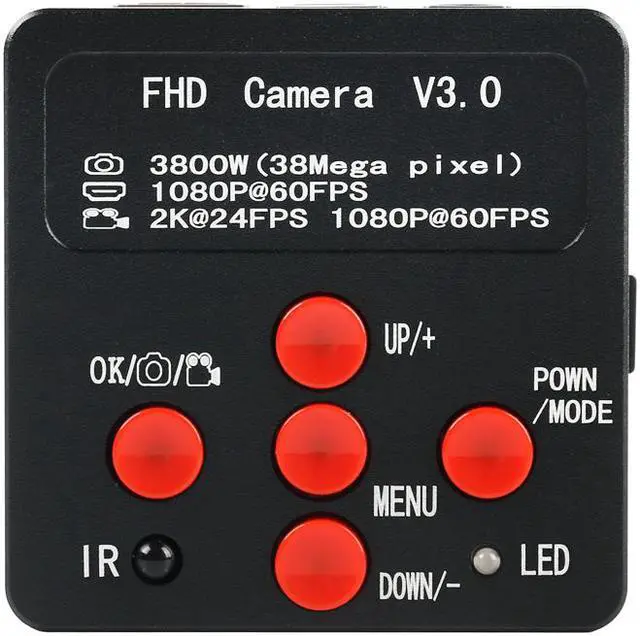
MENU
Short press the button for 1 second and enter menu setting page. UseUP/DOWN button to select related funtions and press OK button toenter submenu.
a) Chinese/English language settings: use UP/DOWN button to select and press OK button to confirm; b)
Grid line settings: press UP/DOWN to select line and press OK button to enter, press UP/DOWN to open/close 10 grid lines rulers, to open/close 8 grid lines, every lines direction, position, color or width, then press OK to change the lines direction, position, color or width. Press MENU button again to return to upper level menu; c)
Exposure setting: press UP/DOWN to select auto/manual exposure mode, then press OK to confirm; d)
EV settings: under auto exposure mode, enter to select +- 0.3 / 0.7 / 1.0 / 1.3 / 1.7 / 2.0 exposure value as needed; e)
White balance settings: can select auto, manual or one-button-calibration mode after entering, there might be color deviation if you change the light, then you can put a white paper and select one-button-calibration to calibrate the color. You can also adjust the red and green value manually for special use; f)
Color setting: can select colorful or white/black mode as needed; g)
Light frequency settings: can select 50Hz/60Hz as needed; h)
Acutance settings: options for strength/standard/soft; i)
Contrast settings: high/middle/low options as needed; j)
Video size: 3 options for 2K24fps/1080P60fps/720P60fps can be used as needed; k)
Mirror function: vertical/horizonal mirror functions in option; l)
Format: it can be used for new card or even defected card before taking photos in memory; m)
Regain default settings: regain all your settings to original default settings; n)
System information: its original software version, repress MENU button to exit;
OK/CAPTURE/RECORD: Under camera mode, short press OK button to take a photo; under video mode, short press to start or stop recording; under MENU mode, itsconfirm button, for lines open/close and vertical/horizonal change, position adjust, and also line color/width change.
UP/+: under camera mode, short press this button to increase EV.
DOWN/-: under camera mode, short press this button to decrease EV.
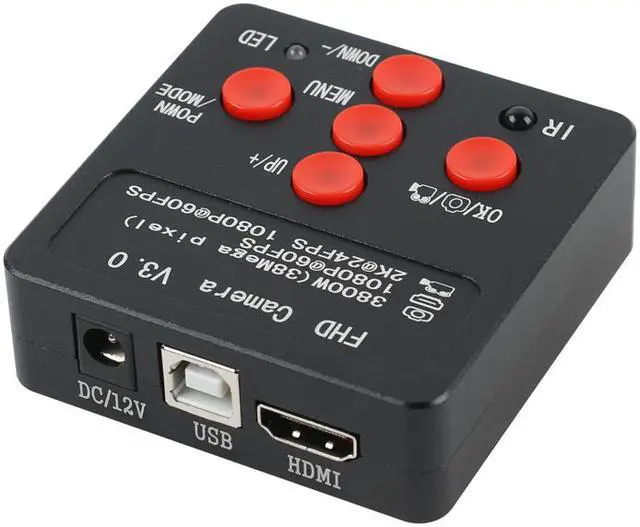
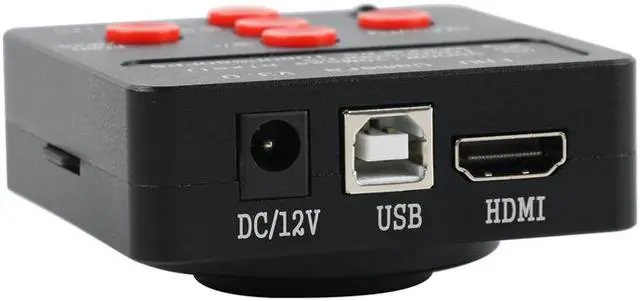
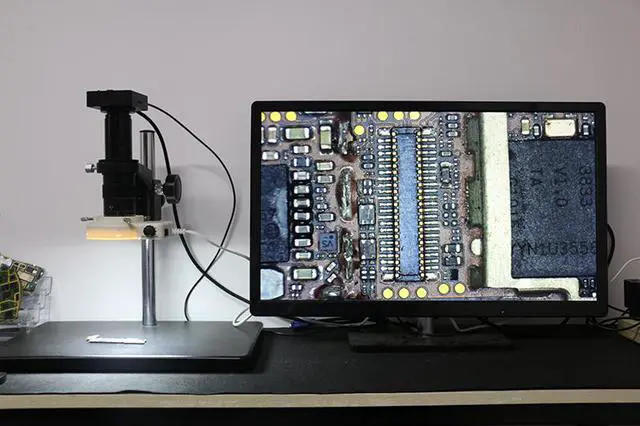
HDMI Interface: connect camera to a monitor with HDMI interface, please use 16:9 wide monitor.
USB/PC Interface: 1. connect the camera to your computer with USB cable, then power on, if a SD card available in camera, then you will enter U disk mode and can prereview the pictures/videos from camera SD card or copy to your computer. 2. If no SD card in camera, you will enter PC-CAM mode to view pictures from your computer directly, and no driver needed here.
FunctionPicture Pixel: 8000*4500 36MTF
Card: Video
RecorderGrid line: 8 horizontal lines, 8 vertical linesVideo
Frame Rate: 60FPS@1920x1080
24FPS@2K 60FPS@720PTF card: 4GB (Up to 32GB maxCMOS censer: 1/
2.33 inchCross line: Overlap or
CancelCMOS pixel: 1.33 um x 1.33 umLens jack: C-mountColor
setting: Auto
Power: 12V/1AWhite
balance: Auto/one
button calibration/ManualSize:
68x68x35mmEV:
Auto/ManualWeight:
180gLanguage: Chinese, EnglishCamera
mode: HDMI output 1080P @60 FPS
Working temperature:
0-70POWER/MODE: This camera is plug-in to power on, long press the button for 3 secondsto power off, then short press for 1 second to power on. Power on success if you hear ticking with red indicator light on. After power on, short press for 1 second to change to video mode, press one more second to change to picture/video playback mode, one more press back to camera mode.