
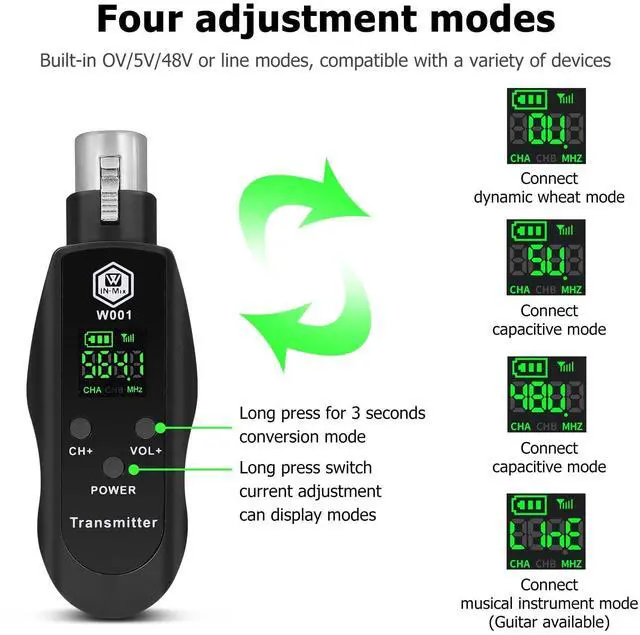
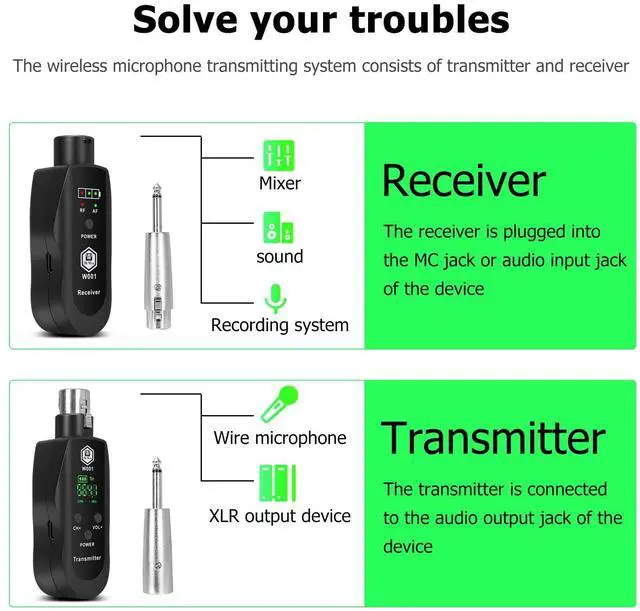


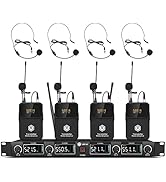
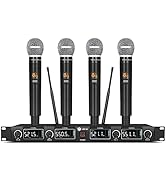
How to switch voltage modes (0V/5V/48V/LINE) on the device?
Press and hold the volume/voltage button for 3 seconds to cycle through modes
0V: Dynamic microphones (default).
5V: Standard condenser mics.
48V: 48V condenser mics.
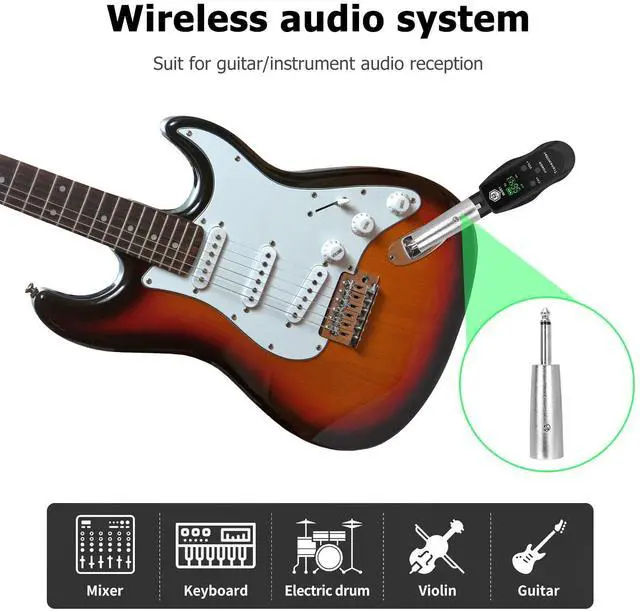
LINE: Instruments (e.g., guitars).
What to do if the device won’t turn on or suddenly shuts down?
Check if the battery is drained; recharge and restart.If the indicator light behaves abnormally (e.g., constant flashing), it may indicate a battery fault—contact after-sales support for replacement.
How to reconnect via identification code if the signal is interrupted?
Turn off receiver and transmitter.Press and hold the transmitter’s “CH” button and power button simultaneously until the screen flashes.Turn on the receiver. When the RF light flashes 3 times, press the “CH” button to confirm the frequency.
How to confirm successful device pairing?
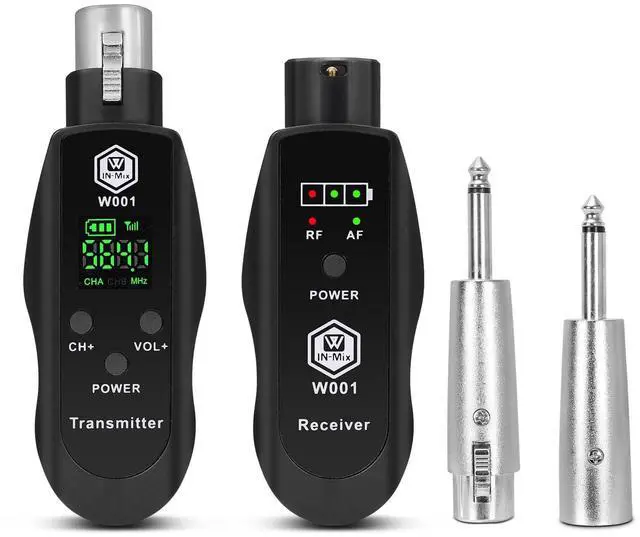
Receiver’s RF light (red) solid: Signal is being received.
AF light (green) on: Audio input detected, confirming active connection.
What to do if there is too much noise in the audio?
Solution 1:Lock the XLR connector: Make sure the XLR plugs of the microphone and transmitter are fully inserted and locked to avoid poor contact caused by looseness.
Solution 2: Adjust transmitter power by following manual or contacting us


W IN-MIX believes in "Music Without Limits" and aims to empower musicians with its products and services. The brand strives to be the top partner and supporter of musicians by providing innovative and high-quality audio equipment and services.W IN-MIX's vision is to become the world's leading audio equipment brand, providing the best audio equipment and services for musicians.
W IN-MIX
W IN-MIX


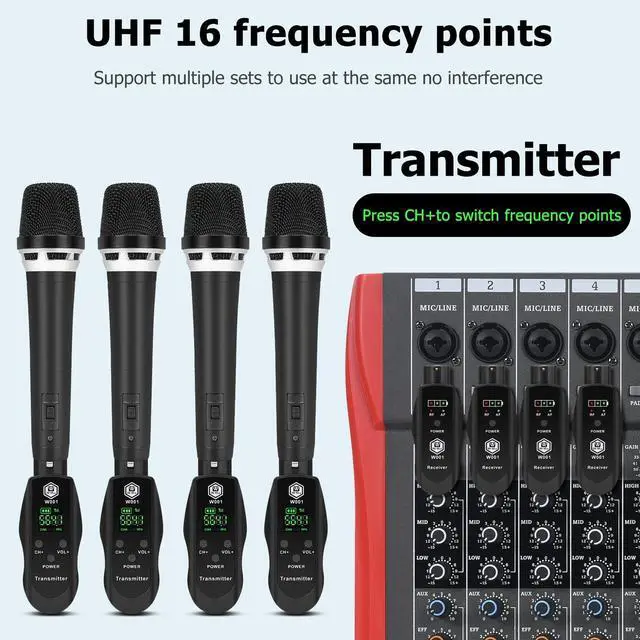
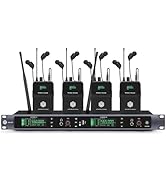
Frequency Adjustment
How to change the Frequency?
1.Frequency Adjustment: There are 16 frequencies
2.After powering on the receiver and transmitter separately,simply press the CH+ button on the transmitter to switch frequencies
Lock Frequency
How to lock the Frequency when multiple sets of machines are used together ?
1.Simultaneously press and hold the CH+and POWER buttons on the transmitter for about 4 seconds until the screen starts flashing
2.Then press and hold the POWER button on the receiver for about 4 seconds until the RF indicator light flashes.Release the button when the flashing stops to lock the channel
3.During multi-channel operations, turn off all other receivers and transmitters, keeping only the pair you wish to pair active
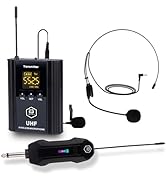
Voltage switching operation
How to change the voltage ?
1.Turn on the transmitter
2.Press the button and continue to hold it for 3 seconds to switch the voltage to OV,5V,48V or LINE (ie,Press and hold it for 3s,you could switch it from OV to 5V, then release the button,Press and hold it for 3s to 48V; then release the button,Press and hold it for 3s to LINE)
3.3V: Dynamic Microphones; 5V: Standard Condenser Microphones; 48V: 48V Condenser Microphones; LINE: Wireless Audio Devices (e.g., Guitars)
How to switch voltage modes (0V/5V/48V/LINE) on the device?
Press and hold the volume/voltage button for 3 seconds to cycle through modes
0V: Dynamic microphones (default).
5V: Standard condenser mics.
48V: 48V condenser mics.
LINE: Instruments (e.g., guitars).
What to do if the device won’t turn on or suddenly shuts down?
Check if the battery is drained; recharge and restart.If the indicator light behaves abnormally (e.g., constant flashing), it may indicate a battery fault—contact after-sales support for replacement.
How to reconnect via identification code if the signal is interrupted?
Turn off receiver and transmitter.Press and hold the transmitter’s “CH” button and power button simultaneously until the screen flashes.Turn on the receiver. When the RF light flashes 3 times, press the “CH” button to confirm the frequency.
How to confirm successful device pairing?
Receiver’s RF light (red) solid: Signal is being received.
AF light (green) on: Audio input detected, confirming active connection.
What to do if there is too much noise in the audio?
Solution 1:Lock the XLR connector: Make sure the XLR plugs of the microphone and transmitter are fully inserted and locked to avoid poor contact caused by looseness.
Solution 2: Adjust transmitter power by following manual or contacting us
W IN-MIX believes in "Music Without Limits" and aims to empower musicians with its products and services. The brand strives to be the top partner and supporter of musicians by providing innovative and high-quality audio equipment and services.W IN-MIX's vision is to become the world's leading audio equipment brand, providing the best audio equipment and services for musicians.
W IN-MIX
W IN-MIX