The S600 3G/4G security cameras support the 4G network including T-Mobile, and AT&T. A prepaid 4G SIM card which has 100M/7 day free data is included in the package. There are no contracts, or other hidden fees to use the card. You can add more data plans in the app easily. (The app will notify you when you run out of cellular data)
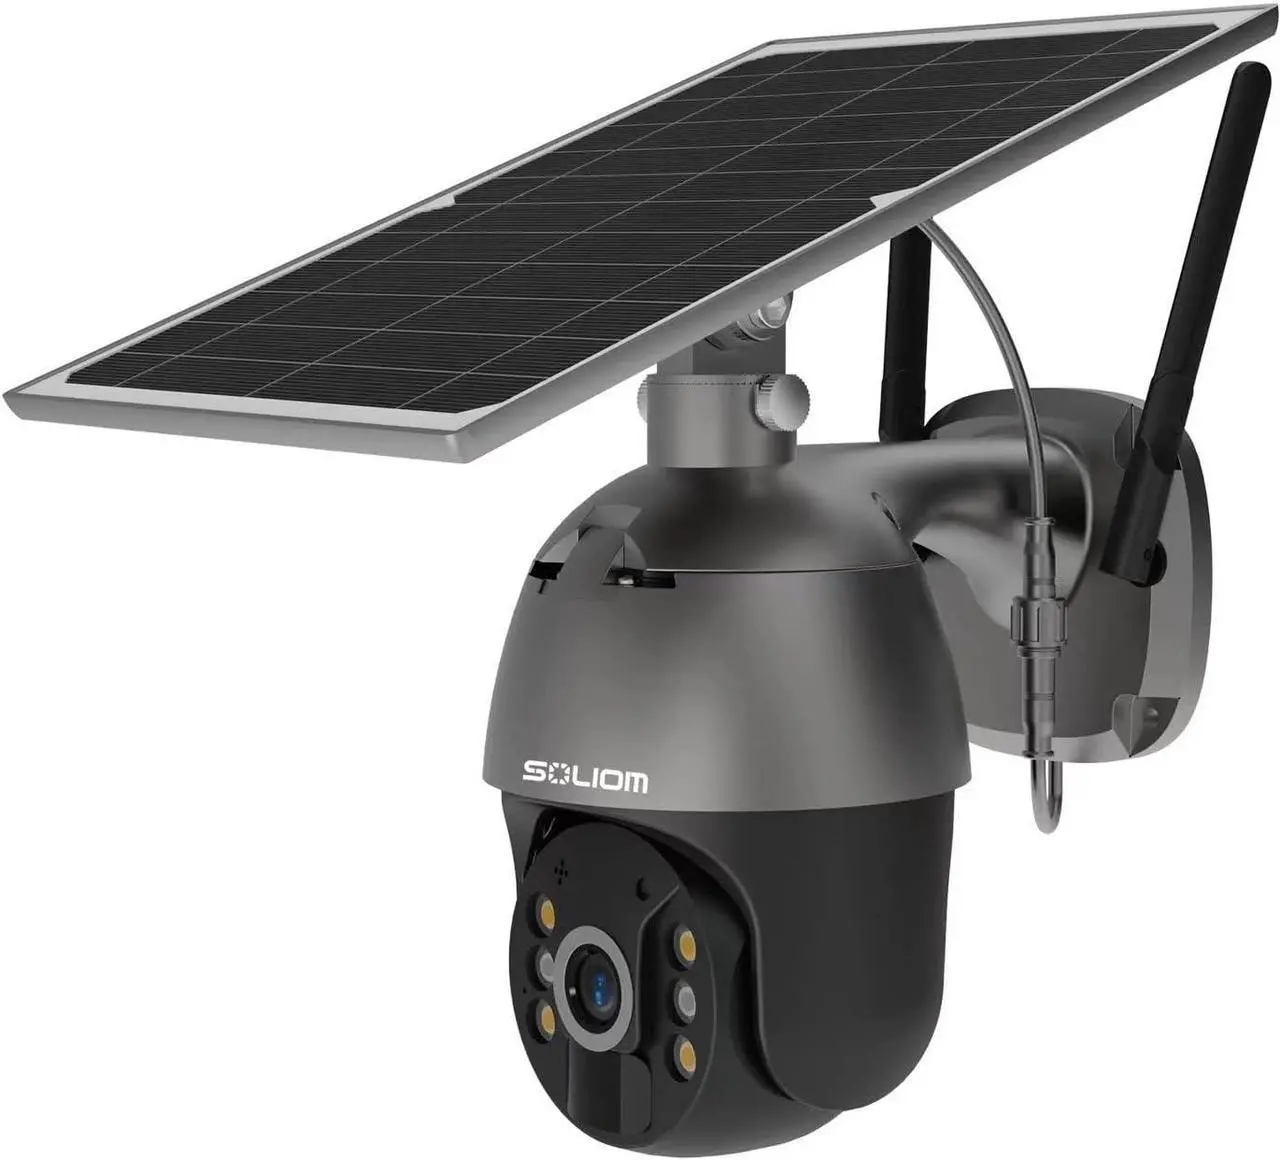
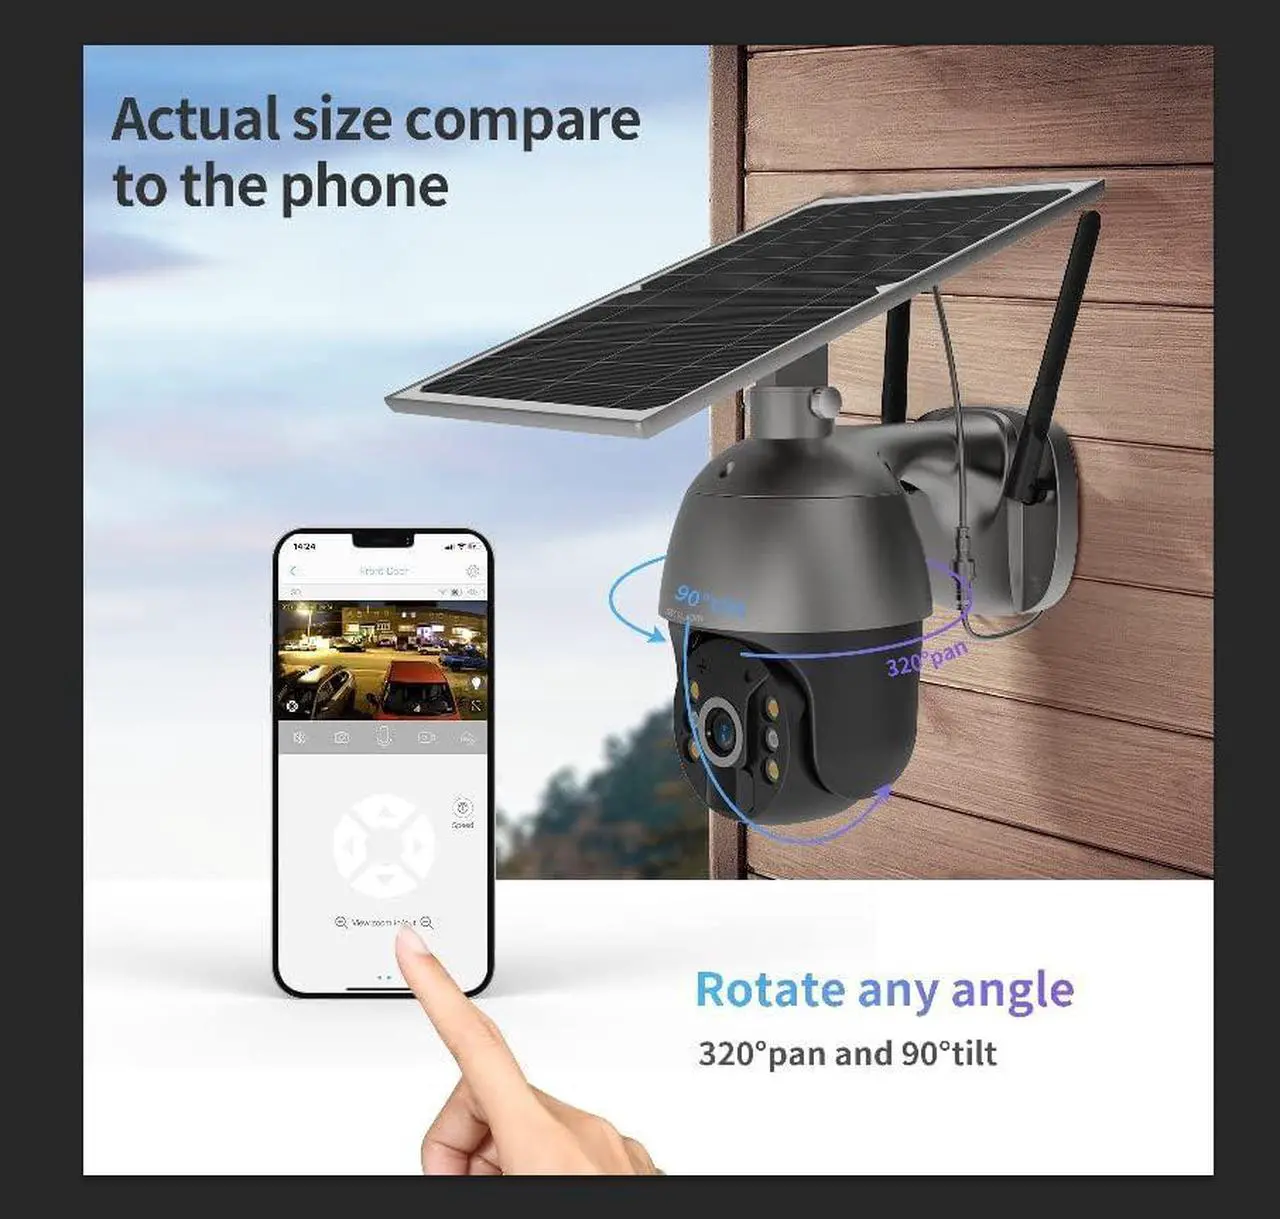
Broader View with 320°pan and 90°tilt
100% Wire-Free 3G/4G LTE camera with color night vision
9000mAh rechargeable batteries built in the solar panel
Built-in PIR Human-AI motion detection technology
Two-way audio(Built-in speaker and microphone)
Support Micro SD card (Max 128G, not included in camera)and 7-day free trial cloud storage
Weatherproof outdoor security camera
Big advantages of 4G Cellular Solar Security Camera
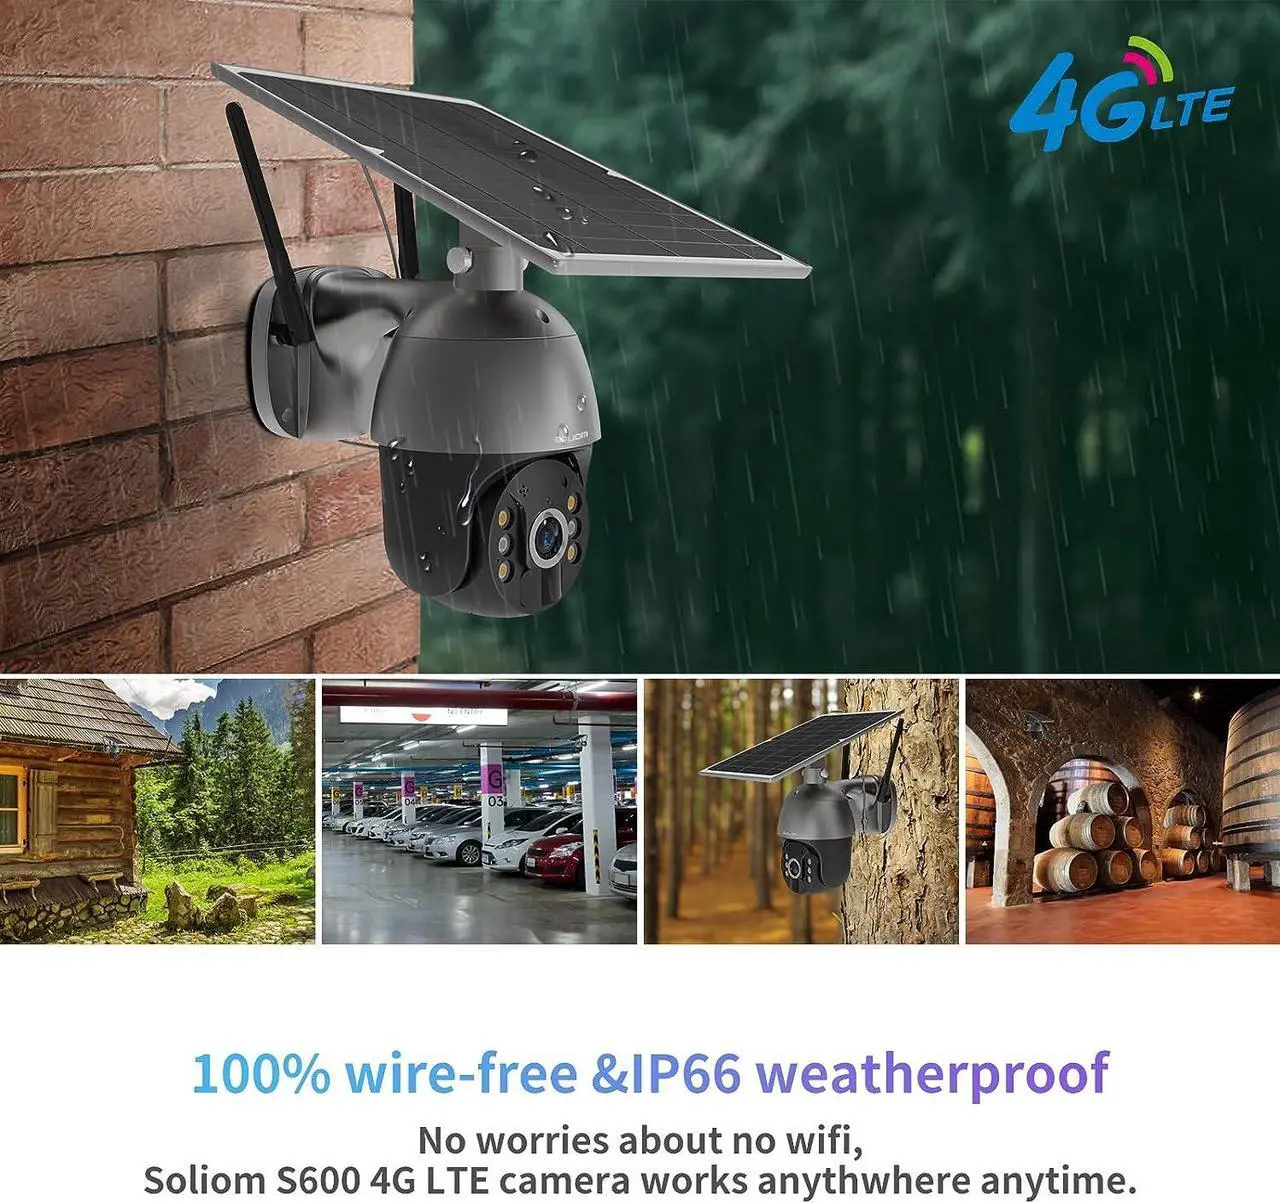
1. 100% Wire-Free: The 4G solar camera is powered by a solar panel, which means it can be placed anywhere without an electric cable in a remote area.
2. No WiFi needed: It is a great choice for those who want a security camera that does not require a WiFi network. This camera runs on a 3G/4G LTE tower, so it can be used anywhere there is cell service. (You can choose to use the best signal cellular service in your area)
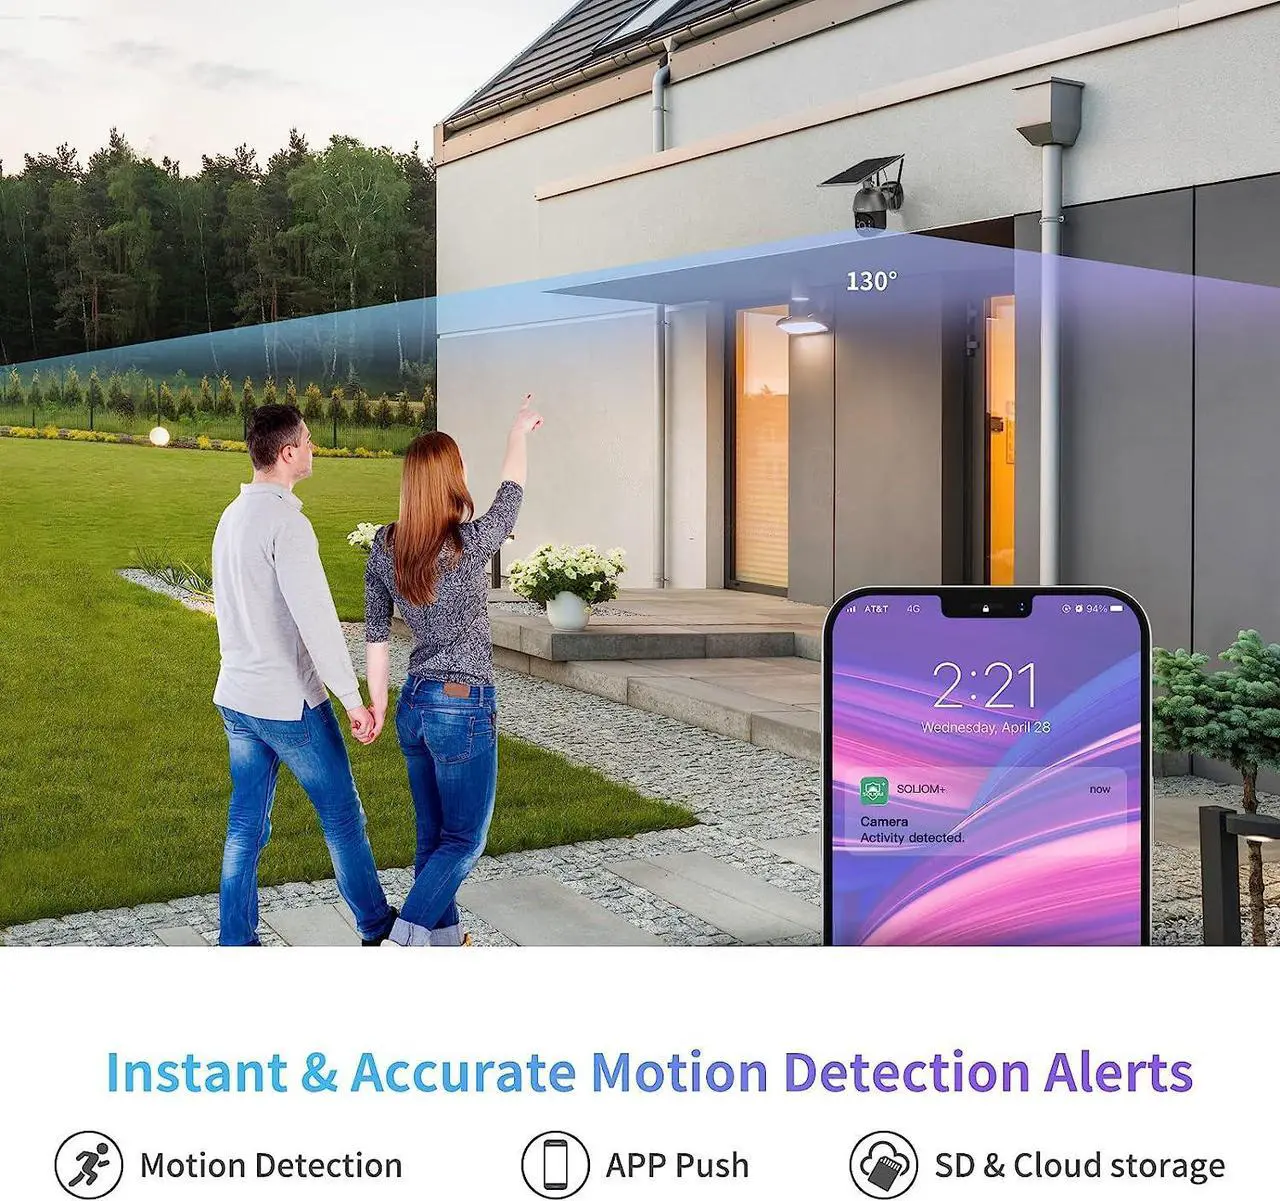
3. Sensitive to Motion: The built-in advanced PIR movement sensor will detect any motion in the area sensitively and send an instant alert to your phone.
Important Note for SIM Card:
1. The virtual cellular SIM card in the package is provided for free, it contains a 100M cellular data package with a limited due date within 30 days after you activate it. If your area cannot find a good signal with the provided SIM card, we suggest you buy another SIM card at the T mobile, AT&T service hall.
2. SIM Card Format: Nano-SIM(4FF) 0.48x0.35x0.026 inch (included)
3. US Network Operator: T-Mobile, AT&T (Prepaid Data Plan Recommended).
4. The camera is suitable only in North American areas (The United States, Mexico, and Canada). Other countries are not incompatible.
IP66 weather-resistant
With IP66 great weatherproof performance, Soliom outdoor security camera can prevent water from seeping into the camera and withstand the temperature range from -20°C to 60°C, which is able to withstand tough weather like wind, and rain, snow.
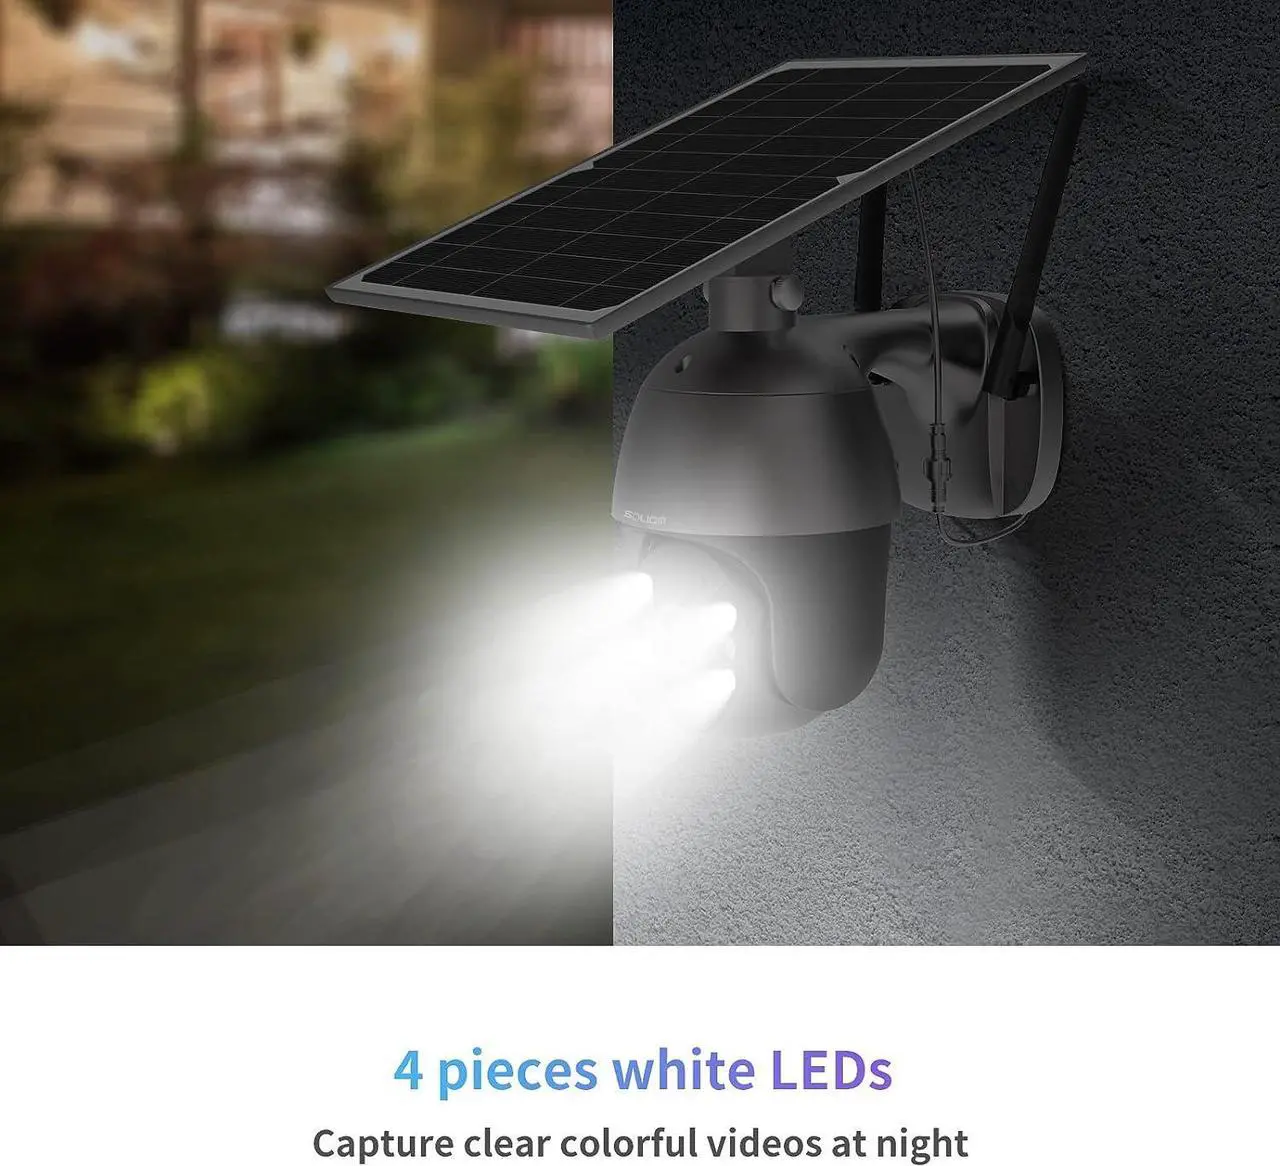
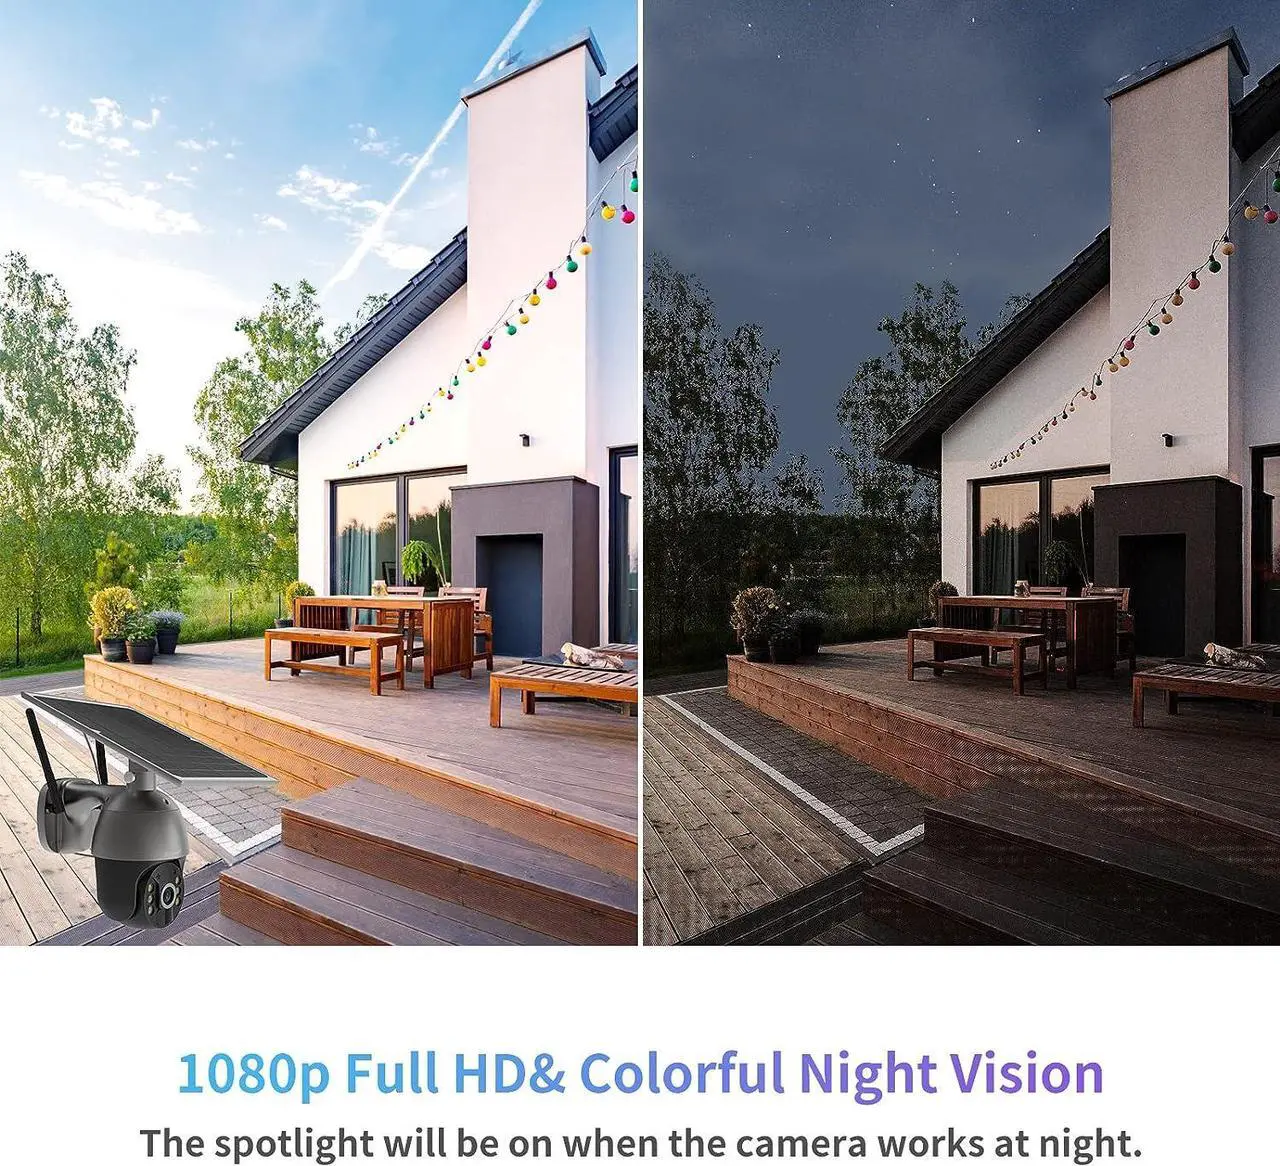
Color Night Vision and Wide Viewing Angle
With built-in 2 infrared LED lights, the solar camera has night vision up to 32.8ft/10m which allows you to pick up more details clearly even at night, delivering colorful and sharp videos even at low-light conditions. 320° wide viewing angle can cover and see a wider field of vision. Let Soliom go provides ultimate security to your family and your business.
Schedule working time and Instant Alerts
You can schedule the working time feature as you want, and set the camera to work only during certain hours, You will receive an alert message upon motion detected and be directed to the alert video page to see what was happening around your home.
2-Way Talk and Live View
The Soliom outdoor camera has a built-in speaker and microphone system allowing clear 2-way audio communication, and real-time speaking with anybody in view of the camera, like families, friends, and intruders.
Flexible and Easy Download & Playback
Motion clips can be recorded securely to a micro SD card (up to 128GB, not included) for local storage. Online backup is also available through the cloud.
Download all videos from a Micro sd card and Cloud is easy from the Soliom+ APP
Share the Access with Your Family
The outdoor camera can be shared with up to 10 family members at the same time, which is convenient to share with your family members for happy moments or to take care of the kids or elders anywhere. You will get to know what your children learn and what funny things happen in real-time, also suitable for the whole family protecting property together.
Steps to set up the camera:
1. Insert the Nano-SIM (Included) into the SIM card slot of the camera.
2. Download Soliom+ APP.
3. Turn on the camera and wait for the led status to turn blue (be careful to distinguish the SIM card slot and SD card slot)
4. Use Soliom+ APP to scan the QR code on the body of the camera
5. Follow the user manual to finish the initial setup