


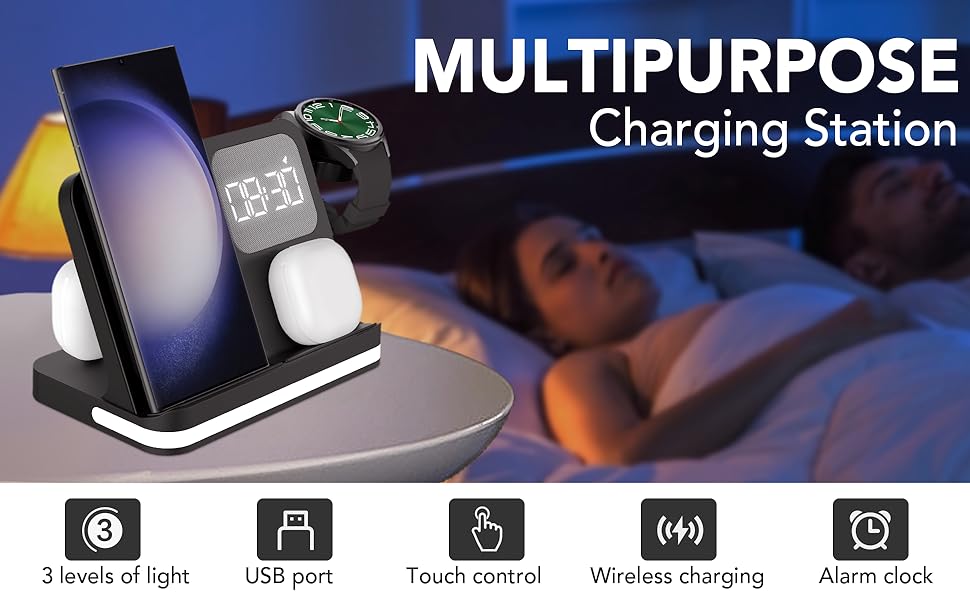
How to use the clock
- Time Setting: To switch between 24-hour and 12-hour clock modes, press the "M" button separately. To set the time, press and hold the "M" button for 5 seconds until the numbers start flashing. Then, use the "+" or "-" buttons to adjust the hours in the 12/24-hour format. Next, press the "M" button again and use the "+" or "-" buttons to set the minutes. The numbers will stopflashing after 10 seconds, indicating that the time has been set.
- Alarm Setting: Alarm Time: To set the alarm time, press and hold the"M" button for 5 seconds until the numbers start flashing. Then, lightly press the "M" button twice. Use the "+" or "-" buttons to set the alarm's hours. Press the "M" button again and use the "+" or "-" buttons to set the alarm's minutes. The numbers will stop flashing after 10 seconds, confirming that the alarm time has been set.
- Alarm Activation: Once you have set the alarm time, you must press and hold the "-" button for 5 seconds until the alarm indicator in the upper right corner remains lit to activate the alarm.
- Alarm Deactivation: Press and hold the "-" button until the alarm indicator in the upper right corner disappears to deactivate the alarm.
- Snooze Mode: Snooze Time Setting: To set the snooze time, press and hold the "M" button for 5 seconds until the numbers start flashing. Then, press the "M" button four times and use the "+" or "-" buttons to set the snooze time (in minutes).
- Snooze: When the alarm starts ringing, press the "+" button once to silence the alarm. The alarm indicator in the upper right corner will continue to flash, and the alarm will sound again after the set snooze time has elapsed.
- Turn Off Snooze: To turn off snooze mode, press and hold the "-" button when the alarm is ringing until the alarm indicator in the upper right corner stops flashing and remains lit.
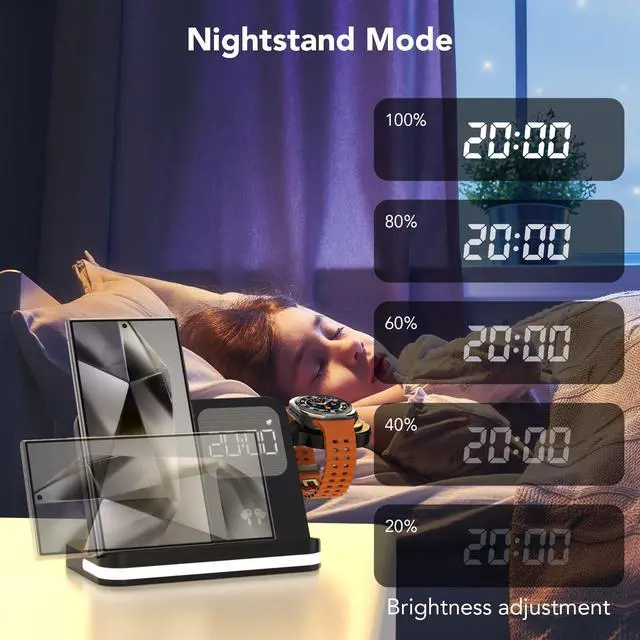
- In Clock Display Mode: Press the "M" button separately to switch between 24-hour and 12-hour clock modes. Press the "+" button separately to adjust the brightness of the clock display. Press the "-" button separately to adjust the volume of the alarm sound. The clock has a time memory function, so there is no need to reset the time after a power outage.


Common Abnormalities Troubleshooting:
If the device does not support wireless charging:
- Check if there is any metal/magnetic foreign object between the device and the charger
- Check that the protective case of the device is too thick beyond the induction range of the coil: remove the protective case to charge.
- If the adapter power is not enough or is damaged: replace the adapter and data cable.
- Magnetic interference of household appliances: re-plug the data cable and change the charging location.
- When there are metal objects in the charging area rotation, the charger will automatically identify and power off protection.
Precautions:
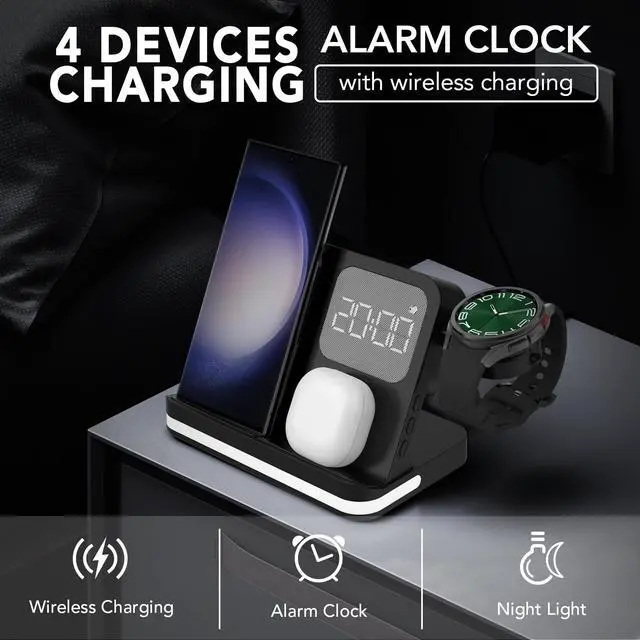
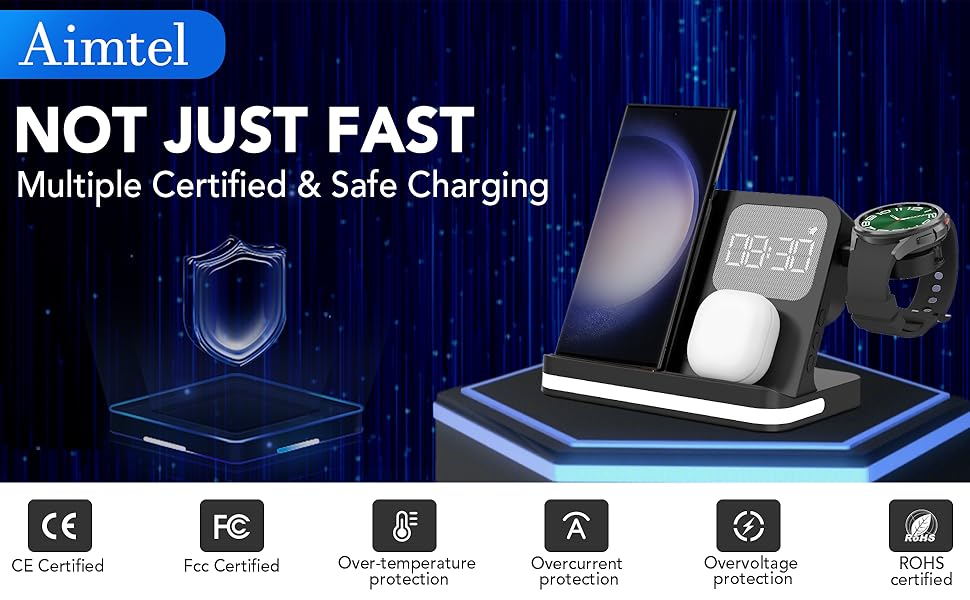
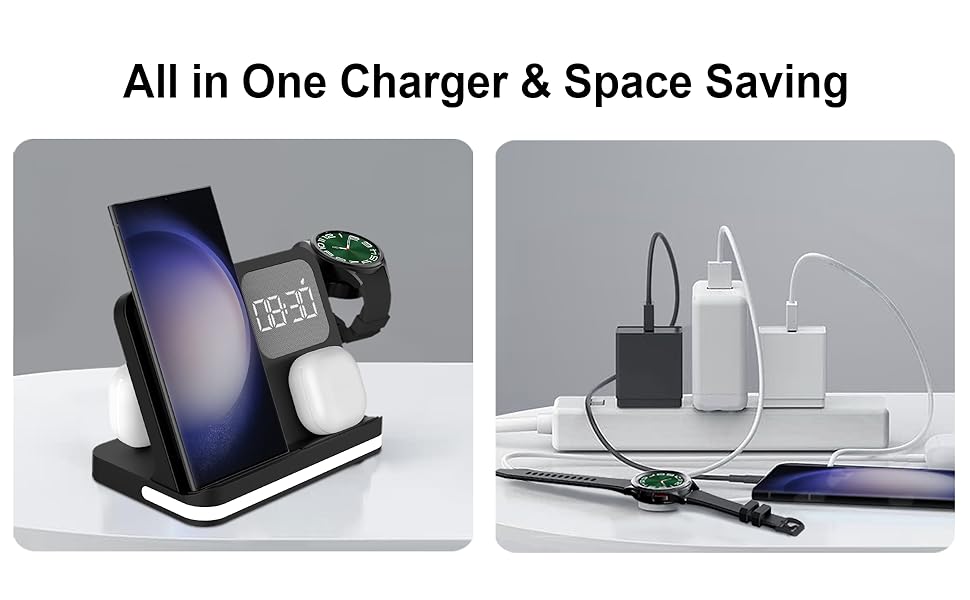
- The charging coil on the stand supports fast charging (15W/10W/7.5W), while the charging coil on the Front base is for regular charging (5W). Please place your phone on the stand for fast charging and your earphones/other phone on the Front base for regular charging.
- This charger is designed for indoor use or in dry environments. Avoid using it in high-temperature, high-humidity, statically charged, or strongly magnetic environments.
- For your safety, please refrain from plugging and unplugging the charger with wet hands.
- Keep the charger out of reach of babies and children.
- Do not use the charger if it comes into contact with water or if it becomes stuck with dirt or dust.
- Unauthorized disassembly and repair are strictly prohibited for non-professionals.
How to use the clock
- Time Setting: To switch between 24-hour and 12-hour clock modes, press the "M" button separately. To set the time, press and hold the "M" button for 5 seconds until the numbers start flashing. Then, use the "+" or "-" buttons to adjust the hours in the 12/24-hour format. Next, press the "M" button again and use the "+" or "-" buttons to set the minutes. The numbers will stopflashing after 10 seconds, indicating that the time has been set.
- Alarm Setting: Alarm Time: To set the alarm time, press and hold the"M" button for 5 seconds until the numbers start flashing. Then, lightly press the "M" button twice. Use the "+" or "-" buttons to set the alarm's hours. Press the "M" button again and use the "+" or "-" buttons to set the alarm's minutes. The numbers will stop flashing after 10 seconds, confirming that the alarm time has been set.
- Alarm Activation: Once you have set the alarm time, you must press and hold the "-" button for 5 seconds until the alarm indicator in the upper right corner remains lit to activate the alarm.
- Alarm Deactivation: Press and hold the "-" button until the alarm indicator in the upper right corner disappears to deactivate the alarm.
- Snooze Mode: Snooze Time Setting: To set the snooze time, press and hold the "M" button for 5 seconds until the numbers start flashing. Then, press the "M" button four times and use the "+" or "-" buttons to set the snooze time (in minutes).
- Snooze: When the alarm starts ringing, press the "+" button once to silence the alarm. The alarm indicator in the upper right corner will continue to flash, and the alarm will sound again after the set snooze time has elapsed.
- Turn Off Snooze: To turn off snooze mode, press and hold the "-" button when the alarm is ringing until the alarm indicator in the upper right corner stops flashing and remains lit.
- In Clock Display Mode: Press the "M" button separately to switch between 24-hour and 12-hour clock modes. Press the "+" button separately to adjust the brightness of the clock display. Press the "-" button separately to adjust the volume of the alarm sound. The clock has a time memory function, so there is no need to reset the time after a power outage.
Common Abnormalities Troubleshooting:
If the device does not support wireless charging:
- Check if there is any metal/magnetic foreign object between the device and the charger
- Check that the protective case of the device is too thick beyond the induction range of the coil: remove the protective case to charge.
- If the adapter power is not enough or is damaged: replace the adapter and data cable.
- Magnetic interference of household appliances: re-plug the data cable and change the charging location.
- When there are metal objects in the charging area rotation, the charger will automatically identify and power off protection.
Precautions:
- The charging coil on the stand supports fast charging (15W/10W/7.5W), while the charging coil on the Front base is for regular charging (5W). Please place your phone on the stand for fast charging and your earphones/other phone on the Front base for regular charging.
- This charger is designed for indoor use or in dry environments. Avoid using it in high-temperature, high-humidity, statically charged, or strongly magnetic environments.
- For your safety, please refrain from plugging and unplugging the charger with wet hands.
- Keep the charger out of reach of babies and children.
- Do not use the charger if it comes into contact with water or if it becomes stuck with dirt or dust.
- Unauthorized disassembly and repair are strictly prohibited for non-professionals.