Your Browsing History


Any questions? Our AI beta will help you find out quickly.
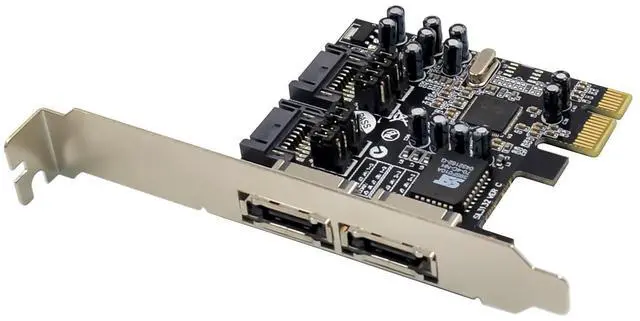
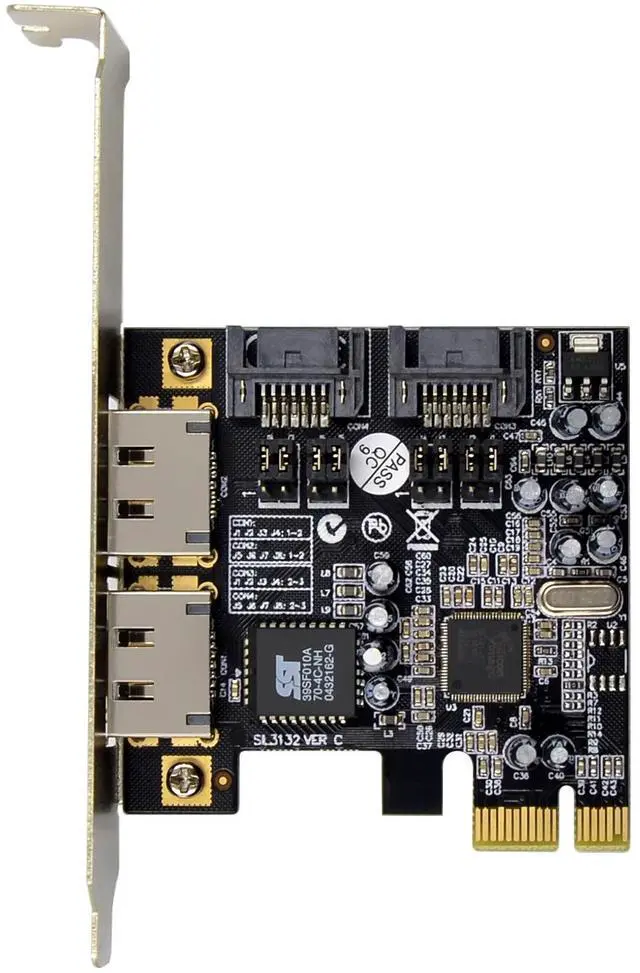
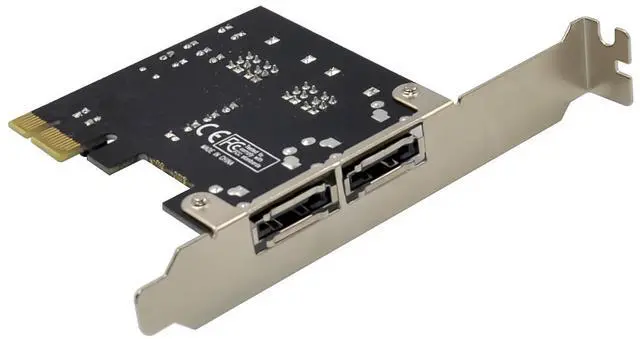
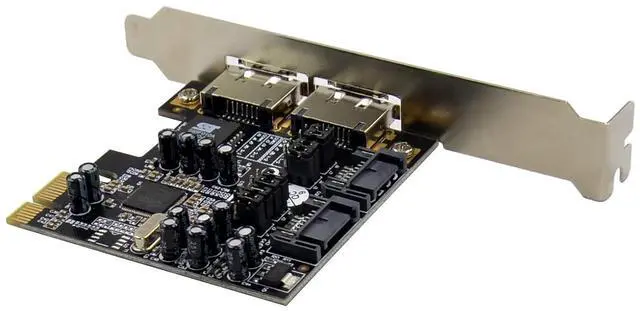
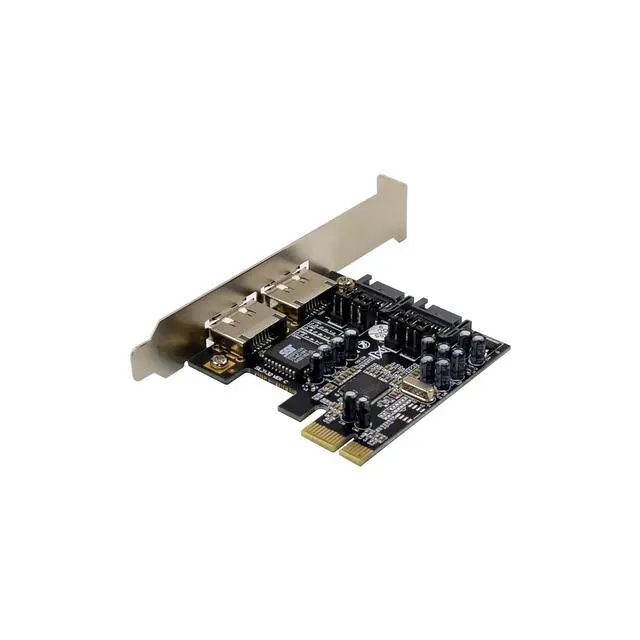
Note: There are four SATA ports in PCIe SATA II 300 2-Channel RAID Card. We named these ports Con1 to Con4. Con1&Con2 are external SATA ports and Con3& 4 are internal SATA ports. By changing the jumper setting on Encore SATA2 RAID PCIe Card that allows you to select between external and internal ports to use.
By default, Con3 and Con4 are working.
JP Description Active Port
J1J2J3J4 2-3 Close Enable SATA Port(Con3, Con4)
J5J6J7J8 2-3 Close
J1J2J3J4 1-2 Close Enable eSATA Port(Con1, Con2)
J5J6J7J8 1-2 Close
J1J2J3J4 2-3 Close Enable SATA Port(Con3) ,eSATA(Con2)
J5J6J7J8 1-2 Close
J1J2J3J4 1-2 Close Enable eSATA Port(Con1) ,SATA(Con4)
J5J6J7J8 2-3 Close
Device Connection
Serial ATA hard drives should come with their own accessories. In most cases, you just need to power up the device and connect them to the ports. The PCIe SATA II 300 2-Channel RAID Card is two channel Serial ATA controller that supports two Serial ATA hard disk drives. It is recommended to use identical drives for all RAID configurations. However, its possible to combine hard drives of different sizes and makes.
RAID Arrays
RAID Arrays are setup in the PCIe SATA II 300 2-Channel RAID Cards BIOS.
RAID 0 (Striping)
This RAID array to be used on New/Blank hard drives. Striping will destroy existing data on the hard drive. Auto Configuration is recommended. For applications that require custom chunk size,Manual Configuration is offered.
Auto configuration (recommended)
The default chunk size is 64k when selecting Auto configuration.
1. As the BIOS boots press Ctrl+S or F4 when prompted to enter the RAID BIOS.
2. At the next screen select Create RAID Set, then press Enter.
3. Select RAID0, then press Enter.
4. Select Auto configuration, then press Enter.
5. Input the RAID size, press Enter.
6. When asked Are You Sure (Y/N), press Y to accept.
7. Press Ctrl+E to exit the BIOS.
8. When asked Are you sure to exit (Y/N), press Y to exit and reboot.
9. Continue with FDISK and FORMAT steps as if you were installing a conventional hard drive.
Manual configuration
1. As the BIOS boots press Ctrl+S or F4 when prompted to enter the RAID BIOS.
2. At the next screen select Create RAID Set, then press Enter.
3. Select RAID0, then press Enter.
4. Select Manual configuration then press Enter.
5. Select chunk size from 8k, 16k, 32k, 64k or 128k, then press Enter.
6. Select the first drive, press Enter.
7. Select the second drive, press Enter.
8. Input the RAID size, press Enter.
9. When asked Are You Sure(Y/N), press Y to accept.
10. Press Ctrl+E to exit the BIOS.
11. When asked Are you sure to exit(Y/N), press Y to exit and reboot.
12. Continue with FDISK and FORMAT steps as if you were installing a conventional hard drive.
RAID 1 (Mirror)
For New/Blank Hard Drives
1. As the BIOS boots press Ctrl+S or F4 when prompted to enter the RAID BIOS.
2. At the next screen select Create RAID Set, then press Enter.
3. At the next screen select RAID1 then press Enter.
4. Select Auto configuration, then press Enter.
5. Input the RAID size, press Enter.
6. When asked Are You Sure(Y/N), press Y to accept.
7. Press Ctrl+E to exit the BIOS.
8. When asked Are you sure to exit(Y/N), press Y to exit and reboot.
9. Continue with FDISK and FORMAT steps as if you were installing a conventional hard drive.
CONCATENATION (JBOD)
This RAID array allows you to use one or two hard drives to a JBOD(Just a Bunch Of Disks) array. Although JBOD doesnt offer other RAID functionality, it makes the hard disks appear to be a single one by combining the drives into one larger logical one without any capacity loss.
Rebuilding a Failed Mirror Set
When a failure to one member occurs, you will be notified by the RAID BIOS during boot. The steps below will guide you in rebuilding a failed mirror set.
1. Replace he failed drive(s) with one of equal or greater capacity, then start the computer.
2. During boot press Ctrl+S or F4 to enter the RAID BIOS.
3. Select Create RAID Set press Enter.
4. Select SPARE DRIVE, then press Enter.
5. Select the single hard drive then press Enter.
6. Input RAID size, press Enter. When asked Are You Sure(Y/N), Press Y to confirm.
7. Select Rebuild Raid 1 Set, press Enter.
8. When asked Are you sure(Y/N), press Y confirm. The mirror will begin rebuilding. Do not interface with process.
9. When rebuilding is finished, press Ctrl+E.
10. When asked Are you sure to exit(Y/N), press Y to exit and reboot.
Deleting RAID Arrays
1. As the BIOS boots press Ctrl+S or F4 when prompted to enter the RAID BIOS.
2. Select Delete RAID Set, then press Enter.
3. Select the RAID set then press Enter.
4. When asked Are You Sure(Y/N), press Y to confirm.
Resolving Conflicts
When a RAID set is created, then metadata written to the disk includes drive connection information. If, after a disk failure, the replacement disk was previously part of a RAID set (or used in another system), it may have conflicting metadata. If so, this will prohibit the RAID set from being either created or rebuilt, in order for the RAID set to function properly, this old metadata must be first overwritten with the new metadata. To resolve this, from the main BIOS window select Resolve Conflicts, then press Enter, the correct metadata, including the correct drive connection information, will be written to the replacement disk.
Low Level Format
Low Level Format is build into the RAID BIOS to make it more convenient to erase the entire contents of a hard disk drive, including data, drive and partition information. The Low Level Format utility works on single hard drive only, before the RAID set is configured.
Logical Drive Info
This menu item allows the display of the assignment of physical drives within a logical set(RAID0, RAID1, etc.). This is display only function.
BIOS Configuration
The PCIe SATA II 300 2-Channel RAID Card BIOS will appear every time your system starts up. If the BIOS doesnt show, please try your controller in another PCI Express slot. During this (POST) process, the BIOS will show up and indicate the devices attached to it.
Driver Installation
For Windows® XP/Win7/ Server 2003
A new installation requires a floppy disk for the driver installation. To make this floppy disk, copy the contents of the PCI_IO\SiI3132\Driver\RAID\FLOPPY folder, found on the driver CD, onto a blank floppy disk then follow the directions below.
1. Setup the RAID Array prior to Windows installation.
2. Follow Microsofts Windows installation procedure.
3. Restart the computer when prompted by Windows installation.
4. At the Windows Setup screen, press F6 to install the RAID driver.
5. When prompted, press S to specify the location of the driver.
6. Insert the floppy disk, then press Enter.
7. Select Silicon Image SiI 3132 SoftRAID 5 Controller for Windows XP/Server 2003, then press Enter.
8. Press Enter to finish driver installation, then follow the on-screen instructions to complete the Windows installation.
To Verify Windows® Installation
1. Right click My Computer and click Manage.
2. Select Device Manager.
3. Double click SCSI and RAID Controller, then double click Silicon Image SiI 3132 SoftRaid 5 Controller to display driver properties. A message this device is working properly is displayed in the dialog box, the driver has been correctly installed.