
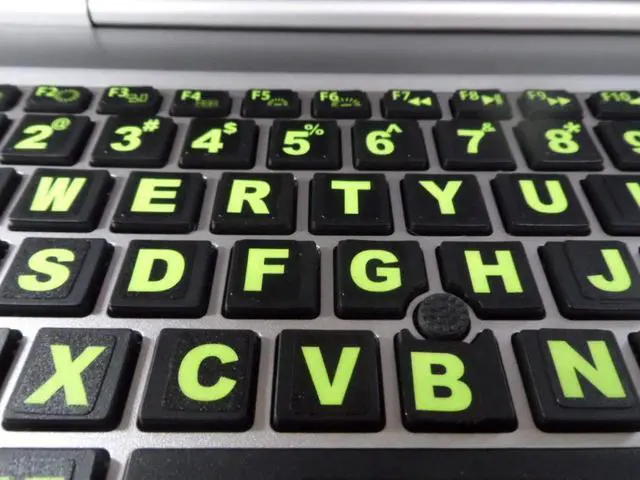
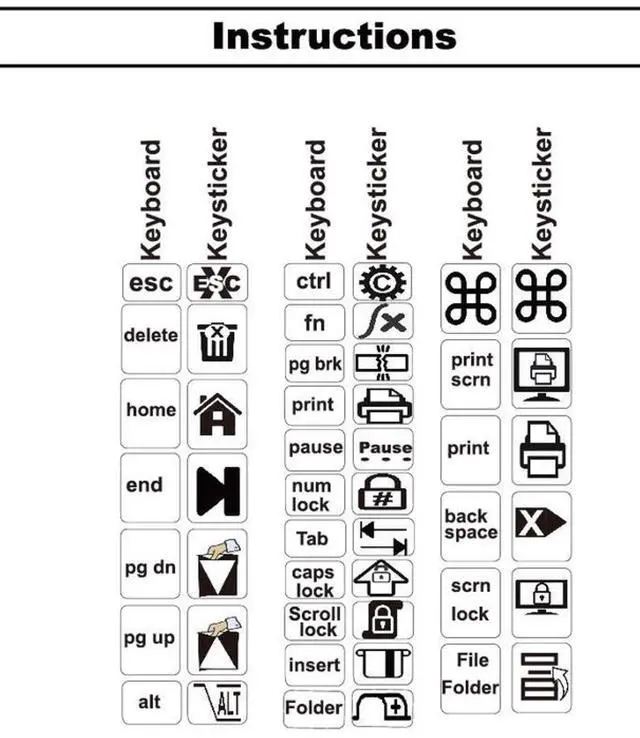


Keystickers Installed on Purchaser's Keyboard

DIRECTIONS:
1. Use the enclosed towelettes to clean the keys on the keyboard thoroughly. Allow a few minutes for the keyboard to dry.
2. Place the keystickers on the keys using the enclosed tweezers. You may cut or trim keystickers with a scissors. You may also put one sticker on top of
another. The is often done to build a function key (F1 - F12) at the top of the keyboard. Your kit contains standard PC and MAC function keys.
3. If you place a sticker on crooked, you can peal the keysticker off and re-attach it.
4. If you are not happy with your first attempt, go to SOVEREIGNGA.US and request a mulligan (a new replacement). There
is no charge for the replacement set.
5. If you wish to clean the keyboard after the keystickers are enclosed, use a damp cloth soaked in detergent or alcohol.
6. If a keysticker should come loose within 3 years of your purchase, go to SOVEREIGNGA.US for a replacement.
Keystickers Installed on Purchaser's Keyboard
DIRECTIONS:
1. Use the enclosed towelettes to clean the keys on the keyboard thoroughly. Allow a few minutes for the keyboard to dry.
2. Place the keystickers on the keys using the enclosed tweezers. You may cut or trim keystickers with a scissors. You may also put one sticker on top of
another. The is often done to build a function key (F1 - F12) at the top of the keyboard. Your kit contains standard PC and MAC function keys.
3. If you place a sticker on crooked, you can peal the keysticker off and re-attach it.
4. If you are not happy with your first attempt, go to SOVEREIGNGA.US and request a mulligan (a new replacement). There
is no charge for the replacement set.
5. If you wish to clean the keyboard after the keystickers are enclosed, use a damp cloth soaked in detergent or alcohol.
6. If a keysticker should come loose within 3 years of your purchase, go to SOVEREIGNGA.US for a replacement.